background image

CANON INC.

U.S.A.

 CANON U.S.A., INC. NEW JERSEY OFFICE

100 Jamesburg Road, Jamesburg, NJ 08831 USA

CANON U.S.A., INC. CHICAGO OFFICE

100 Park Blvd., Itasca, IL 60143 USA

CANON U.S.A., INC. LOS ANGELES OFFICE

15955 Alton Parkway, Irvine, CA 92618 USA

CANON U.S.A., INC. HONOLULU OFFICE

210 Ward Avenue, Suite 200, Honolulu, HI 96814 USA

z

If you have any questions, call the Canon U.S.A. Information Center
toll-free at 1-800-828-4040 (U.S.A. only).

CANADA

 CANON CANADA INC. NATIONAL HEADQUARTERS

6390 Dixie Road, Mississauga, Ontario L5T 1P7

CANON CANADA INC. CALGARY

2828, 16th Street, N.E. Calgary, Alberta T2E 7K7

CANON CANADA INC. MONTREAL

5990 Côte de Liesse, Quebec H4T 1V7

z

If you have any questions, call the Canon Canada Information Center 
toll-free at 1-800-828-4040. (Canada only)

z

Si vous avez des questions, veuillez téléphoner sans frais au
Canada 1-800-828-4040. (Canada seulement)

MEXICO

CANON MEXICANA, S. DE R.L. DE C.V

.

Periferico Sur No. 4124 Col. Ex-Rancho de Anzaldo C.P. 01900 
México, D.F., México

CANON U.S.A., INC. NEW JERSEY OFFICE

100 Jamesburg Road, Jamesburg, NJ 08831 USA

CENTRO Y
SURAMÉRICA

CANON LATIN AMERICA, INC.

703 Waterford Way Suite 400 Miami, FL 33126 USA

ASIA

CANON HONGKONG COMPANY LTD

.

19/F, The Metropolis Tower, 10 Metropolis Drive, Hunghom, Kowloon, Hong Kong

Printed on 100% reused paper.

Document réalisé avec du papier recyclé à 100%.

El papel aqui utilizado es 100% reciclado.

PRINTED IN JAPAN

PUB.DIM-720

© CANON INC. 2005

MPRIME AU JAPON

0000Ni0.0

IMPRESO EN JAPÓN

Summary of Contents for 0967B001 - XL H1 Camcorder

Page 1: ...ital Video Cassette HD VIDEO CAMERA RECORDER Instruction Manual CAMÉSCOPE ET LECTEUR VIDÉO HD Manuel d instruction VIDEOCÁMARA Y GRABADORA HD Manual de Instrucciones NTSC A PUB DIM 720 English Français Español ...

Page 2: ...turning the equipment off and on the user is encouraged to try to correct the interference by one or more of the following measures Reorient or relocate the receiving antenna Increase the separation between the equipment and receiver Connect the equipment into an outlet on a circuit different from that to which the receiver is connected Consult the dealer or an experienced radio TV technician for ...

Page 3: ... to replace your obsolete outlet Do not defeat the safety purpose of the polarized plug 12 Power Cord Protection Power cords should be routed so that they are not likely to be walked on or pinched by items placed upon or against them Pay particular attention to plugs and the point from which the cords exit the product 13 Outdoor Antenna Grounding If an outside antenna is connected to the product b...

Page 4: ...uct has been dropped or the cabinet has been damaged f When the product exhibits a distinct change in performance This indicates a need for service 20 Replacement Parts When replacement parts are required be sure the service technician has used replacement parts that are specified by Canon or that have the same characteristics as the original part Unauthorized substitutions may result in fire elec...

Page 5: ...k of Canon Inc is a trademark HDV and the logo are trademarks of Sony Corporation and Victor Company of Japan Ltd JVC is a trademark Windows is either a trademark or registered trademark of Microsoft Corporation in the United States and or other countries Other names and products not mentioned above may be trademarks or registered trademarks of their respective companies Setting the Time Zone Date...

Page 6: ...1 and the recording standards used by the recorder section of the XL H1 The video signal can be set to HD high definition or SD standard definition specifications The recording standard on the tape will be HDV high definition or DV respectively Camera Section HD SD Recorder Section HDV DV Playback Signal HDV DV HD SD SDI Terminal HD SD HDV DV Terminal HDV DV ...

Page 7: ...Focus 52 Using the ND Filter Lenses with Built in ND Filter 55 Selecting the Frame Rate 56 Setting the Time Code 58 Synchronizing the Camcorder s Time Code 60 Setting the User Bit 62 Audio Recording 63 Image Stabilizer Lenses Equipped with Image Stabilizer 68 Using the Programmed AE Modes 69 Recording in the Shutter Priority Tv Mode 72 Recording in the Aperture Priority Av Mode 73 Recording in the...

Page 8: ...ing the Image Quality Size 114 File Numbers 115 Recording Still Images on a Memory Card 116 Selecting the Drive Mode 119 Selecting the Metering Method 121 Using an Optional Flash 122 Reviewing a Still Image Right after Recording 123 Playing Back Still Images from a Memory Card 124 Erasing Images 126 Protecting Images 127 Initializing a Memory Card 128 Print Order Settings 129 Additional Informatio...

Page 9: ... 1000 Shoulder Strap Adapter Holder Stereo Cable DTC 1000Component Video Cable Canon HD Video 5 4 108 mm L IS II Zoom Lens with soft case Lens Cap Lens Dust Cap Lens Hood The serial number of this product can be found at the battery attachment unit of the camcorder Write down the number and other information here and retain this book as a permanent record of your purchase to aid identification in ...

Page 10: ...tch 24 SET button 31 IRIS dial 73 SELECT dial 31 record review button 46 BARS FADE SELECT button 93 BARS FADE ON OFF button 93 MENU button 31 GAIN dial 75 WHITE BALANCE dial 78 WHITE BALANCE button 78 STANDBY button 43 INPUT SELECT switch CH3 CH4 66 REC LEVEL switch CH3 CH4 67 INPUT SELECT switch CH1 CH2 64 REC LEVEL switch CH1 CH2 67 REC CH SELECT switch CH1 CH2 64 CH1 CH2 dials 67 FRONT MIC ATT ...

Page 11: ...up 20 Color viewfinder 19 22 Lock release button 21 Viewfinder cable 19 Zoom ring 50 Lens hood 25 Focus ring 52 RESET button Memory card slot 30 ND filter operating ring 55 ND filter unlock button 55 STABILIZER ON OFF switch 68 POSITION PRESET switch 51 AF switch 52 POSITION PRESET ON SET switch 51 Focus selector 53 ...

Page 12: ...64 Terminal cover Battery attachment unit 16 BATT RELEASE button 16 HD SD SDI terminal 100 GEN LOCK terminal 60 TC OUT terminal 60 TC IN terminal 60 Serial number Screw hole for adapter holder 23 AE SHIFT dial 76 LOCK lever 43 FRONT MIC terminals 22 Microphone cable 22 Lens hood locking screw 25 Grip zoom lever 50 PHOTO button 116 Cassette compartment 29 ...

Page 13: ...ay operate differently than the buttons on the camcorder Front view Back view Tally lamp 97 Remote sensor 28 109 Grip belt 23 Attachment sockets for the optional TA 100 Tripod Adapter 150 Tripod socket Viewfinder cable 19 Remote sensor 28 109 Start stop button 42 Microphone locking screw 22 Strap mount 23 XLR input terminals 65 66 SHUTTER buttons 72 PHONES LEVEL dial phones terminal HDV indicator ...

Page 14: ...rward button 98 button 87 124 REC record button 110 Screw holes for adapter holder 23 Tally lamp 97 Remote sensor 28 109 Handle zoom lever 50 Viewfinder locking screw 19 Microphone 22 Advanced accessory shoe 66 122 Start stop button 42 PHOTO button 116 CUSTOM PRESET SELECT button 85 CUSTOM PRESET ON OFF button 85 EVF DISPLAY button 45 CUSTOM KEYS 90 EJECT switch 29 ...

Page 15: ...NITOR button 67 104 END SEARCH button 49 SEARCH SELECT button 106 107 REC PAUSE button 110 REW button 98 ZERO SET MEMORY button 105 button 98 PAUSE button 98 REMOTE SET button 109 AV DV button 112 Zoom buttons 50 Menu selection buttons 31 SET button 31 button 124 button 87 124 MIX BALANCE buttons 104 buttons 106 107 PLAY button 98 FF button 98 button 98 STOP button 98 button 98 SLOW button 98 ...

Page 16: ... clicks The charge indicator starts flashing The indicator will stay on when the charging is complete 4 When the charging is complete remove the battery pack from the adapter 5 Unplug the power cord from the power outlet and disconnect it from the adapter Attaching the Battery Pack 1 Turn the POWER dial to OFF 2 Attach the battery pack to the camcorder Press lightly and slide the battery pack up i...

Page 17: ...for only short times or do not use it for a period of over 3 months it will become totally depleted In that case recharge the built in battery by powering the camcorder from a power outlet and leaving it with the POWER dial set to OFF for at least 24 hours Disconnect the DC coupler from the power adapter when charging a battery pack Turn off the camcorder before connecting or disconnecting the pow...

Page 18: ... 170 min Playback Time Supplied color viewfinder 165 min 250 min 350 min 480 min Recording and Playback Times Maximum Recording Time HD 20x L IS Lens Supplied color viewfinder 155 min 230 min 335 min 455 min Optional FU 1000 monochrome viewfinder 120 min 180 min 250 min 350 min 20x L IS Lens Supplied color viewfinder 140 min 210 min 300 min 415 min Optional FU 1000 monochrome viewfinder 110 min 17...

Page 19: ...onto the bracket and tighten the locking screw 2 Connect the viewfinder cable to the upper socket of the camcorder body 3 Hook the viewfinder cable onto the cable clamp Insert the cable plug straight into the camcorder socket Detaching the Viewfinder Unit 1 Detach the viewfinder cable 2 Loosen the locking screw and slide the viewfinder unit off the bracket ...

Page 20: ...osition Detaching the Eye Cup Detach the eye cup as shown in the illustration Adjusting the Position of the Viewfinder The viewfinder position can be changed right left forward backward When storing the camcorder in the optional HC 3200 System Case adjust the viewfinder to the right and lock it Right eye use Left eye use Right Left Adjustment Loosen the locking screw move the viewfinder to the rig...

Page 21: ... by the lens Pay special attention when mounting the camcorder on a tripod or during transportation Using the Viewfinder as LCD Panel You can use the viewfinder as an LCD panel by opening the eyepiece adapter Press the lock release button and open the eyepiece adapter Make sure to close the eyepiece adapter when you are not using the viewfinder as an LCD panel The screen is slightly brighter when ...

Page 22: ... adjustment you will return to the EVF SETUP submenu Change additional settings in the same way as necessary For more details regarding the EVF BW MODE setting refer to 92 5 Press the MENU button to close the menu Attaching the Microphone Unit 1 Loosen the microphone locking screw on the viewfinder unit open the microphone clamp and insert the microphone into the microphone clamp 2 Align the mark ...

Page 23: ...ng the strap or the grip belt Attaching the Adapter Holder Attach the adapter holder to use the optional CH 910 Dual Battery Charger Holder or a commercially available wireless microphone receiver 1 Attach the adapter holder and secure it by tightening the screws 2 Adjust the position of the support bars When using the optional CH 910 hook it onto the support bars and secure it with the stop lever...

Page 24: ...areful not to drop the lens or camcorder when mounting or removing the lens Avoid direct sunlight or strong light sources when mounting or removing the lens The XL mount is not compatible with the VL mount Do not touch the lens lens mount and the interior of the mount or expose them to dust or dirt If necessary clean the lens with a dry soft lens cleaning cloth Make sure to turn off the camcorder ...

Page 25: ...sing the extender even with an HDV compatible lens Attaching the Lens Hood Attach the lens hood to protect the lens and shade it from stray light 1 Place the lens hood on the front of the lens and screw it clockwise until the Canon logo appears on top Be careful not to deform the lens hood Make sure that the lens hood is aligned with the thread 2 Tighten the locking screw ...

Page 26: ...ll zoom out and full zoom in 6 Check that the exposure conditions are appropriate If necessary use the ND filter AF Adjustment 1 Press the MENU button 2 Turn the SELECT dial to select CAMERA SETUP and press the SET button 3 Select FB and then select AF ADJUST 4 When the confirmation screen appears press the SET button to begin the adjustment 5 Once the message FB ADJUSTMENT SUCCESSFUL is displayed...

Page 27: ...MERA SETUP and press the SET button 3 Select FB and then select SET DEFAULT 4 Select YES and press the SET button 5 Press the MENU button to close the menu In the following cases the flange back cannot be adjusted correctly and the camcorder will return to the flange back adjustment selection screen In the AF adjustment the camcorder cannot focus The lens was removed during the flange back adjustm...

Page 28: ...he and markings 3 Close the battery cover The camcorder and wireless controller are equipped with 2 remote sensor modes 109 If the wireless controller does not work check if the camcorder and wireless controller are set to the same mode When the camcorder cannot be operated with the wireless controller or when it can only be operated at very close range replace the batteries Make sure to replace b...

Page 29: ...d unload the cassette Insert the cassette straight fully into the compartment with the window facing out Unload the cassette by pulling it straight out 3 Close the cassette compartment cover Press the mark on the cover Do not interfere with the cassette compartment while it is opening or closing automatically Be careful not to get your fingers caught in the cassette compartment If the camcorder is...

Page 30: ...he memory card without first pushing it in to release it 1 Set the POWER dial to OFF Make sure that the CARD indicator is not flashing before you turn off the camcorder 2 Open the memory card slot cover 3 Push the memory card to release it and then remove the memory card 4 Close the card slot cover This camcorder is compatible with SD Memory Cards or MultiMediaCards MMC only Do not use any other t...

Page 31: ...tton to close the menu The and displays in green at the bottom of the screen will give you additional indications about what buttons to operate during each menu setting Pressing the MENU button at any time closes the menu Unavailable items will appear grayed out You may find it more convenient to use the wireless controller to operate the menu Press the MENU button on the wireless controller to op...

Page 32: ...8 COUNT UP REC RUN REC RUN PS FREE RUN1 58 START VALUE SET RESET 58 EXT SYNC OFF GENLOCK GENLOCK TC 61 GENLCK ADJUST 1023 1023 61 T CODE OUT ON OFF 60 COMP OUT 480i 1080i 480i 101 SDI OUTPUT ON OFF 101 SDI SPEC AUTO SD LOCKED 101 CAMERA SETUP 24F MODE SEL 2 3 2 3 3 2 57 ZEBRA ON OFF 80 ZEBRA LEVEL 70 75 80 85 90 95 100 80 SKIN D SET HUE 81 CHROMA AREA Y LEVEL SKIN DETAIL OFF LOW MIDDLE HIGH 81 F S...

Page 33: ... HIGH BLACK STRETCH MIDDLE PRESS MASTER PED 9 9 SETUP LEVEL 9 9 SHARPNESS 9 9 H DTL FREQ LOW MIDDLE HIGH DTL HV BALANCE 9 9 CORING 9 9 NR1 OFF LOW MIDDLE HIGH NR2 OFF LOW MIDDLE HIGH COLOR MAT NORMAL CINE1 CINE2 COLOR GAIN 9 9 COLOR PHASE 9 9 R GAIN 9 9 G GAIN 9 9 B GAIN 9 9 RG MATRIX 9 9 RB MATRIX 9 9 GR MATRIX 9 9 GB MATRIX 9 9 BR MATRIX 9 9 BG MATRIX 9 9 SELECT CP 87 SAVE POSITION EXECUTE RETUR...

Page 34: ...T MRK OFF LEVEL MARK CENT MARK 45 ASPECT GUIDE OFF 4 3 13 9 14 9 1 66 1 1 75 1 1 85 1 2 35 1 45 SAFETY ZONE OFF 80 90 45 TV SCREEN ON OFF 132 AUDIO LEVEL ON OFF 67 LANGUAGE ENGLISH 97 OBJ DST UNIT m meter ft feet 97 ZOOM IND BAR NUMBER 51 GUIDE INFO OFF CUSTOM KEYS D T DISPLAY 41 UB DISPLAY ON OFF 62 SYSTEM CUSTOM KEY 1 TIME CODE INDEX WRITE ZEBRA VCR STOP TV SCREEN TC HOLD AUDIO LEVEL EVF BW MODE...

Page 35: ...REE RUN1 58 START VALUE SET RESET 58 PLAYBACK STD AUTO HDV DV 98 T CODE OUT ON OFF 60 COMP OUT 480i 1080i 480i 101 SDI OUTPUT ON OFF 101 SDI SPEC AUTO SD LOCKED 101 AV DV ON OFF 112 HD DOWN CONV ON OFF 102 RECORDING SETUP REC MODE SP LP 96 UB SELECT 00 00 00 00 TIME DATE 62 IMG QUALITY SUPER FINE FINE NORMAL 114 HD STILL SIZ LW 1920x1080 SW 848x480 114 FILE NOS RESET CONTINUOUS 115 AUDIO SETUP SEL...

Page 36: ...ON OFF 90 DATA CODE DATE TIME DATE TIME CAMERA DATA CAM D T 108 LANGUAGE ENGLISH 97 6 SEC DATE ON OFF 108 UB DISPLAY ON OFF 62 SYSTEM CUSTOM KEY 1 TIME CODE TV SCREEN DATA CODE AUDIO LEVEL TC HOLD EVF BW MODE NONE 91 CUSTOM KEY 2 TIME CODE TV SCREEN DATA CODE AUDIO LEVEL TC HOLD EVF BW MODE NONE WL REMOTE 1 2 OFF 109 TALLY LAMP ON BLINK OFF 97 D TIME SET T ZONE DST 41 DATE TIME 41 DATE FORMAT 97 L...

Page 37: ...ADJUST 1023 1023 61 COMP OUT 480i 1080i 480i 101 SDI OUTPUT ON OFF 101 SDI SPEC AUTO SD LOCKED 101 CAMERA SETUP ZEBRA ON OFF 80 ZEBRA LEVEL 70 75 80 85 90 95 100 80 SKIN D SET HUE 81 CHROMA AREA Y LEVEL SKIN DETAIL OFF LOW MIDDLE HIGH 81 F SPEED PSET1 LOW MIDDLE HIGH 54 FB AF ADJUST 26 MF ADJUST 26 SET DEFAULT 27 FOCUS PRI ON OFF 117 REVIEW OFF 2 sec 4 sec 6 sec 8 sec 10 sec 123 ...

Page 38: ... HIGH DTL HV BALANCE 9 9 CORING 9 9 COLOR GAIN 9 9 COLOR PHASE 9 9 R GAIN 9 9 G GAIN 9 9 B GAIN 9 9 RG MATRIX 9 9 RB MATRIX 9 9 GR MATRIX 9 9 GB MATRIX 9 9 BR MATRIX 9 9 BG MATRIX 9 9 SELECT CP 87 SAVE POSITION EXECUTE RETURN IMPORT 87 SELECT POSITION EXECUTE RETURN RECORDING SETUP IMG QUALITY SUPER FINE FINE NORMAL 114 IMAGE SIZE LW 1920x1080 SW 848x480 L 1440x1080 S 640x480 114 FILE NOS RESET CO...

Page 39: ... ON OFF 132 GUIDE INFO OFF CUSTOM KEYS D T DISPLAY 41 LANGUAGE ENGLISH 97 SYSTEM CUSTOM KEY 1 ZEBRA TV SCREEN EVF BW MODE FB FLIP EVF NONE 91 CUSTOM KEY 2 ZEBRA TV SCREEN EVF BW MODE CP BKWD KEY FB FLIP EVF NONE WL REMOTE 1 2 OFF 109 POWER SAVE ON OFF 43 D TIME SET T ZONE DST 41 DATE TIME 41 DATE FORMAT 97 LED ON OFF ON OFF 96 IRIS DIAL UP OPEN DOWN OPEN 73 CARD CAMERA MENU Submenu Menu Item Setti...

Page 40: ...FF 127 PRINT ORDER 0 99 COPIES 129 SLIDESHOW CANCEL START 124 META DATA CP IMPORT 82 SELECT POSITION EXECUTE RETURN DISPLAY SETUP EVF EVF BW MODE ON OFF 92 BRIGHTNESS 22 CONTRAST COLOR SHARPNESS TV SCREEN ON OFF 132 DISPLAYS ON OFF PLAYBK 132 CUSTOM KEYS ON OFF 90 DATA CODE DATE TIME DATE TIME CAMERA DATA CAM D T 108 LANGUAGE ENGLISH 97 SYSTEM CUSTOM KEY 1 TV SCREEN DATA CODE EVF BW MODE NONE 91 C...

Page 41: ... press the SET button The year display starts flashing 6 Turn the SELECT dial to select the year and press the SET button The next part of the display starts flashing Set the month day hours and minutes in the same way 7 Press the MENU button to close the menu and to start the clock Displaying the Date and Time during Recording You can display the date and time in the lower left corner of the scre...

Page 42: ...ne at the front The tally lamp and the REC lamp on the viewfinder will light up Press the start stop button again to pause recording When You Have Finished Recording 1 Set the POWER dial to OFF 2 Replace the lens cap 3 Unload the cassette 4 Disconnect the power source Wait until the tape counter stops completely before you start recording If you do not remove the cassette you can record the next s...

Page 43: ...ads the camcorder will enter the power save mode VCR STOP after 3 minutes in record pause mode If left 2 more minutes without any operation the camcorder will automatically shut off However you can activate or deactivate the camcorder s automatic shut off with the POWER SAVE option in the SYSTEM submenu Even if the power save is set to ON the camera section will still be powered so the camcorder w...

Page 44: ... when the battery pack is empty When you attach an empty battery pack the power may turn off without displaying The actual battery charge may not be indicated accurately depending on the condition under which the battery pack and camcorder are used SHUTTER lamp Lights up when the shutter speed is changed from the following 60i 1 60 of a second 30F 1 30 of a second 24F 1 48 of a second 1 60 of a se...

Page 45: ... Open the menu and select DISPLAY SETUP Select ASPECT GUIDE select a setting option and close the menu Displaying the Safety Zone Guide The safety zone guide shows a frame including 80 or 90 of the screen area Use it as an indication to accurately frame subjects Open the menu and select DISPLAY SETUP Select SAFETY ZONE set it to 80 or 90 and close the menu MENU 31 DISPLAY SETUP LEV CENT MRK CENT M...

Page 46: ...as been recorded properly Press and release the record review button The camcorder rewinds the tape plays back the last few seconds and returns to record pause mode If the current video signal standard is different from the signal standard in which the tape was recorded the recording will not be played back correctly record review button ...

Page 47: ...he camcorder as a high definition HD camera SD 16 9 SD 4 3 To record on the tape in DV standard or to use the camcorder as a standard definition SD camera Select the aspect ratio as desired If you set the LED ON OFF option in the SYSTEM submenu to ON the MODE SELECT switch will light on in blue when you set the MODE SELECT switch to HD MODE SELECT switch ...

Page 48: ... will not change immediately It changes once you pause recording TV sets with S1 Video terminals Recording made with a 16 9 aspect ratio will automatically be played in widescreen mode if you connect the camcorder to the TV using the S1 VIDEO terminal TV sets equipped with the ID 1 System Recording made with a 16 9 aspect ratio will automatically be played in widescreen mode whether you connect th...

Page 49: ...s back the last few seconds of the recording and stops the tape Pressing the button again cancels the search End search cannot be used once you unload the cassette End search may not work properly if there is a blank section between recordings on the tape The end search function may not work correctly if you mix recordings in HDV and DV standards on the same tape END SEARCH button ...

Page 50: ...E the zoom speed will depend on how you operate the zoom lever Pressing softly will result in a slower zoom pressing harder in a faster zoom Zoom speed with the HD 20x L IS Lens from wide angle to telephoto CONSTANT Level 1 approx 60 seconds Level 16 approx 3 5 seconds VARIABLE approx 3 5 60 seconds The actual zoom speed varies depending on the lens Zoom ring The zoom speed depends on how fast you...

Page 51: ...T ON SET switch to ON The camcorder returns to the preset zoom position The preset setting is canceled when you attach the optional Extender XL 1 6x or mount a lens with a different magnification The camcorder uses the zoom speed of the CONSTANT setting when returning to the preset zoom position Changing the Zoom Bar Display You can select to display the zoom position as a normal zoom bar or to di...

Page 52: ... with the HD 20x L IS Lens Turn the focus ring during autofocus to focus manually The camcorder will return to autofocus as soon as you release the focus ring When recording under bright conditions the camcorder sets a small aperture value and the picture may appear blurred This may be more noticeable at wide angle When you are using a lens with built in ND filter turn it on off according to the s...

Page 53: ...ill be displayed for approx 3 seconds when you switch from autofocus to manual focus or when you operate the focus ring in the manual focus mode It will also be displayed with the focus preset You can select to display the focal distance in meter or ft The focal distance will not be displayed when the optional Extender XL 1 6x is attached to the camcorder Use the distance display as an estimate Wh...

Page 54: ... to be memorized and to return to that focus setting instantly You can also select the speed at which the camcorder returns to the preset focus setting Presetting the Focus 1 Set the focus selector to M MF appears 2 Set the POSITION PRESET switch to FOCUS The focus preset speed currently selected appears 3 Adjust the focus with the focus ring 4 Move the POSITION PRESET ON SET switch to SET MF and ...

Page 55: ...et a small aperture value Depending on the scene the color may change when turning the ND filter on off In such case setting a custom white balance may be effective 79 Screen display What it means What you should do No display ND filter is not activated ND ND filter is activated ND flashes in red Built in ND filter incorrect setting Turn the ND filter operating ring to select a suitable setting ND...

Page 56: ... COMPONENT OUT D terminal will be down converted to 60 fps using the 2 3 pulldown method Records in 24 fps progressive mode like movie cameras creating a true cinematic feel to the picture 24F 2 3 Mode Signals are down converted to 60 fps interlaced using the 2 3 pulldown method This 24F mode is suited for playback on a TV screen 24F 2 3 3 2 Mode Signals are down converted to 60 fps interlaced usi...

Page 57: ... rate will not change immediately It changes once you pause recording Selecting the 24F Pulldown Mode Open the menu and select CAMERA SETUP Select 24F MODE SEL select a setting option and close the menu 2 3 24F appears in white 2 3 3 2 24F appears in orange If you are using an editing system that does not support the 2 3 3 2 pulldown method make sure to record in 24F 2 3 pulldown mode MENU 31 CAME...

Page 58: ... and close the menu REC RUN Close the menu REC RUN PS FREE RUN Continue the procedure below to set the start point 2 Select SET The hours display flashes 3 Set the time code s starting value Turn the SELECT dial to set the value for the hours and press the SET button The next field of the display starts flashing Set the value for the minutes seconds and frames in the same way 4 Close the menu Abou...

Page 59: ...p frame time codes including 24F frame rate in SD mode the time code at the point where the recording starts may be discontinuous When recording over existing scenes When a time code discontinuity occurred near the recording start point the time code at the point where the recording starts may be discontinuous As long as the built in rechargeable lithium battery is charged the free run time code c...

Page 60: ...g signal can also be recorded on tape Time Code OUT The camcorder s internal time code is sent out from the TC OUT terminal as a standard LTC timing signal Select whether to send out the camcorder s time code signal with the T CODE OUT option in the SIGNAL SETUP submenu When you set T CODE OUT to ON TC OUT will appear on the side panel display In SD mode Time Code IN is not available if you select...

Page 61: ...orrect When recording in SD mode Time Code IN is not available if you select the 24F frame rate the mode will be canceled and the TC IN display on the side panel will disappear Genlock synchronization is not possible when the signal standard of the camcorder HD SD is different from that of the external Genlock signal The phase difference between the external Genlock signal and the camcorder is ini...

Page 62: ...cted 00 00 00 00 2 Select SET The first part of the display flashes 3 Turn the SELECT dial to select a number or letter and press the SET button The next character of the user bit starts flashing Set the rest of the user bit in the same way 4 Close the menu To reset the user bit to 00 00 00 00 select CLEAR in step 2 The user bit can be recorded when recording with the camcorder or from analog devi...

Page 63: ...ecord on all 4 channels simultaneously Audio Lock You can select to lock the sampling rates of audio and video to record them in a synchronized fashion LOCK MODE or to record them independently of each other UNLOCK MODE Open the menu and select AUDIO SETUP Select AUDIO LOCK select a setting option and close the menu Selecting the Audio Mode 2CH 4CH 48kHz 2CH 32kHz 2CH 32kHz 4CH Open the menu and s...

Page 64: ...o the Audio Block Diagram 157 When Using the Front Microphone Set the INPUT SELECT switch to FRONT MIC You can select the microphone setting with the STEREO MONO switch on the microphone itself In the MONO position the same monaural audio signal will be recorded on channels 1 and 2 If necessary turn on the microphone attenuator 20 dB by setting the FRONT MIC ATT switch to ATT When Connecting to th...

Page 65: ...put signal The setting of the LINE MIC switch applies simultaneously to channels 1 and 2 5 If necessary turn on the microphone attenuator 20 dB by setting the MIC ATT switch to ATT The microphone attenuator will only be effective when the LINE MIC switch is set to MIC 6 For 12dB gain up Open the menu and select AUDIO SETUP Select R XLR GAINUP set it to 12dB and close the menu When connecting a mic...

Page 66: ...is camcorder When Connecting to the RCA terminals of AUDIO2 Line in Recording 1 Connect the device to the RCA terminals of AUDIO2 2 Set the INPUT SELECT switch to AUDIO2 When Connecting to the XLR terminals 1 Connect a microphone to the XLR terminals To supply a microphone with phantom power set the 48V switch to ON Make sure to connect the microphone first before turning on the phantom power Keep...

Page 67: ...ssing the button will cycle through the settings in the following order CH1 2 CH3 4 CH1 3 2 4 Do not select CH1 3 2 4 when adjusting the level 3 Turn the respective CH1 CH2 CH3 or CH4 dial to adjust the audio level We recommend using headphones when adjusting the audio level If the input level is too high audio may become distorted even if the audio level indicator is displaying an appropriate lev...

Page 68: ...cannot be turned off in the Easy Recording mode We recommend turning off the image stabilizer when mounting the camcorder on a tripod The image stabilizer is designed to compensate for a normal degree of camcorder shake The image stabilizer may not be effective when attaching an optional Extender The image stabilizer will be activated while half pressing the PHOTO button to lock the autofocus STAB...

Page 69: ...ptly Easy Recording The camcorder automatically controls the focus shutter speed aperture gain white balance and AE Shift allowing you to simply point and shoot This mode locks all of these features and options making them fixed and unadjustable Auto Like the Easy Recording mode the camcorder automatically controls camera adjustments allowing you to simply point and shoot However in the Auto mode ...

Page 70: ...utter speed and aperture levels Spotlight The Spotlight mode automatically adjusts the exposure to effectively record images and or subjects lit by a spotlight or other concentrated light source Night p This mode allows you to continue recording even when light levels begin to fall The camcorder uses lower shutter speeds 60i 30F 1 4 1 500 24F 1 3 1 500 to deliver proper exposure Moving subjects ma...

Page 71: ...e 3x zoom lens Recording programs EXP LOCK button IRIS dial 1 1 SHUTTER button 1 1 AE SHIFT dial 0 0 GAIN dial auto 0 dB auto WHITE BALANCE dial auto Custom preset adjustments CUSTOM PRESET SELECT button CUSTOM PRESET ON OFF button Skin detail Clear Scan Frequency selection of Clear Scan 2 2 Recording program Modes other than Manual focus ring Zoom ring Image Stabilizer on ND filter Focus mode aut...

Page 72: ...ted shutter speed is not suitable for the recording conditions In such case readjust the shutter speed If you are using an ND filter turn it off first and readjust the shutter speed The image quality may decrease to some extent when using slow shutter speeds Autofocus may not work when using slow shutter speeds When recording under artificial light sources such as fluorescent mercury or halogen la...

Page 73: ...option of the SYSTEM submenu Other settings such as the shutter speed are set automatically The aperture changes when you lock and change the exposure When the gain is set to automatic the aperture number flashes on the screen when the selected aperture is not appropriate for the recording condition In such case readjust the aperture When the built in ND filter of a lens is activated the picture m...

Page 74: ... 1 30 1 60 1 75 1 90 1 100 1 120 1 150 1 180 1 210 1 250 1 300 1 360 1 420 1 500 1 600 1 720 1 840 1 1000 1 1200 1 1400 1 1700 1 2000 1 2300 1 2600 1 3000 1 4000 1 8000 1 15000 CS clear scan 24F Frame rate 1 3 1 6 1 12 1 24 1 48 1 60 1 75 1 90 1 100 1 120 1 150 1 180 1 210 1 250 1 300 1 360 1 420 1 500 1 600 1 720 1 840 1 1000 1 1200 1 1400 1 1700 1 2000 1 2300 1 2600 1 3000 1 4000 1 8000 1 15000 ...

Page 75: ...settings with the HD 20x L IS lens The setting can be adjusted in 1 4 stop steps However only the following numbers are displayed on the screen F1 6 F2 0 F2 8 F4 0 F5 6 F8 0 F9 5 CLOSE Select the aperture with the IRIS dial Changing the Shutter Speed after Exposure Lock You can select from 13 shutter speeds with the HD 20x L IS lens Select the shutter speed with the SHUTTER or button Changing the ...

Page 76: ...e the automatic exposure system to darken or lighten the image Select from 13 AE levels 2 0 1 5 1 0 0 75 0 5 0 25 0 0 25 0 5 0 75 1 0 1 5 2 0 1 Set the POWER dial to Tv or Av 2 Turn the AE SHIFT dial to adjust the level The selected level appears POWER dial AE SHIFT dial ...

Page 77: ...ess the GAIN dial so that it pops out 3 Turn the GAIN dial to adjust the level The selected level appears With some gain level settings the picture may flicker slightly 3 dB For the lowest noise recording for indoor low light or low contrast scenes Auto Automatic adjustment of gain 0 dB For lifelike night scenes or scenes under artificial lighting 3 dB 6 dB 12 dB 18 dB Increases the brightness in ...

Page 78: ...lor Temperature 1 Set the POWER dial to a recording program other than 2 Set the WHITE BALANCE dial to K The color temperature currently set will be displayed 3 Press the WHITE BALANCE button The color temperature display will start flashing 4 Turn the SELECT dial to set the desired color temperature 5 Press the WHITE BALANCE button again The color temperature display stops flashing and stays on A...

Page 79: ...ng on the light source may keep flashing The result will still be better than with the auto setting Perform the custom white balance setting procedure in a sufficiently well lit place Readjust the custom white balance if you turn the built in ND filter on off or when the light source has changed The following custom preset settings take precedence and will override the white balance set with the p...

Page 80: ...g functions Use this feature to guide the adjustment of the aperture and shutter speed Available zebra pattern settings 70 IRE 75 IRE 80 IRE 85 IRE 90 IRE 95 IRE and 100 IRE Selecting the Zebra Pattern Level Open the menu and select CAMERA SETUP Select ZEBRA LEVEL select a setting option and close the menu Activating the Zebra Pattern Open the menu and select CAMERA SETUP Select ZEBRA set it to ON...

Page 81: ... it to HIGH MIDDLE or LOW and close the menu appears Determining the Skin Area Open the menu and select CAMERA SETUP and SKIN D SET Select HUE CHROMA AREA or Y LEVEL adjust the levels and close the menu HUE Adjust the hue for detection of the skin area Adjusting to R detects reddish skin color and to G detects greenish skin color CHROMA Adjust the color saturation for detection of the skin area Ad...

Page 82: ...ss master pedestal setup level sharpness horizontal detail frequency horizontal vertical detail balance coring NR1 NR2 color matrix color gain color phase R gain G gain B gain R G matrix R B matrix G R matrix G B matrix B R matrix and B G matrix Available only when recording on the tape Gamma Curve GAM only in CAMERA mode You can select from NORMAL CINE1 or CINE2 Knee Point Adjustment KNE Adjust t...

Page 83: ...tical detail balance in the range 9 only horizontal to 9 only vertical Coring COR Adjust the detail noise level in the range 9 to 9 Noise Reduction 1 NR1 only in CAMERA mode You can select from OFF HIGH MIDDLE or LOW With the HIGH setting moving subjects may leave a trailing afterimage When picture noise is already low due to the gain settings the noise reduction function may not be noticeable Noi...

Page 84: ... 9 B Gain BGN Adjust the blue level in the range 9 to 9 R G Matrix RGM Adjust the level in the range 9 to 9 R B Matrix RBM Adjust the level in the range 9 to 9 G R Matrix GRM Adjust the level in the range 9 to 9 G B Matrix GBM Adjust the level in the range 9 to 9 B R Matrix BRM Adjust the level in the range 9 to 9 B G Matrix BGM Adjust the level in the range 9 to 9 ...

Page 85: ... step to adjust all the items you want to adjust 6 When you finish adjusting all the items in the custom preset select RTN You will return to the custom preset submenu 7 Close the menu The custom preset items appear in one screen as 3 letter abbreviations followed by the current setting value As you move between the items with the SELECT dial the full name of the currently selected item and its cu...

Page 86: ...rocedure for a custom preset file with the mark Resetting a Custom Preset File 1 Open the menu and select CUSTOM PRESET followed by EDIT 2 From the edit submenu select RESET A confirmation screen will appear 3 Turn the SELECT dial to select YES and press the SET button You will return to the custom preset submenu 4 Close the menu A protected preset file cannot be reset Activating the Custom Preset...

Page 87: ...py the file 5 Close the menu Loading a Custom Preset File from the Memory Card 1 Open the menu and select CUSTOM PRESET followed by 2 From the copy submenu select IMPORT and then select the name of the custom preset file you want to load to the camcorder 3 Select SELECT POSITION and select the preset number under which you want to store the file in the camcorder 4 Select EXECUTE and in the confirm...

Page 88: ... Open the menu and select RECORDING SETUP Select STILL I REC set it to ON CP DATA and close the menu While you are recording on the tape press the PHOTO button The custom preset currently in effect will be saved to the memory card along with a still image of the current scene When saving the custom preset currently in use embedded in a still image the number of custom preset files you can save is ...

Page 89: ... screen You can adjust the frequency from 60 1 Hz to 203 9 Hz 1 Set the POWER dial to Tv or M 2 Press the SHUTTER button to display CS 3 Open the menu and select CAMERA SETUP Select CLEAR SCAN adjust the frequency and close the menu Adjust the frequency so that the black band does not appear MENU 31 CAMERA SETUP CLEAR SCAN 60 1Hz SHUTTER buttons POWER dial ...

Page 90: ...en the menu and select DISPLAY SETUP Select GUIDE INFO set it to CUSTOM KEYS and close the menu In VCR PLAY mode Open the menu and select DISPLAY SETUP Select CUSTOM KEYS set it to ON and close the menu CUSTOM KEY 1 TIME CODE TV SCREEN ZEBRA TV SCREEN CUSTOM KEY 2 INDEX WRITE DATA CODE TV SCREEN DATA CODE Time code Index write Zebra pattern VCR stop 2 TV screen Time code hold 2 Audio level EVF B W...

Page 91: ...signal cannot be added or erased later Zebra Pattern 80 Press the CUSTOM KEY 1 or 2 button The zebra pattern is activated Press the button again to deactivate it VCR STOP 43 When the camcorder is in record pause mode you can turn off the recorder section If the POWER SAVE option in the SYSTEM submenu is set to OFF even in VCR STOP mode the camera section is still powered allowing you to adjust the...

Page 92: ...io level indicator EVF Black White Mode Press the CUSTOM KEY 1 or 2 button The image on the screen will be shown in black white on screen displays and indicators will still be displayed in color Press the button again to return to color display Flange Back Adjustment Press the CUSTOM KEY 1 or 2 button The flange back adjustment menu appears CP Backward Key Press the CUSTOM KEY 2 button Usually pre...

Page 93: ...ing 2 Press the BARS FADE ON OFF button COLOR BARS stops flashing and the color bars appear Press the button again to deactivate the color bars Audio Reference Signal You can record a 1 kHz audio reference signal 12 dB or 20 dB along with the color bars Open the menu and select AUDIO SETUP Select 1kHz TONE select the audio signal and close the menu The selected audio reference signal sounds If you...

Page 94: ...er COLOR BARS WHITE FADE BLACK FADE no display The selected fader display starts flashing 2 Press the BARS FADE ON OFF button The selected fader display stops flashing 3 Press the start stop button Record pause the recording will fade in and start During recording the recording will fade out and stop After the fade in out the fader display will start flashing again To activate the fader again pres...

Page 95: ...tart stop button again XL H1 Record pause mode Connected device Record pause mode The status of the connected device is indicated as follows Connected device is recording Connected device is in record pause or stop mode Connected device is in a mode other than record pause or stop DV CONTROL is set to ON but no DV device is connected xxx min Recording on the computer s hard disk While both the XL ...

Page 96: ...posing the Screen Displays Character recording is a feature that allows for the superimposition of meta data year month day hour and minute permanently burned on to the video This is ideal for surveillance and law enforcement use Open the menu and select SYSTEM Select CHAR REC set it to ON and close the menu Make sure to set CHAR REC to OFF when you do not wish to superimpose the screen displays S...

Page 97: ... Changing the Date Format You can select between three date formats For example JAN 1 2005 1 JAN 2005 and 2005 1 1 Open the menu and select SYSTEM Select the D TIME SET submenu and then select DATE FORMAT Select a date format and close the menu Changing the Distance Units When using an HDV compatible lens the focal distance to the subject will be displayed for approx 3 seconds when you switch from...

Page 98: ...ontroller during normal playback Rewind Playback Fast Forward Playback Press down and hold the or button on the camcorder or the REW or FF button on the wireless controller during normal playback rewind or fast forward to enter the fast playback at 8x the normal playback speed Reverse Playback Press the button on the wireless controller during normal playback Press the play button to return to nor...

Page 99: ...ller repeatedly during playback pause Hold the button pressed down to enter the continuous frame advance reverse playback Slow Reverse Slow Forward Plays back at about 1 3 normal speed Press the SLOW button on the wireless controller during normal or reverse playback Press the play button to return to normal playback Reverse Playback Press the button on the wireless controller during normal playba...

Page 100: ...e SD HD SDI Terminal HD SD SDI Terminal COMPONENT OUT D Terminal HDV DV Terminal S VIDEO Terminals HD 1920x1080 D3 1440x1080 MPEG TS SD in 4 3 640x480 D1 SD Normal DV SD SD in 16 9 640x480 D1 SD DV SD 1 AUDIO VIDEO R L S S1 VIDEO INPUT Stereo Cable supplied BNC Cable commercially available Signal flow Signal flow Open the terminal cover The audio signal is separate from the component video signal ...

Page 101: ...t AUTO or SD LOCKED to match the video output you wish to use 4 Close the menu Using the COMPONENT OUT D Terminal Select the appropriate component video signal depending on the TV or monitor you connect Open the menu and select SIGNAL SETUP Select COMP OUT select a setting option and close the menu 2 AUDIO VIDEO R L S S1 VIDEO INPUT Signal flow Stereo Cable supplied Signal flow DTC 1000 Component ...

Page 102: ... with the following procedure Open the menu and select SIGNAL SETUP Select HD DOWN CONV select a setting option and close the menu Using the S VIDEO or VIDEO Terminal If connecting to a TV set the input selector to VIDEO If connecting to a VCR set the input selector to LINE Refer also to the instruction manual of the TV or VCR 3 DV Cable commercially available 4 pin 6 pin 4 AUDIO VIDEO R L S S1 VI...

Page 103: ...ignal depending on the TV or monitor you connect Open the menu and select SIGNAL SETUP Select COMP OUT select a setting option and close the menu Using the S VIDEO or VIDEO Terminal Refer to the connection diagram in the previous section 102 If connecting to a TV set the input selector to VIDEO If connecting to a VCR set the input selector to LINE Refer also to the instruction manual of the TV or ...

Page 104: ...ect a setting option and close the menu Selecting the Audio Mix 1 Open the menu and select AUDIO SETUP Select MIX SELECT set it to VARIABLE or FIXED and close the menu 2 If you selected VARIABLE adjust the mix balance with the MIX BALANCE CH1 2 and CH3 4 buttons on the wireless controller MENU 31 AUDIO SETUP SEL AUDIO CH CH CH MENU 31 AUDIO SETUP MIX SELECT VARIABLE AUDIO MONITOR button AUDIO2 RCA...

Page 105: ...ater The tape counter is reset to 0 00 00 and the mark appears To cancel press the ZERO SET MEMORY button again 2 After you finish playing back the tape rewind the tape RTN appears The tape stops automatically at 0 00 00 and the mark disappears The tape counter changes to time code The zero set memory may not function correctly if the time code has not been recorded consecutively The zero set memo...

Page 106: ...T button to display INDEX SEARCH appears 2 Press the or button to begin searching Press more than once to search for further index signals up to 10 times Press the STOP button to stop searching Playback may start slightly before or after the index signal The index search function may not work correctly if you mix recordings in HDV and DV standards on the same tape SEARCH SELECT button buttons ...

Page 107: ...ss the or button to begin searching Press more than once to search for further date changes up to 10 times Press the STOP button to stop searching A recording of longer than a minute per date time zone is required The date search may not function if the data code is not correctly displayed The date search function may not work correctly if you mix recordings in HDV and DV standards on the same tap...

Page 108: ...Displaying the Data Code Press the DATA CODE button on the wireless controller The data code will not display the next time you turn on the camcorder Six Second Auto Date The date and time appear for 6 seconds when you begin playback or to indicate that the date or time zone has changed Open the menu and select DISPLAY SETUP Select 6SEC DATE set it to ON and close the menu MENU 31 DISPLAY SETUP DA...

Page 109: ...On the wireless controller press and hold the REMOTE SET button Press the ZOOM T button for mode 2 Keep the button pressed for over 2 seconds If you have set the camcorder to mode 1 press the ZOOM W button for mode 1 The wireless controller returns to mode 1 when you replace the batteries Change the mode if necessary Make sure that the camcorder and wireless controller are set to the same mode Dis...

Page 110: ...ode In this mode you can monitor the picture on the screen If you press only the button recording will start immediately 7 Connected device Play back the tape 8 Press the button or the PAUSE button on the wireless controller when the scene you wish to record appears Recording starts 9 Press the button to stop recording 10 Connected device Stop playback HDV DV In 1 Connect the camcorder to the exte...

Page 111: ...pt to play back such tape COPYRIGHT PROTECTED PLAYBACK IS RESTRICTED appears and you will not be able to view the contents of the tape If you attempt to record from such tape via the DV terminal COPYRIGHT PROTECTED DUBBING RESTRICTED appears and you will not be able to record the contents of the tape We recommend powering the camcorder from a household power outlet ...

Page 112: ...ork properly e g signals that include copyright protective signals or anomalous signals such as ghost signals For normal use set AV DV to OFF If it is set to ON digital signals cannot be input via the camcorder s HDV DV terminal Depending on the software and the specifications of your computer you may not be able to transfer converted signals via the HDV DV terminal We recommend powering the camco...

Page 113: ...apturing system is compatible with the video signal standard you are using If the computer is not compatible with the signal standard of the camcorder s video output the camcorder may not be correctly detected or may not operate properly Refer also to the instruction manual of the computer Adjust the PLAYBACK STD and HD DOWN CONV settings in the SIGNAL SETUP submenu in accordance with the video si...

Page 114: ...orded on a memory card These figures are approximate They vary according to the recording condition and the subject The total number of still images that can be recorded will decrease if you store custom preset files on the card MENU 31 RECORDING SETUP IMG QUALITY FINE MENU 31 RECORDING SETUP IMAGE SIZE 1440x1080 Image Size Image Quality Number of Images File Size per Image 16MB 128MB 512MB LW 192...

Page 115: ...number will be reset each time a new memory card is inserted If the memory card already contains image files the consecutive file number will be assigned CONTINUOUS The camcorder memorizes the file number of the last image and assigns the consecutive file number to the next image even when a new memory card is inserted If a higher file number already exists on the memory card the consecutive numbe...

Page 116: ... is half pressed you can also use the focusing ring to adjust the focus Exposure is locked When you press the PHOTO button on the wireless controller recording starts immediately 3 Press the PHOTO button fully The symbol disappears The CARD access indicator flashes and the card access display appears Do not turn off the camcorder change the position of the TAPE CARD switch or the POWER dial open t...

Page 117: ... the POWER dial to OFF and then back to a recording mode Turning Off the Focus Priority Mode Turn off the Focus Priority mode if you wish to record a still image as soon as you press the PHOTO button Open the menu and select CAMERA SETUP Select FOCUS PRI set it to OFF and close the menu Recording a Still Image on a Memory Card While Recording Movies on a Tape When you are recording a movie on a ta...

Page 118: ...ering mode currently selected for recording still images Drive Mode Icon Indicates the drive mode currently selected for recording still images Remaining Card Capacity for Still Images flashing in red No card in green 6 or more images in yellow 1 to 5 images in red No more images The indication may not decrease even though a recording has been made or may decrease by 2 images at once All indicator...

Page 119: ...ubjects Sufficient space on the memory card is required Continuous shooting stops when card is full Continuous Shooting Captures a quick series of still images while you hold the PHOTO button pressed down For the number of frames per second refer to the table below High Speed Continuous AEB Auto Exposure Bracketing The camcorder records a still image in three different exposures dark normal light ...

Page 120: ...120 Auto Exposure Bracketing Press the PHOTO button Three still images in different exposures are recorded to the memory card Make sure that there is sufficient space on the memory card ...

Page 121: ...center of the screen EVALUATIVE Appropriate for standard shooting conditions including backlit scenes The camcorder divides images into several zones for light metering It evaluates the position and brightness of the subject background direct light or backlight and adjusts the exposure of the main subject accordingly CENT WEIGHT AVERAGE Averages the light metered from the entire screen giving more...

Page 122: ...h While the Speedlite flash is charging the indicator will flash in white Once charged the indicator will stay on in green If the indicator keeps flashing in white for a long time replace the flash s batteries 2 Press the PHOTO button to record a still image Wait until the flash is charged before recording the still image You can record a still image while the flash is charging but the flash will ...

Page 123: ...enu A still image is displayed as long as you hold the PHOTO button after recording The still image operations menu appears when you press the SET button while you are reviewing a still image or when you press the SET button right after recording In this menu you can protect 127 or erase 126 the image REVIEW cannot be selected when continuous shooting high speed continuous shooting or auto exposur...

Page 124: ...s have been changed may not be played back correctly Do not turn off the camcorder change the position of the TAPE CARD switch or the POWER dial open the memory card cover or remove the memory card while the card access indicator is flashing Doing so could result in data damage Slide Show Press the SLIDE SHOW button Images are played back one after another Press the button again to stop the slides...

Page 125: ...essing the button 3 Move the zoom lever toward T The index screen is cancelled and the selected image is displayed Card Jump Function You can locate images without displaying them one by one The number in the upper right of the screen indicates the image number of the current image out of the total number of images Press and hold the button When you release the button the image of the displayed im...

Page 126: ... Press the SET button to open the still image operations menu In mode the menu appears when you press the SET button while you are reviewing a still image or if you press the SET button immediately after recording an image 3 Select IMAGE ERASE 4 Select YES The image is erased and the previous image appears If an image is protected YES will appear grayed out Erasing All Images 1 Open the menu and s...

Page 127: ...u appears when you press the SET button while you are reviewing a still image or if you press the SET button immediately after recording an image 3 Select PROTECT appears and now the image cannot be erased Protecting during Index Screen Display 1 Move the zoom lever toward W Up to 6 images appear Select the image you wish to protect 2 Open the menu and select CARD OPERATIONS Select PROTECT and pre...

Page 128: ... including protected images and custom preset files Images and custom preset files erased through the card initialization cannot be recovered If you use a memory card other than the supplied one initialize it with the camcorder 1 Open the menu and select CARD OPERATIONS 2 Select INITIALIZE 3 Select EXECUTE 4 In the confirmation screen select YES The card initialization starts MENU 31 CARD OPERATIO...

Page 129: ...R 4 Select the number of copies appears on the image To cancel the print order set the number of copies to 0 Selecting in Index Screen Display 1 Move the zoom lever toward W Up to 6 images appear Select the image you wish to print 2 Open the menu and select CARD OPERATIONS Select PRINT ORDER 3 Press the SET button and set the number of copies with the SELECT dial appears on the image To cancel the...

Page 130: ...d Power Off STANDBY Mode Changing the MODE SELECT switch between HD and SD Aperture setting in Av mode Reset Shutter speed setting in Tv mode Reset Aperture shutter speed setting in Manual mode Reset Custom white balance Exposure lock on off Returns to off Reset Aperture shutter speed setting during exposure lock Reset Reset Color bars setting Reset Color bars on off Reset Faders setting Reset Fad...

Page 131: ...ing When you change to Easy Recording When you change the frame rate Aperture setting in Av mode Reset Shutter speed setting in Tv mode Reset Aperture shutter speed setting in Manual mode Reset Custom white balance Exposure lock on off Returns to off Aperture shutter speed setting during exposure lock Reset Color bars setting Color bars on off Faders setting Reset Faders on off Reset MENU setting ...

Page 132: ...ape operation displays appear for 2 seconds Hiding Showing the Displays on the TV Screen When you connect a TV for recording you can select to hide the camcorder displays on the TV screen For playback you can show the camcorder displays on the TV screen Open the menu and select DISPLAY SETUP Select TV SCREEN set it to ON or OFF and close the menu The displays appear on or disappear from the TV scr...

Page 133: ... 75 AE shift 76 White balance 78 Skin detail 81 Peaking 53 Manual focus 53 Custom preset 82 Custom keys 90 Date and time 41 Gain 77 Recording standard 47 Frame rate 56 Tape operation REC PAUSE STOP EJECT Remote sensor mode 109 Wind screen 64 Recording mode 96 Audio level indicator 67 Magnifying 53 Metering method 121 Drive mode 119 Available still images on the card 114 Still image size quality 11...

Page 134: ... standard 47 Frame rate 56 Tape operation 98 REC PAUSE STOP EJECT PLAY Fast forward Rewind Fast forward playback rewind playback u2 playback u1 playback Frame advance playback User bit 62 Audio level indicator 67 Custom preset data embedded with the still image 88 Image protected 127 Image number 115 Total number of still images 114 Still image size 114 ...

Page 135: ...anel Video signal standard AUDIO LEVEL is set to MANUAL Time code Tape has reached the end Remaining battery charge Time code synchronization setting Audio level indicator Time code setting Video output signal from the HD SD SDI Terminal ...

Page 136: ... FULL No remaining capacity on the memory card Replace with another card or erase images NAMING ERROR The folder and file numbers have reached their maximum value UNIDENTIFIABLE IMAGE Image is not recorded with JPEG compression or with a compression not compatible with the camcorder or the image file is corrupted THE CARD IS SET FOR ERASURE PREVENTION SD memory card is set for erasure prevention R...

Page 137: ...nerated by lighting equipment Do not disassemble the camcorder If the camcorder does not function properly consult qualified service personnel Handle the camcorder with care Do not subject the camcorder to shocks or vibration as this may cause damage Avoid sudden changes in temperature Moving the camcorder rapidly between hot and cold temperatures may cause condensation to form on its internal sur...

Page 138: ...s momentarily about 0 5 seconds the video heads need to be cleaned To maintain the best picture quality we recommend cleaning the video heads frequently with the Canon DVM CL Digital Video Head Cleaning Cassette or a commercially available dry cleaning cassette Tapes already recorded with dirty video heads may not be played back correctly even when you clean the video heads Do not use wet type cle...

Page 139: ...he warning message CONDENSATION HAS BEEN DETECTED appears for approx 4 seconds and starts flashing If a cassette is loaded the warning message REMOVE THE CASSETTE appears and starts flashing Remove the cassette immediately and leave the cassette compartment open Leaving the cassette in the camcorder may damage the tape A cassette cannot be loaded when condensation is detected Resuming use It takes...

Page 140: ...tions at the same time for all battery packs Although the battery pack s operating temperature range is from 0 ºC to 40 ºC 32 ºF to 104 ºF the optimal range is from 10 ºC to 30 ºC 50 ºF to 86 ºF At cold temperatures performance will temporarily decline Warm it in your pocket before use Replace the battery pack if the usable time after full charge diminishes substantially at normal temperatures Abo...

Page 141: ...seconds and starts flashing If you wish to record on that cassette slide the tab back to the right Memory Card To transfer the still images recorded on the memory disc to a computer use a commercially available card reader or PC PCMCIA memory card adapter Initialize new memory cards with the camcorder Memory cards initialized with other devices such as a computer may not operate correctly We recom...

Page 142: ...reen You can only play back your recordings on TVs with NTSC system The NTSC system is used in the following countries areas American Samoa Antigua Aruba Bahamas Barbados Bermuda Bolivia Canada Chile Colombia Costa Rica Cuba Ecuador El Salvador Guam Guatemala Greenland Haiti Honduras Jamaica Japan Korea Mexico Micronesia Myanmar Nicaragua Panama Peru Philippines Puerto Rico Saint Kitts and Nevis S...

Page 143: ...tic joints and remove the cover 3 Using a pair of pliers extract the flexible board on which the lithium battery is installed and pull to detach it Do not remove the cover for any other purpose than removing the battery for recycling when disposing the camcorder When you have removed the battery keep it out of reach of children If it is swallowed seek medical assistance immediately The battery cas...

Page 144: ...d reconnect it after a short time If the problem still persists disconnect the power source and press the RESET button with a pointed item Pressing the RESET button resets all settings The POWER dial is not in the OFF position but the POWER indicator is off The LED ON OFF option is set to OFF Set the LED ON OFF option to ON 96 Image will not appear on the screen The POWER dial is not set to a reco...

Page 145: ...hile playing back a tape recorded in HDV standard there are brief stops in the playback picture Video heads are dirty Clean the video heads 138 While connected to a TV or monitor with the COMPONENT OUT D Terminal all on screen displays are turned off The HD DOWN CONV option is set to ON or the DISPLAYS option is set to OFF PLAYBK Set the HD DOWN CONV option to OFF or set the DISPLAYS option to ON ...

Page 146: ... high precision manufacturing techniques with more than 99 99 of the pixels operating to specification Less than 0 01 of the pixels may occasionally misfire or appear as black or green dots This has no effect on the recorded image and does not constitute a malfunction ...

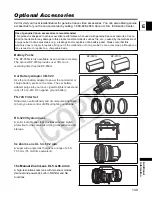
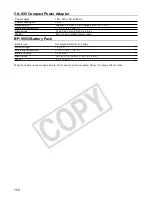
Page 147: ...er XL 4 WL D5000 Wireless Controller MiniDV Video Cassette HC 3200 System Case TA 100 Tripod Adapter SS 1000 Shoulder Strap FU 1000 Monochrome CRT Viewfinder Unit 3 DC 920 DC Coupler BP 930 BP 945 BP 950G BP 970G Battery Pack CB 920 Car Battery Adapter CA 920 Compact Power Adapter CH 910 Dual Battery Charger Holder BP 930 BP 945 BP 950G BP 970G Battery Pack S Video Cable Stereo Cable VCR DV cable ...

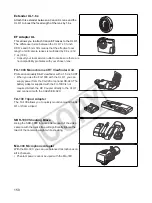
Page 148: ...er as the power source You cannot use the battery adapter supplied with the FU 1000 instead connect the DC coupler directly to the XL H1 and connect it to the compact power adapter or the car battery adapter Also you cannot use the microphone protector supplied with the FU 1000 when using it with the XL H1 4 When attaching EF lenses to the XL H1 the approximate 35 mm equivalent of the effective fo...

Page 149: ...ighting conditions HC 3200 System Case A solid lockable case that provides safe and stylish protection for the camcorder during transportation and storage 3x Zoom Lens XL 3 4 10 2 mm A super wide angle lens that gives a range of 24 5 73 5 mm 35 mm film equivalent 16x Manual Zoom Lens XL 5 4 86 4 mm A high resolution zoom lens with two zoom modes manual and powered built in ND filter and AE functio...

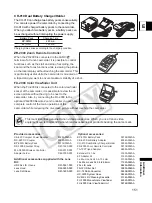
Page 150: ... Professional quality B W viewfinder with a 1 5 inch CRT When you use the FU 1000 with the XL H1 you can supply power from the CA 920 or optional CB 920 The battery adapter supplied with the FU 1000 is not required Attach the DC Coupler directly to the XL H1 and connect it with the CA920 CB 920 TA 100 Tripod Adapter The TA 100 allows you to quickly mount unmount the XL H1 on from a tripod SBR 1000...

Page 151: ...complete control of the main operations of the camcorder while reviewing the on screen picture without touching the camcorder Battery Pack Charging Time BP 950G 280 min BP 970G 380 min This mark identifies genuine Canon video accessories When you use Canon video equipment we recommend Canon brand accessories or products bearing the same mark Provided accessories Optional accessories CA 920 Compact...

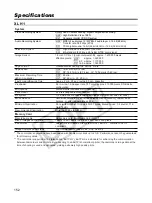
Page 152: ...000 4 3 approx 1 170 000 16 9 approx 1 560 000 Tape Format Videocassettes bearing the MiniDV mark Tape Speed 18 81 mm s 0 74 ips SP 18 81 mm s 0 74 ips LP 12 56 mm s 0 49 ips Maximum Recording Time 60 min cassette 60 min SP 60 min LP 90 min Fast Forward Rewind Time Approx 2 min 20 sec with a 60 min cassette Viewfinder 2 4 in wide 16 9 aspect ratio TFT color approx 215 000 pixels RGB delta configur...

Page 153: ...ut only 1 Vp p 75 ohms Headphone Terminal ø3 5 mm stereo mini jack 23 5 dBv 16 ohm load 50 ohms LANC Terminal ø2 5 mm stereo mini jack Power Others Power supply rated 7 4 V battery pack Power consumption 7 8 W recording with autofocus HD 20x L IS Lens mounted HD mode Operating temperature 0 40 C 32 104 F Dimensions W x H x D 226 x 220 x 496 mm 8 9 x 8 7 x 19 5 in Weight camcorder body only fully l...

Page 154: ...umption 24 W Rated output Adapter 7 2 V DC 2 0 A Charger 8 4 V DC 1 5 A Operating temperature 0 40 C 32 104 F Dimensions 75 x 99 x 51 mm 3 0 x 3 9 x 2 0 in Weight 215 g 7 6 oz without power cable Battery type Rechargeable lithium ion battery Rated voltage 7 4 V DC Operating temperature 0 40 C 32 104 F Battery capacity 5 200 mAh Dimensions 38 2 x 40 3 x 70 5 mm 1 5 x 1 6 x 2 8 in Weight 210 g 7 4 o...

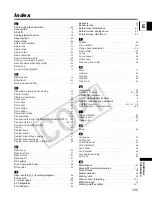
Page 155: ...a code 108 Date and time 41 Date format 97 Date search 107 DC coupler 17 Drop frame time code 58 DV control 95 E Easy recording recording program 69 End search 49 Error messages 136 EVF Magnifying 53 EVF Peaking 53 Exposure 75 Exposure lock 75 External synchronizations 60 External video analog line in 110 External video HDV DV in 110 F Faders 94 File numbers 115 Flange back adjustment 26 Flash sti...

Page 156: ...mote sensor 28 S Safety zone 45 Screen displays 132 134 SD memory card 30 Setup level 83 Sharpness 83 Shoulder strap 23 Shutter speed 72 Signal standard 47 Slide Show 124 SP mode 96 Specifications 152 Spotlight 70 Still image review 123 Still image erasing 126 Still image protecting 127 Still image quality and size 114 T Tally lamp 97 Tape protection 141 Temporary autofocus 53 Time code 58 Time co...

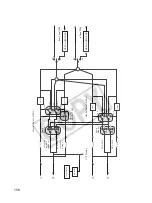
Page 157: ...Hz CH 1 CH 2 4CH 48kHz CH 1 CH 2 HD 2CH 48kHz CH 1 CH 2 4CH XLR GAIN UP REAR FRONT PHONES ADVANCED Phantom 48V ON OFF CH1 CH2 MIC LINE CH 1 CH 3 CH 2 CH 4 1 sheeld 2 hot 3 cold Mic Power CH 3 CH 1 3 CH 2 4 CH 4 ATT REAR ATT SW ATT FRONT ATT SW Head Amp balance to unbalance balance to unbalance ATT Head Amp ATT Head Amp ATT Head Amp ATT Phone Amp Phone Amp Head Amp Head Amp Bilingual Bilingual OUTP...

Page 158: ...LAY DELAY from Tape 1394 to Tape 1394 normal normal Line Out Line Out PB PB CH1 CH3 CH2 CH4 MIX MIX CH1 CH2 CH1 REC CH SELECT SW Monitor Select MENU DELAY DELAY Audio Monitor RCA CH 3 RCA CH 4 MUTE MUTE MUTE MUTE CH3 CH4 normal normal Line Out Line Out PB PB CVF Display Monitor Select MENU MPEG AUDIO DEC MPEG AUDIO ENC SD HD SD HD ...

Page 159: ...s The following functions can be assigned to the custom keys 1 Can only be assigned to Custom Key 2 2 This function can only be operated with a custom key CUSTOM KEY 1 TIME CODE TV SCREEN ZEBRA TV SCREEN CUSTOM KEY 2 INDEX WRITE DATA CODE TV SCREEN DATA CODE Time code Index write Zebra pattern VCR stop 2 TV screen Time code hold 2 Audio level EVF B W mode CP backward key 1 2 Flip EVF 2 Time code T...

Page 160: ...TO USE THE DV CAMCORDER REGARDLESS OF THE LEGAL THEORY ON WHICH THE CLAIM IS BASED AND EVEN IF CUSA HAS BEEN ADVISED OF THE POSSIBILITY OF SUCH DAMAGES NOR SHALL RECOVERY OF ANY KIND AGAINST CUSA BE GREATER THAN THE PURCHASE PRICE OF THE DV CAMCORDER SOLD BY CUSA AND CAUSING THE ALLEGED DAMAGE WITHOUT LIMITING THE FOREGOING YOU ASSUME ALL RISK AND LIABILITY FOR LOSS DAMAGE OR INJURY TO YOU AND YOU...

Page 161: ...Liesse Quebec H4T 1V7 z If you have any questions call the Canon Canada Information Center toll free at 1 800 828 4040 Canada only z Si vous avez des questions veuillez téléphoner sans frais au Canada 1 800 828 4040 Canada seulement MEXICO CANON MEXICANA S DE R L DE C V Periferico Sur No 4124 Col Ex Rancho de Anzaldo C P 01900 México D F México CANON U S A INC NEW JERSEY OFFICE 100 Jamesburg Road ...

Reviews: