Printed in KOREA
Instruction Guide
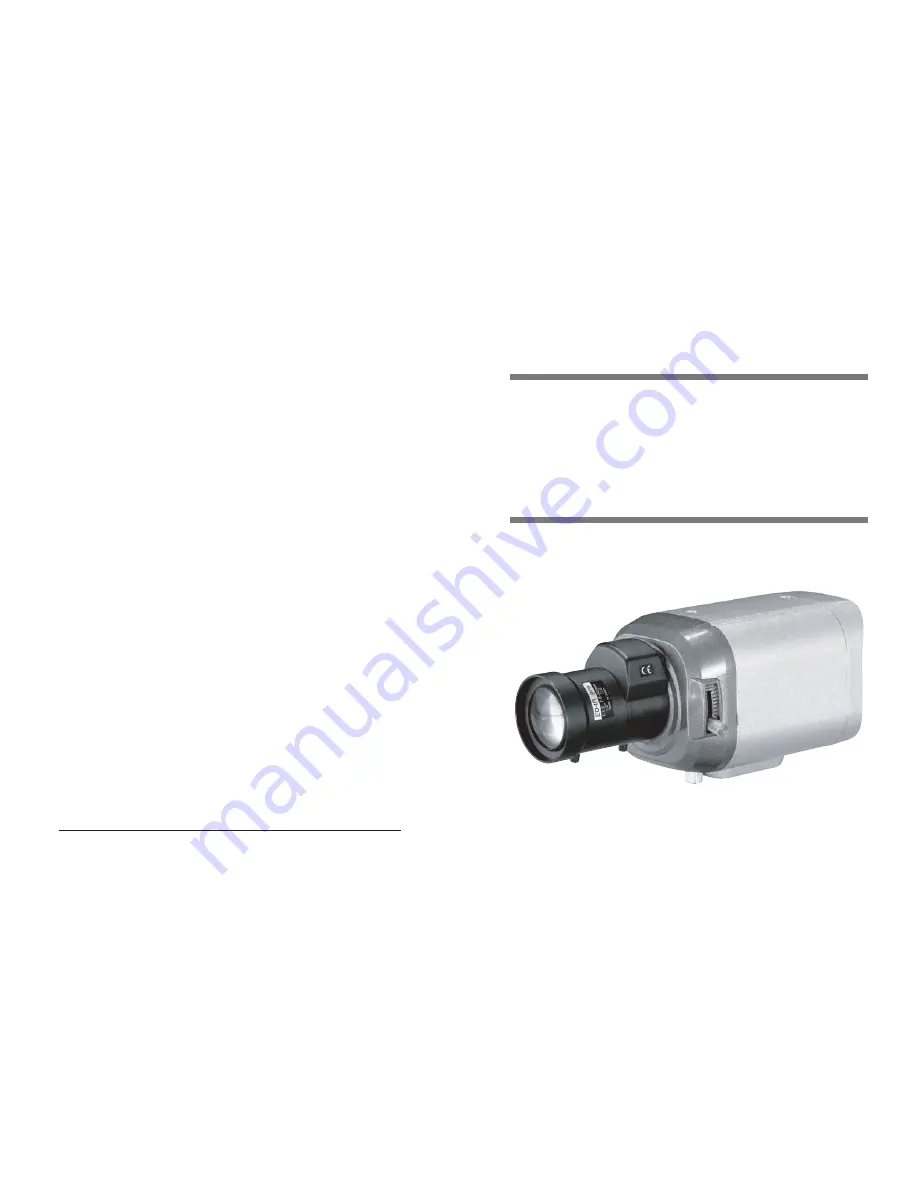
Ultra High Resolution
Color Camera
Ultra High Resolution Color Camera
Page 1: ...urces other than those specified Do NOT expose this appliance to rain or moisture This installation should be made by a qualified service person and should conform to all local codes The lightning fla...
Page 2: ...AL 30 EXIT 36 31 32 32 33 34 34 35 36 36 Troubleshooting 37 Specifications 39 2 Ultra High Resolution Color Camera 3 Ultra High Resolution Color Camera Contents Features Precautions Overview Installat...
Page 3: ...carry out the inspection Stop using your camera when you find it malfunctioning If the camera emits smoke or is unusually hot for a long period a fire may be caused Do not Install the camera on a sur...
Page 4: ...era Be careful not to leave fingerprints on the lens cover Do not install or use the camera in an environment where the humidity is high If the camera is exposed to spotlight or an object reflecting s...
Page 5: ...unting Bracket to the top of the camera C Mount Lens Adapter Install this adapter to use a C Mount Lens Back Focus Control Lever Adjust Back Focus using this control lever Components and Accessories O...
Page 6: ...ector Used to connect Auto Iris Lens plug The Tripod Mounting Bracket can be unscrewed and installed on the top or bottom of the camera Make sure to use the Tripod Mounting Bracket when fixing the cam...
Page 7: ...pprox 8mm approx 2mm Auto iris lens selection switch Used to change between DC or Video depending upon the type of auto iris in use Rear View OSD Setup Buttons SET Button Displays the menu on the scre...
Page 8: ...ount or CS Mount This camera is set for a CS Mount Lens by default To install a C Mount Lens a simple modification is required When Using a CS Mount Lens Remove the protective cover from the front of...
Page 9: ...era to the Monitor DVR Since the connection procedure may differ depending on the type of monitor or peripheral device to be connected refer to the User Manual for the device to be connected Make sure...
Page 10: ...ake sure to check your model name and specifications before connecting power You can connect power as shown in the following figure Check the standard power requirement before connecting to power Conn...
Page 11: ...made The SETUP menu is displayed on the monitor 2 Select a menu item from the list available by using the UP and DOWN buttons Funtions are selected using up and down buttons The selected position is...
Page 12: ...djust the Lens VR adjust the BRIGHTNESS and then check if the screenbrightnesschangesproperly Otherwise adjusttheLensVRagain 1 When the SETUP menu screen is displayed select LENS by using the Up and D...
Page 13: ...from 5 3dB to 37dB SENS UP When it is night or dark the camera automatically detects thelightlevelandmaintainsaclearpictureifthismodeisactivated OFF Deactivates the SENS UP function AUTO Activates the...
Page 14: ...mages with high contrast between bright and dark spots 1 When the SETUP menu screen is displayed select SSDR by using the Up and Down buttons so that the arrow indicates SSDR 2 Use the Left Right butt...
Page 15: ...se plate observation it needs minimum illumination and fast shutter speed more than 1 200sec Because there can be a difference in the effectiveness of HLC according to the amount of light area in the...
Page 16: ...using the Up and Down buttons COLOR The picture is always displayed in color B W The picture is always displayed in black and white You can turn on or off the burst signal on B W mode AUTO The mode i...
Page 17: ...theoutputphase ofmultiplecamerasusingthepower synchronizationfunction Line Lock without using a synchronization signal generator INT Internal Synchronization Type L L Power Synchronization Type Line l...
Page 18: ...otion detection sensitivity is increased to recognize even small movement AREA MODE Determines whether to use the MD area selected in SENSITIVITY SEL POS Determines which of the 4 vertices of each MD...
Page 19: ...es do not enable you to solve the problem contact an authorized technician Problem Nothing appears on the screen The image on the screen is dim Check the power connections Check the VIDEO signal line...
Page 20: ...V 768 H x 494 V 752 H x 582 V 2 1 Interlace INT Horizontal 15 734KHz Vertical 59 94Hz Horizontal 15 625KHz Vertical 50 00Hz 600 TV lines 52dB AGC Off Weight ON NTSC PAL PowerConsumption H Resolution S...
Page 21: ...R Motion Detection Privacy Function V REV H REV Freeze Sharpness Day Night DIS Digital Zoom BlemishCompensation Lens Mount BackFocusAdjustment 0 15Lux 40IRE ATW AWC MANUAL 1700 K 11 000 K 1 60 1 50 1...
Page 22: ...Printed in KOREA Instruction Guide Ultra High Resolution Color Camera Ultra High Resolution Color Camera...