


11. Optionally, click the Rename button (
) to provide the data logger a descriptive name.
12. Apply your changes.
Adding leaf data loggers to the network
1. In the LoggerNet Standard Setup view (click the Setup (
) option and click the View menu
to ensure you are in the Standard view), right-click on the router data logger in the Entire
Network pane on the left side of the window and select CR6Series.
2. With the newly added data logger selected in the Entire Network pane, set the PakBus
Address to the address that was assigned to the leaf data logger in Device Configuration
Utility.
3. Click Rename. Enter a descriptive name for the data logger.
4. Apply your changes.
5. Repeat these steps for each leaf data logger in the network.
If you experience problems with network communications, see
(p. 134) for assistance.
Using additional communications methods
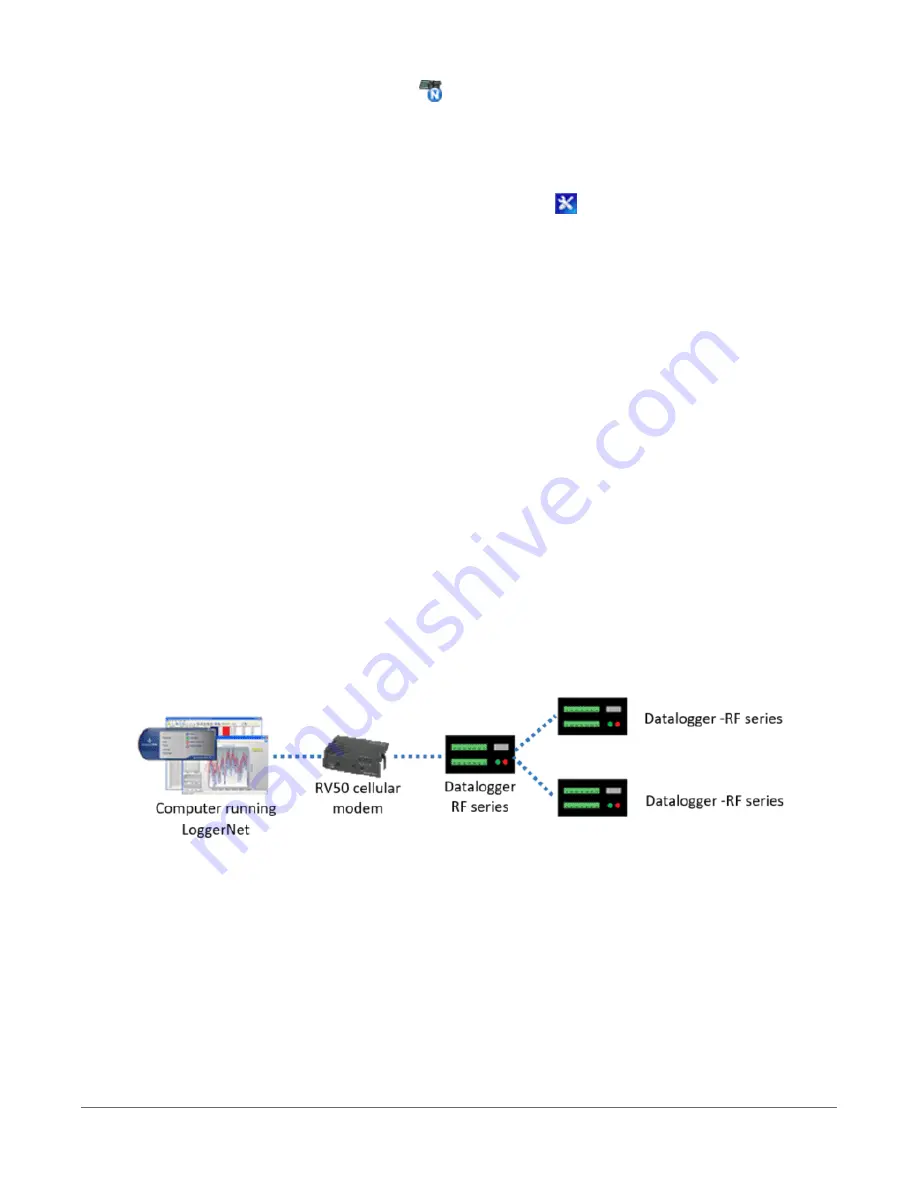
Using similar instructions, a RF407-series data logger can be used in a system with additional
communication methods. For example, in the following image, the router RF407-series data
logger communicates with LoggerNet through an RV50 cellular modem connected to RF407-
series data logger using the RS-232 port. The router RF407-series data logger communicates with
the leaf RF407-series data loggers over RF.
3.1.5.4 RF451 radio communications with one or more dataloggers
To configure an RF451 radio to communicate with the data logger, you must complete the
following steps (detailed instruction follows):
l
Ensure your data logger and RF451 radio are connected to an antenna and power.
l
Configure the RF451 radio that will be connected to the computer using Device
Configuration Utility.
3. Setting up the CR6
35


