OSD Menu Operation
OSD Menu Operation
30
31
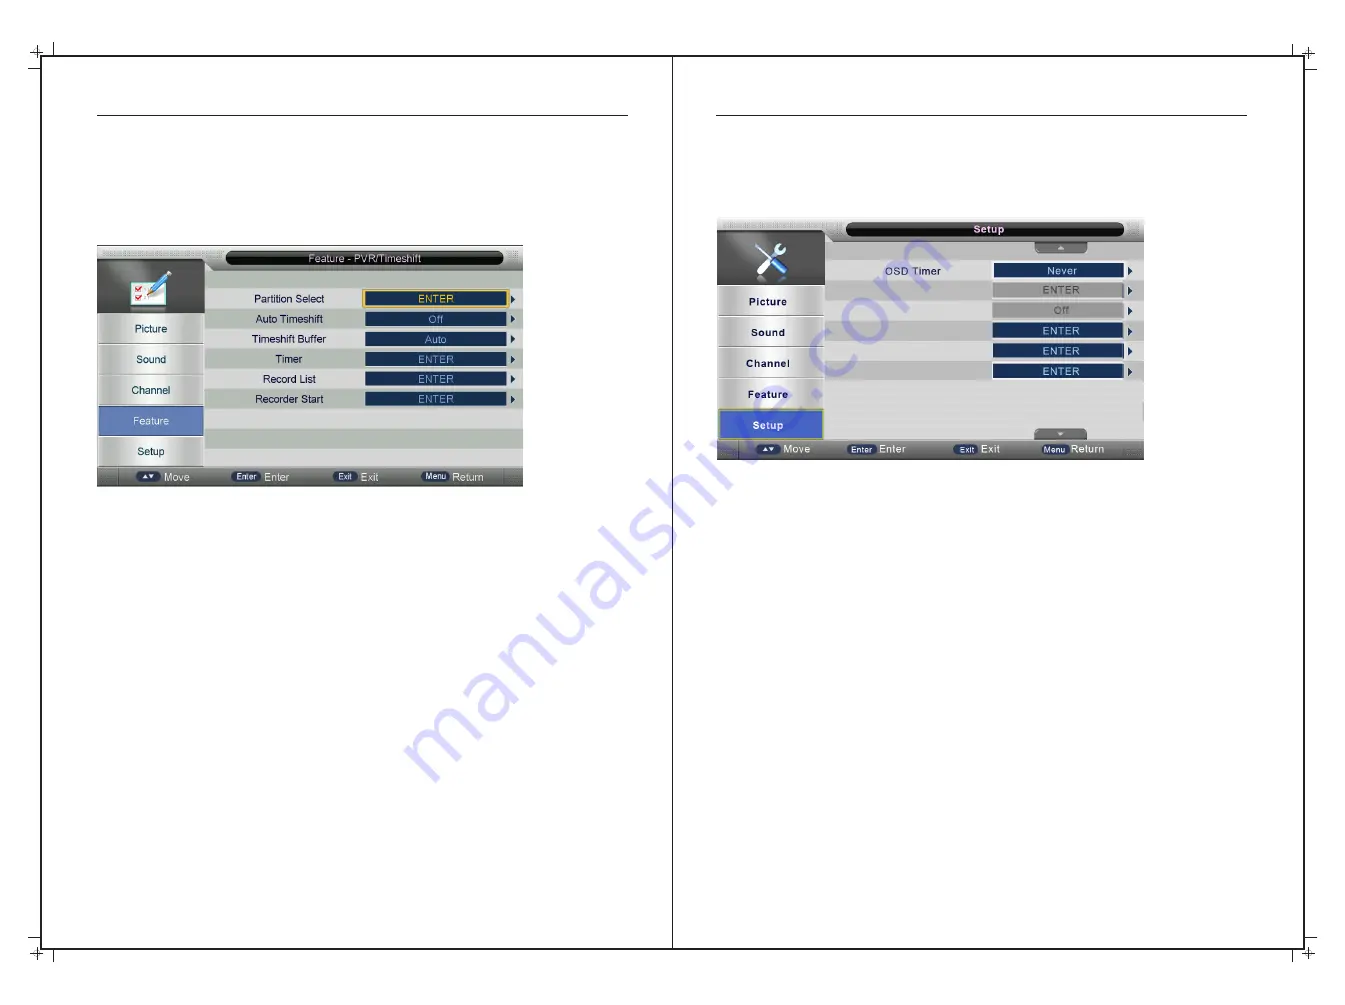
Setup Menu
Press
the MENU
button
to
display
the
main
menu
.
Press
▲
/
▼
buttons
to
select
Setup
in
the
main
menu
,
then
press
ENTER
or
►
to
enter
.
OSD
Timer
Press
▲
/
▼
buttons
to
select
the length of time the On Screen Display
stays on
,
then
press
the
ENTER
or
►
button
to
enter
the
sub
menu
,
then
Press
▲
/
▼
buttons
to
select
.
(
Available
OSD
Timer options
:
5,
10,
15,
20,
25,
30
Seconds or
Never
),
then
press
the ENTER
or
►
button
to
confirm.
PC
Setup
Press
▲
/
▼
buttons
to
select
PC
Setup
,
then
press
the ENTER
or
►
to
enter
the
sub
menu
,
then
Press
►
to
enter
,
then
press
ENTER
or
►
to
confirm
(
when
the
PC
signal
is
connected
).
A sub menu will then appear with PC specific adjustments such as Horizontal/Vertical position,
phase & clock settings. Please use the default settings if you are unsure how to use these
settings.
Blue Screen
Press
▲
/
▼
buttons
to
select
Blue Screen rather than the default Black Screen when there is
no source
,
then
press
ENTER
or
►
to
enter
the
sub
menu
,
then
Press
▲
/
▼
to
select
On
or
Off
.
then
press
ENTER
or
►
to
confirm
.
This option is only available on some sources.
Home
Mode
This selects the of screen brightness and style your prefer. Press
▲
/
▼
buttons
to
select
Home
Mode
,
then
press
the ENTER
or
►
button
to
enter
the
sub
menu
,
then
Press
▲
/
▼
buttons
to
select
.
(
Home, Dynamic, Standard, Mild.
),
then
press
the ENTER
or
►
button
to
confirm
.
Reset
TV
Setting
Press
▲
/
▼
buttons
to
select
Reset
TV
Setting WHICH RESETS ALL MENU SETTINGS, and
then
press
ENTER
or
►
to
select. The
password
menu
will
appear
when
the
Child
Lock
is
on
.
Software Upgrade
From time to time we may release new firmware to improve the running
of the television. This menu lets you upgrade that software on the
television. Further details of how to do this will be issued with the firmware if required.
PC Setup
Blue Screen
Home Mode
Reset TV Setting
Software Upgrade
Feature Menu Cont’d
PVR/Timeshift
Press
the MENU
button
to
display
the
main
menu
.
Press
▲
/
▼
buttons
to
select PVR
/
Timeshift
in
the
main
menu
,
then
press
the ENTER
or
►
to
enter
.
Partition Select
Press ▲/▼ buttons to select Partition Select, then press the ENTER or ► button to enter the
sub menu, then Press ▲/▼ buttons to select the desired Partition you would like to use on
the USB drive. Note this is not required for normal USB operation, but if you want to use a
USB drive that has data on it as well, it is advisable to create a separate partition for PVR
recording.
Auto Timeshift
Press
▲
/
▼
buttons
to
select
Auto Timeshift
,
then
press
ENTER
or
►
to
enter
the
sub
menu
,
then
Press
▲
/
▼
to
select
On
or
Off
.
This function starts buffering a DTV channel as soon as
a channel is changed but is not necessary unless you like pausing and searching Live DTV
a lot so the default setting is “Off”
Timeshift Buffer
This function selects how long time shift will operate when, for example, the Live TV picture
is paused. The default setting is Auto as this determines the duration of the time shift based
on the available memory of the USB drive. To change, press ▲/▼ buttons to select
Timeshift Buffer, then press the ENTER or ► button to enter the sub menu, Then Press ▲/▼
buttons to select from Auto, 30min, 1Hr & 2Hr. The default setting is “Auto”
Timer
Press ▲/▼ buttons to select the record Timer, then press the ENTER or ► button to enter
the sub menu, then Press ▲/▼ buttons to select the start and end time of the recording.
Record List
Press ▲/▼ buttons to select Record List, then press the ENTER or ► button to enter the sub
menu, then Press ▲/▼ buttons to select. Note this function is easier to perfrom using the
EPG - see P29-31
Recorder Start
Press ▲/▼ button to select Recorder Start, then press ENTER or ► button to enter the sub
menu, then Press ▲/▼ button to select. Note it is easier to start recording using the record
button on the remote - see P13.


