4
5
2
Connecting Label Printer to Computer
Choose from the following options for connecting a computer to the label printer:
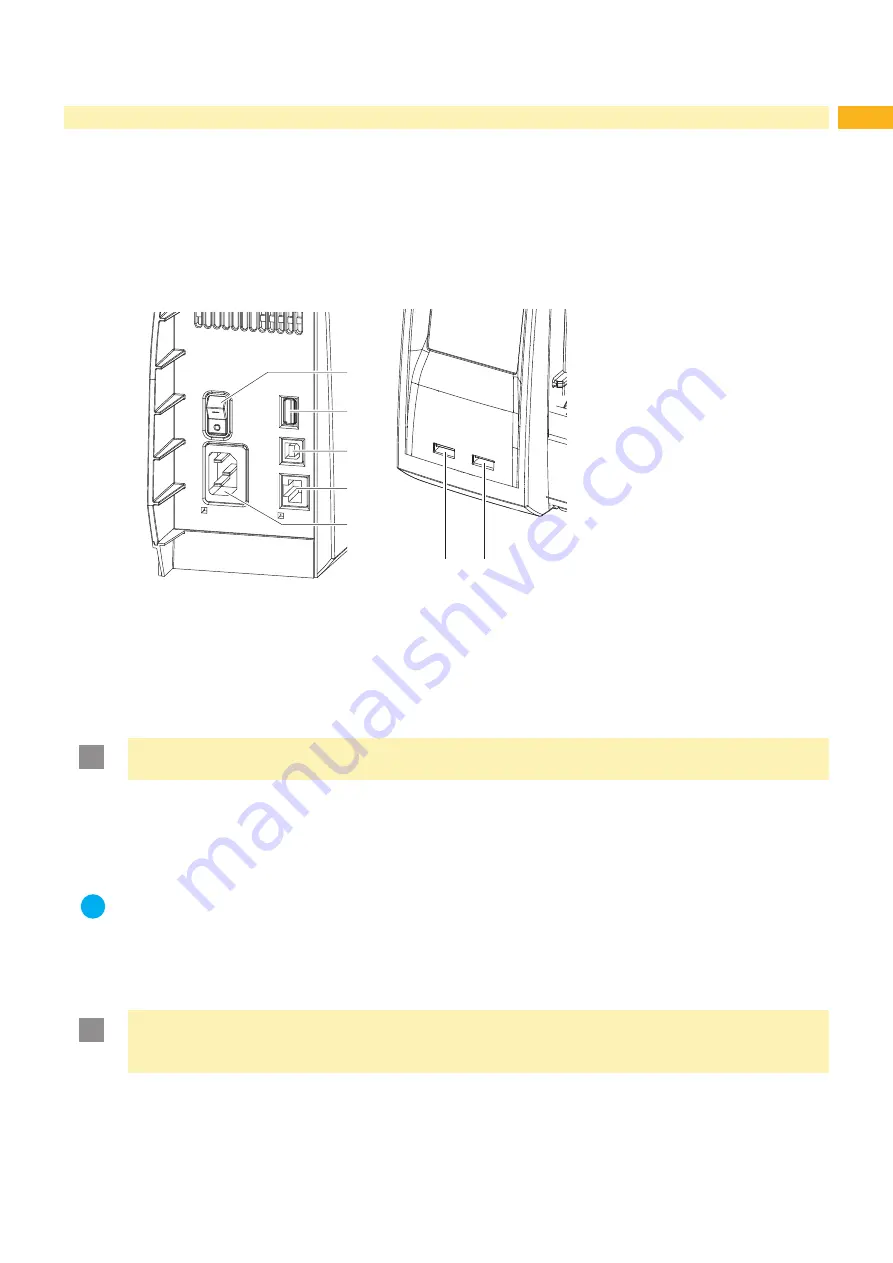
• Direct connection to the Ethernet interface (4)
• Connection via a computer network to the Ethernet interface (4)
• Direct connection to the full-speed USB slave interface (3)
• Connection via optional RS-232 interface adapter connected to an USB master interface (2).
• Connection to a wireless network via optional WLAN adapter connected to an USB master interface (2).
• Connection via optional Bluetooth adapter connected to an USB master interface (2).
2
3
4
5
1
2
2
1 Power switch
2 USB master interfaces for
keyboard, scanner, memory stick
or service key
3 USB full-speed slave interface
4 Ethernet 10/100 Base-T
5 Power connection jack
Fig. 1
Connections
2.1
Connecting Label Printer via Ethernet Interface
To connect the label printer to a network jack, a patch cable with an RJ45 plug for 10 Base T or 100 Base T is
required. For direct connection of the printer to the Ethernet card of a local computer, use an appropriate crossover
cable.
!
Attention!
Use a shielded cable to connect the printer to the network.
1. Connect computer and label printer with a suitable cable.
2. Make basic settings for operation of the Ethernet interface
3. Call up the printer web interface
4. Open the "Setup" tab on the printer web interface.
5. Set the parameters described in
Tab "Setup" on page 20 in the path
Setup > Interfaces > Network.
i
Notice!
For changing parameter settings user name and password must be entered
User name :
admin
Password (Default) :
admin
6. Set up print service if necessary
7. Adjust Windows printer setting
!
Attention!
Do not change the settings of the "IP" and "Gateway" on the printer web interface, as otherwise the
connection to the printer may be lost.


