MM3156A DRUM SANDER
11
However, due to stresses imposed on the unit during shipment, you may need to adjust
or align your unit or return it to perfect alignment. It is very important that the following
adjustments be performed as described.
WARNING:
Never make any adjustments with the unit connected to the power source.
Failure to heed this warning can result in serious personal injury.
WARNING:
Always secure tool to workbench or workstand to avoid tendency for tool
to tip over, slide, or walk on the supporting surface. Failure to secure tool can result in
serious personal injury.
SANDING DRUM DEFLECTION
Before beginning the sanding drum alignment procedures outlined in the following
section, ensure that minimal upward deflection of the sanding drum occurs when
sanding. The three primary causes of excessive sanding deflection are:
1. Excessive depth of cut.
Decrease the depth of cut to minimize pressure on the
sanding drum assembly. Refer to the Introduction to Drum Sanding
section for hints regarding depth of cuts.
2.
Loose Elevation Tension Screws.
Refer to Step 1 in the Drum Alignment section
for hints regarding depth of cuts.
3.
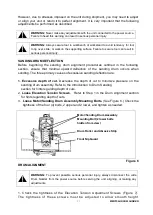
Loose Motor/Sanding Drum Assembly Mounting Bolts.
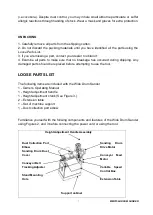
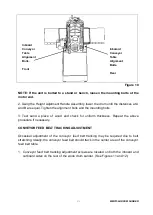
(See Figure 6.) Check the
tightness of the four (4) bolts, 2 upper and 2 lower, and tighten as needed.
Figure 6
DRUM ALIGNMENT
WARNING:
To prevent possible serious personal injury, always disconnect the wide
Drum Sander from the power source before serving the unit, aligning, or making any
adjustments.
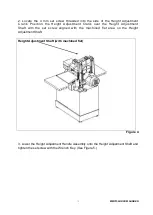
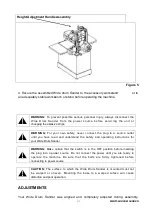
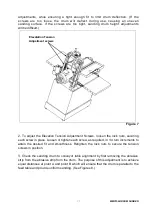
1. Check the tightness of the Elevation Tension Adjustment Screws (Figure 7).
The tightness of these screws must be adjusted to allow smooth height
Motor/Sanding Drum Assembly
Mounting Bolt (2 lower bolts
hidden from view)
Drum Roller and Abrasive Strip
Front Nip Guard


