5
Burley Solo Walk ‘n Roller Instruction Guide: Models ‘04 and Beyond
Re-Assembly with the Pivot Wheel
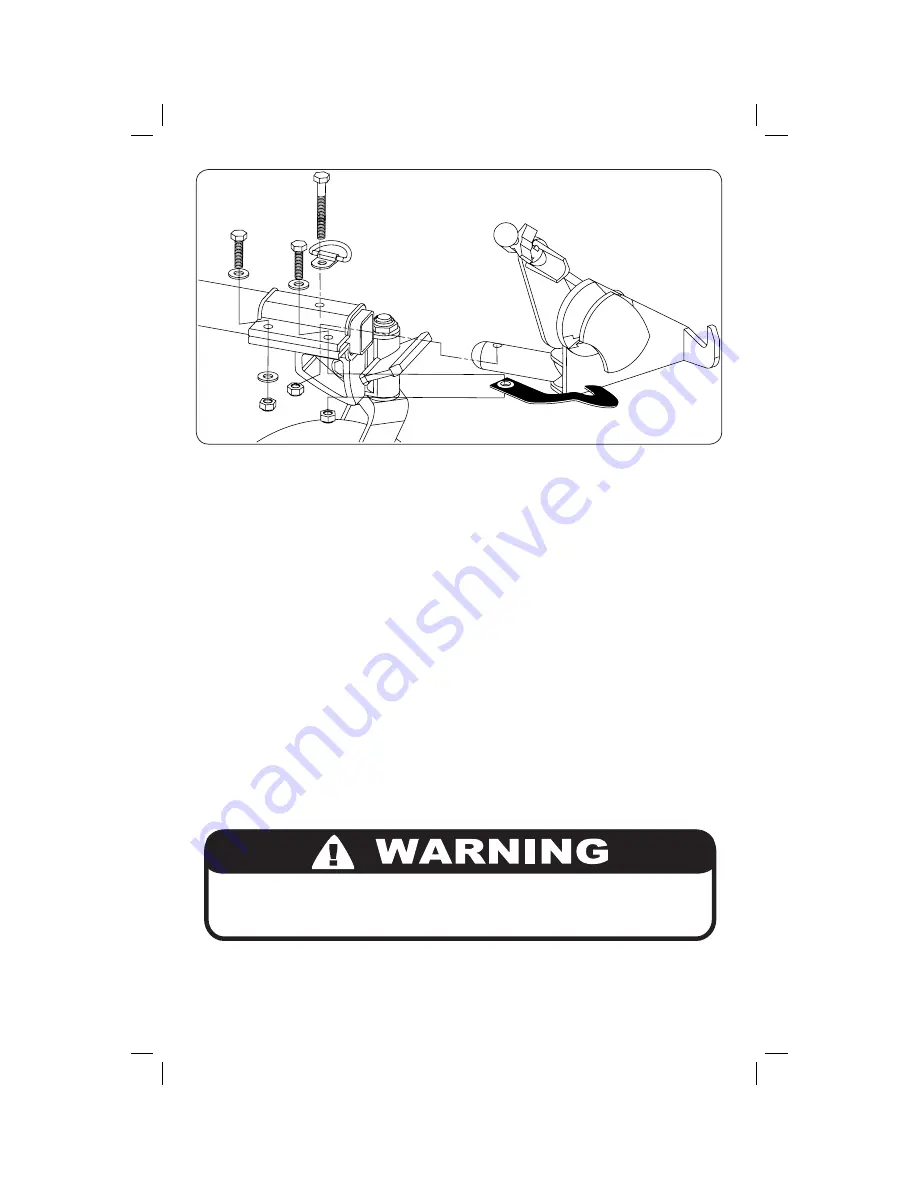
Slide the Wheel pivot assembly over the end of the tongue so that the hole in the
tongue lines up with the hole in the top as shown below.
• Line up the hitch connector hole (#4, see left), with those those same two holes.
• Run the 2 inch bolt provided through the d-ring, and then through the wheel pivot
assembly, tongue hitch connector.
• Push the bolt through the hole at the bottom, visible in the cavity underneath, and
then secure with the new locking nut provided (tighten to 6 ft-lbs).
• The end of the bolt should be fl ush with, or completely pass through the end of the
nut.
• Place the 1 inch bolt (#2), using 2 washers as shown and a locking nut. Then place
the other 1 inch bolt (#3), through one washer and the remaining hole.
• On the underside of (#3) place the safety strap and a locking nut. Tighten to 6 ft-
lbs using the torque wrench, the end of the bolt must be fl ush with or completely
pass through the nut.
The bolt must go through the hole in the fl exible coupling;
otherwise, hitch could come loose causing an accident
resulting in serious injury or death.
2
3
5
4
1


