background image

Preface

ix

Communication Statements

The following statements apply to this product. The statements for other products intended for use with this product
appears in their accompanying manuals.

Federal Communications Commission (FCC) Statement

Note:

This equipment has been tested and found to comply with the limits for a Class A digital device, pursuant
to Part 15 of the FCC Rules. These limits are designed to provide reasonable protection against harmful
interference when the equipment is operated in a commercial environment. This equipment generates,
uses, and can radiate radio frequency energy and, if not installed and used in accordance with the
instruction manual, may cause harmful interference to radio communications. Operation of this equipment
in a residential area is likely to cause harmful interference in which case the user will be required to
correct the interference at his own expense.

Properly shielded and grounded cables and connectors must be used in order to meet FCC emission limits. Neither
the provider or the manufacturer are responsible for any radio or television interference caused by using other than
recommended cables and connectors or by unauthorized changes or modifications to this equipment. Unauthorized
changes or modifications could void the user’s authority to operate the equipment.

This device complies with Part 15 of the FCC Rules. Operation is subject to the following two conditions: (1) this
device may not cause harmful interference, and (2) this device must accept any interference received, including
interference that may cause undesired operation.

EC Council Directive

This product is in conformity with the protection requirements of the following EC Council Directives:

89/336/EEC and 92/31/EEC (for the electromagnetic compatibility)

73/23/EEC (for the low voltage)

93/68/EEC (for CE marking).

Neither the provider nor the manufacturer can accept responsibility for any failure to satisfy the protection
requirements resulting from a non-recommended modification of the product, including the fitting of option cards not
supplied by the manufacturer.

International Electrotechnical Commission (IEC) Statement

This product has been designed and built to comply with IEC Standard 950.

Avis de conformité aux normes du ministère des Communications du Canada

Cet appareil numérique de la classe A respecte toutes les exigences du Réglement sur le matériel brouilleur du
Canada.

Canadian Department of Communications Compliance Statement

This Class A digital apparatus meets all requirements of the Canadian Interference Causing Equipment
Regulations.

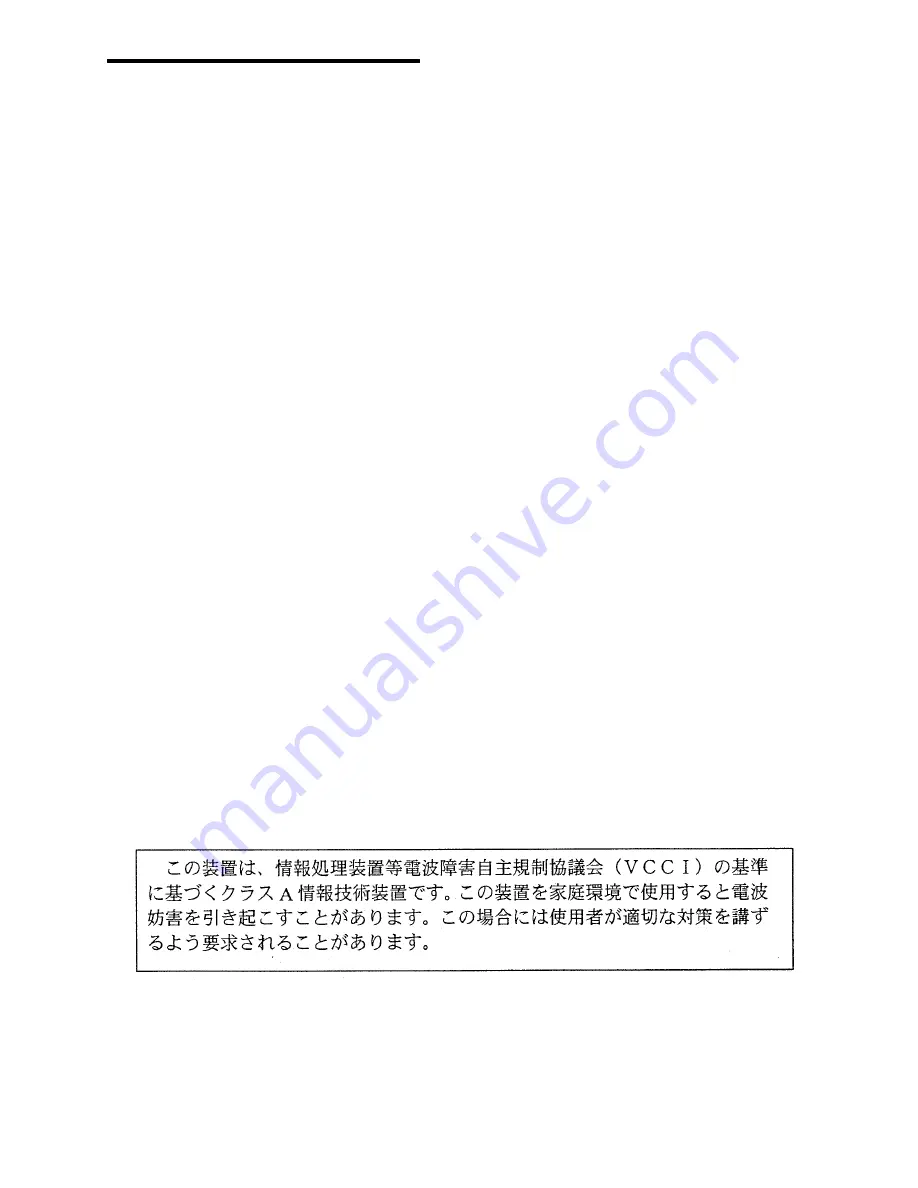
VCCI Statement

The following is the translation of the VCCI Japanese statement in the box above.

This is a Class A product based on the standard of the Voluntary Control Council for Interferences by Information
Technology Equipment (VCCI). If this equipment is used in a domestic environment, radio disturbance may arise.
When such trouble occurs, the user may be required to take corrective actions.

Summary of Contents for ESCALA E Series

Page 1: ...Bull ESCALA E Series Setting Up the System 86 A1 86PN 01 ORDER REFERENCE...

Page 2: ......

Page 3: ...Bull ESCALA E Series Setting Up the System Hardware December 1997 BULL ELECTRONICS EUROPE S A Service CEDOC 331 Avenue PATTON BP 428 49004 ANGERS CEDEX 01 FRANCE 86 A1 86PN 01 ORDER REFERENCE...

Page 4: ...this book or other Bull Technical Publications you are invited to use the Ordering Form also provided at the end of this book Trademarks and Acknowledgements We acknowledge the right of proprietors o...

Page 5: ...Preface iii...

Page 6: ...tion Site Preparation on page 2 1 Reference information Connecting Devices on page 3 2 Graphic monitor ASCII terminal Parallel printer 508 mm 20 inches 508 mm 20 inches 508 mm 20 inches RS 485 RS 232...

Page 7: ...ed System on page 3 12 Check the software status for your system pre installed not installed If the Preload Report sheet has been supplied with the system the software is pre installed Skip to step 6...

Page 8: ...Setting Up the System vi...

Page 9: ...m Features 1 4 Base Unit 1 4 Disk Expansion Unit 1 4 Front View of the Base Unit 1 5 Rear View of the Base Unit 1 6 Chapter 2 Site Preparation 2 1 Preparing the Site 2 2 Floor 2 2 Fire Protection 2 2...

Page 10: ...Connecting the Power Cord 3 10 Starting the System for the First Time 3 11 Checking the Software Status 3 11 First Startup of a Pre Installed System 3 12 First Startup of a Not Installed System 3 12...

Page 11: ...ubject to the following two conditions 1 this device may not cause harmful interference and 2 this device must accept any interference received including interference that may cause undesired operatio...

Page 12: ...t HD 482 S1 1988 The German testing institute VDE assigned a certificate of conformity to DIN IEC 825 VDE 0837 02 86 and CENELEC HD 482 S1 03 88 the certificate registration number is 3642 In addition...

Page 13: ...rked in order to correctly address the recycling operations The unit is designed taking into account the requirements for disassembly largest parts are made of homogeneous material to facilitate recyc...

Page 14: ...Setting Up the System xii...

Page 15: ...This booklet is available on paper only Operator s Guide contains information about system operability features and use of installed devices This guide is available both on paper and in an online ver...

Page 16: ...the base unit and the hardware procedure for a quick set up of the disk expansion unit This leaflet is available on paper only Using the Disk Expansion Unit contains information about the disk expans...

Page 17: ...em This chapter contains information about system unpacking and a description of the available system documentation In addition it provides a simple overview of the system Unpacking and Inspecting You...

Page 18: ...on CD ROM while other ones are on CD ROM only For information on online documentation which is delivered on CD ROM see Online Documentation below For detailed information about the system specific do...

Page 19: ...3 System Features Overview The following paragraphs give a brief description of the system features and help you become familiar with the system components System Features Front View of the Base Unit...

Page 20: ...r 8 x 1 6 Inch high hard disks Media Devices One floppy diskette drive Up to 4 media devices such as CD ROM 4 mm 8 mm tape QIC tape PCI ISA Controllers Up to 4 PCI ISA cards 2 PCI cards 2 ISA cards wi...

Page 21: ...g Your New System 1 5 Front View of the Base Unit From the front of the base unit you have access to the following features and components Device Shutter Key Lock Operator Panel Media and Disk Devices...

Page 22: ...s to the following connectors RS 485 for expansion unit connection Mouse 6 pin mini DIN female Keyboard 6 pin mini DIN female RS 232 serial port 9 pin male COM2 RS 232 serial port 9 pin male COM1 Para...

Page 23: ...able location for the system and list the system and environment specifications for the base unit The same level of information for the disk expansion unit is provided in the Using the Disk Expansion...

Page 24: ...2 or inert gas If a water system is used precautions should be taken to prevent the accidental turning on of the water It is recommended to install smoke and heat detectors Arranging your Office We of...

Page 25: ...rresponds to a maximum system configuration i e including a max number of cards and devices Clearance The amount of space needed by the system unit during normal operation is indicated in the figure b...

Page 26: ...4kg water kg dry air Environment Temperature System Running System On Standby Dry Bulb Temperature from 10 C to 40 C from 5 C to 50 C from 50 F to 104 F from 41 F to 122 F 32 C 89 6 F with K45 CPU car...

Page 27: ...ond to a system placed in a room having the temperature of 20 C 68 F with a configuration including 1 CPU card 2 memory risers 3 PCI ISA cards 3 hard disks and 2 media devices System Running System Id...

Page 28: ...standards Hardware EMC CISPR 22 Class A VDE871 2 Class A FCC CFR47 Class A VCCI Class A Safety EN60950 IEC950 CSA950 UL1950 Firmware IEEE1275 1994 Open Firmware The system is also compliant with the...

Page 29: ...the System for the First Time Note If you need to connect one or more disk expansion units to the base unit proceed as follows 1 Set up the base unit start it for the first time and make sure that no...

Page 30: ...from the system ensure that the power cables for those devices are unplugged before the signal cables are connected If possible disconnect all power cables from the existing system before you add a d...

Page 31: ...a an external modem an ASCII terminal to be used for remote maintenance by customer service centers It can also be used as a normal RS232 serial line SVGA Used to connect a graphic display monitor whi...

Page 32: ...specified below Communication Options Line Speed baud rate 9600 Word Length bits per character 8 Parity no none Number of Stop Bits 2 Interface RS 232C or RS 422A Line Control IPRTS Keyboard and Disp...

Page 33: ...t them if you are not going to connect any graphic monitor Connect the mouse to the dedicated connector at the rear of the base unit Do not force the cable plug into the socket Connect the keyboard to...

Page 34: ...l connectors RS 232 ports Base Unit Rear Side Serial Ports Parallel Port You can also connect printers to a SCSI port if PCI controllers housing SCSI ports are installed inside the system unit and to...

Page 35: ...If you need to connect one or more PCI controller cables for external connections please refer to the specific documentation delivered with each controller and for SCSI connections to the Maintenance...

Page 36: ...mode These functions are managed by the key controlled switch which is named Key Mode Switch The second pair of keys is used to mechanically lock unlock the device shutter Operator Panel Keys Device...

Page 37: ...the operator panel key performing the following steps 1 Gain access to the operator panel firmly gripping the front bezel and opening it to the left Insert the operator panel key in the Key Mode Switc...

Page 38: ...off 2 Identify the power receptacle toward the bottom of the rear of the system 3 Connect the power cord supplied with the system first to the system unit and then to the wall outlet as shown in the f...

Page 39: ...lled on your system when you receive it This makes your first startup of the system easier and faster Make sure your system software is pre installed by checking that the Preload Report sheet has been...

Page 40: ...ch terminal Press the specified key on the terminal you want to use as the system console Press a key on only one terminal 5 The startup procedure continues up to the display of the login prompt Type...

Page 41: ...Chapter 4 Starting and Stopping the System This chapter describes the steps for the power on and power off procedures for daily operation of your system Starting the System Logging into the System Sto...

Page 42: ...m Note In case you power on the system by setting the Key Mode Switch to the Service position you enter the operating system diagnostic mode Logging into the System Warning After you have started the...

Page 43: ...seconds allowing the user to exit the vi editor for example to several minutes allowing the user to properly finish the update of a database In the case of a user updating a database if the system is...

Page 44: ...4 4 Setting Up the System...

Page 45: ...What To Do When a Problem Occurs 5 1 Chapter 5 What To Do When a Problem Occurs Identifying the Problem System Power Monitor Mouse Keyboard Printer...

Page 46: ...hardware and perform the fault isolation If you are maintaining the system on your own you can find the description of these tools in the Maintenance and Service Guide This guide is available at your...

Page 47: ...nobs until you can see the display displays on the screen see note below The computer system is not powered on Power on the system The monitor video cable is not properly connected to the dedicated po...

Page 48: ...ontacts with a component cleaning spray allow the keyboard to dry thoroughly before powering up the system Printer The printer does not power on The printer power switch is not set to the ON position...

Page 49: ...ral Processing Unit D DDS Digital Data Storage device shutter The shutter which protects media and disk device areas This shutter should be kept closed during system operations DIMM Dual In line Memor...

Page 50: ...tion presented through more than one type of media On computer systems this media includes sound graphics animation and text multitasking The ability to perform several tasks simultaneously Multitaski...

Page 51: ...to guide cooling air to the top of the unit SMIT System Management Interface Tool It is an interactive screen oriented command interface It is provided with your Operating System Stand By menu A menu...

Page 52: ...G 4 Setting Up the System...

Page 53: ...startup not installed system 3 12 pre installed system 3 12 front view base unit 1 5 I inspecting base unit 1 2 K keyboard connecting 3 5 problems 5 4 keys See system keys L logging into the system 4...

Page 54: ...m features base unit 1 4 front 1 5 rear 1 6 disk expansion unit 1 4 overview 1 4 system keys operator panel 3 8 system setup See setup procedure system unit acoustic noise 2 5 daily startup 4 1 4 2 fi...

Page 55: ...r ponse crite veuillez indiquer ci apr s votre adresse postale compl te Your comments will be promptly investigated by qualified technical personnel and action will be taken as required If you requir...

Page 56: ..._ _ _ _ _ _ _ _ _ _ _ _ _ _ _ _ _ _ _ _ _ _ _ _ _ _ _ _ _ _ _ _ _ _ _ _ _ _ _ _ _ _ _ _ _ _ _ _ _ _ _ _ _ _ _ _ _ _ _ _ _ _ _ _ _ _ _ _ _ _ _ _ _ _ _ _ _ _ _ _ _ _ _ _ _ _ _ _ _ _ _ _ _ _ _ _ _ _ _ _...

Page 57: ......

Page 58: ...BULL ELECTRONICS EUROPE S A Service CEDOC 331 Avenue PATTON BP 428 49004 ANGERS CEDEX 01 FRANCE 86 A1 86PN 01 ORDER REFERENCE PLACE BAR CODE IN LOWER LEFT CORNER...

Page 59: ...our obtenir les tiquettes Use the cut marks to get the labels 86 A1 86PN 01 Setting Up the System Bull ESCALA E Series 86 A1 86PN 01 Setting Up the System Bull ESCALA E Series 86 A1 86PN 01 Setting Up...

Page 60: ......

Reviews: