User’s Guide
QL-1110NWB
Read the
Product Safety Guide
first, then read the
Quick Setup Guide
for
the correct setup procedure. After reading this guide, keep it in a safe place for quick reference.
Version 01
ENG
Page 1: ...r s Guide QL 1110NWB Read the Product Safety Guide first then read the Quick Setup Guide for the correct setup procedure After reading this guide keep it in a safe place for quick reference Version 01 ENG ...
Page 2: ...ncluded with the Label Printer for information about safety and operation The Label Printer shown in the illustrations may be different from your Label Printer The available supplies may vary depending on the country Available Manuals Visit the Brother Solutions Center at support brother com and click Manuals on your model page to download the latest manuals 1 Printed manual in the box 2 PDF manua...
Page 3: ...esult in death or serious injuries Indicates a potentially hazardous situation which if not avoided may result in minor or moderate injuries IMPORTANT Indicates information or directions that should be followed Ignoring them may result in damage or failed operations Note Indicates notes that provide information or directions that can help you better understand and use the product more efficiently ...
Page 4: ...l may remain applied Prior to using CD DVD labels be sure to follow the instructions in your CD DVD player s instruction guide regarding applying CD DVD labels DO NOT use CD DVD labels in a slot loading CD DVD player DO NOT peel off the CD DVD label once it is applied to the CD DVD a thin surface layer may come off resulting in damage to the disc DO NOT apply CD DVD labels to CDs DVDs designed for...
Page 5: ...able Applications 16 Create Labels from Your Computer 17 Attach Labels 18 3 Print Using a Mobile Device 19 Install Applications for Use with Mobile Devices 19 Available Applications 19 Connect the Label Printer to a Mobile Device 19 Connect Using Wireless Direct 19 Connect Using Bluetooth 20 Print Labels from a Mobile Device 21 Use a Mobile Device to Print Templates Created on a Computer 21 Attach...
Page 6: ...rinting from a Mobile Device 49 5 Print Labels Using P touch Template 50 P touch Template Operations 50 Preparation 51 Specify Settings in the P touch Template Settings Tool 51 Connect a Barcode Scanner 53 Standard Template Printing 54 Advanced Template Printing 56 Database Lookup Printing 59 Numbered Serialized Number Printing 62 Text Numbering Serializing 62 Barcode Numbering Serializing 63 Prin...
Page 7: ...e Computer to the Label Printer 96 Back up Templates or Other Data Saved in the Label Printer 101 Delete Label Printer Data 102 Create Transfer Files and Transfer Package Files 103 P touch Library 104 Start P touch Library 104 Open and Edit Templates 106 Print Templates 107 Search for Templates 108 11 How to Transfer Templates with P touch Transfer Express Windows only 110 Preparing P touch Transf...
Page 8: ...on IV Appendix 16 Reset the Label Printer 132 Reset All Settings to the Factory Settings Using the Label Printer Buttons 132 Reset Data Using the Printer Setting Tool 132 17 Maintenance 133 Clean the Exterior of the Unit 133 Clean the Label Outlet 133 Clean the Roller 134 Self Cleaning Print Head 134 18 Troubleshooting 135 Overview 135 LED Indications 136 Printing Problems 138 Network Setup Proble...
Page 9: ...Security Features 152 Types of Network Connections and Protocols 153 Types of Network Connections 153 Configure Your Label Printer for a Network 155 IP Addresses Subnet Masks and Gateways 155 Wireless Network Terms and Concepts 157 Security Terms 157 23 List of Barcodes for the P touch Template Function 161 General Procedure for the P touch Template Function 161 List of Barcodes for Specifying Set...
Page 10: ...Basic Operations I Set Up the Label Printer 2 Print Using a Computer P touch Editor 9 Print Using a Mobile Device 19 Change the Label Printer Settings 23 Print Labels Using P touch Template 50 Other Functions 65 ...
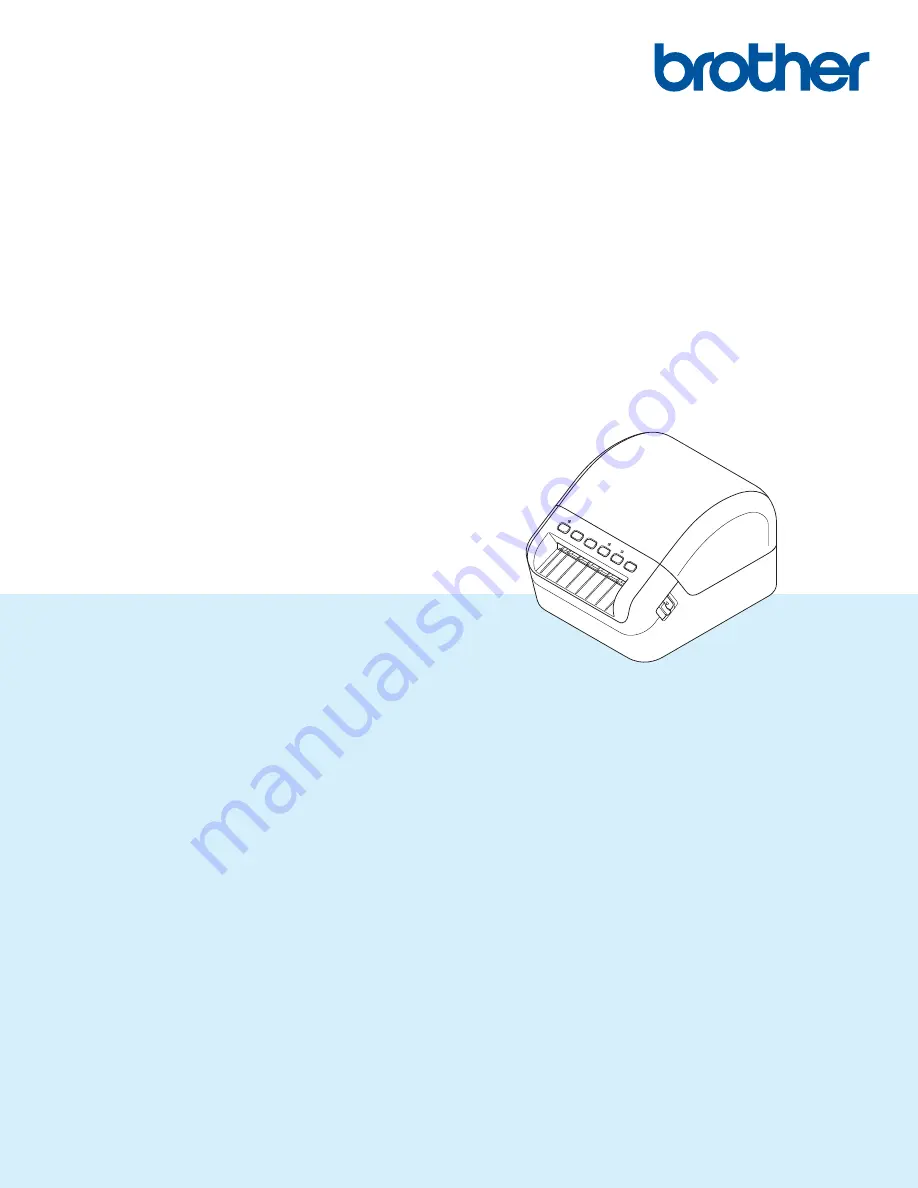
Page 11: ... Set Up the Label Printer 1 1 Status LED 2 Power Button 3 Feed Button 4 Cutter Button 5 Bluetooth Button 6 Wi Fi Button 7 WPS Button 8 Wi Fi LED 9 Bluetooth LED 10 Label Output Slot 11 DK Roll Compartment Cover 1 2 3 4 5 6 7 9 8 11 10 ...
Page 12: ...Set Up the Label Printer 3 1 Rear 1 1 USB Port 2 LAN Port 3 USB Host Port 4 AC Power Port 1 2 3 4 ...
Page 13: ...rd to the Label Printer Then plug the AC Power Cord into a grounded AC power outlet IMPORTANT Do not use your Label Printer in areas where the power source voltage is different from the Label Printer s specified voltage For more information see Product Specifications on page 147 ...
Page 14: ...ff b Pull the release levers on both sides of the Label Printer to unlock the DK Roll Compartment Cover Hold the Label Printer by the front and firmly lift the DK Roll Compartment Cover to open it IMPORTANT Before using the Label Printer remove the protective sheet 1 from the Label Output Slot 1 ...
Page 15: ... Printer d Thread the DK Roll through the Label Printer Align the edge of the DK Roll with the upright edge of the Label Output Slot Check that the DK Roll is threaded straight so that the labels will not be skewed Push the first label through the Label Output Slot until the end comes out of the Slot as shown Note If you have difficulty inserting the first label try inserting from the side under t...
Page 16: ...PORTANT Do not leave any printed labels in the Label Printer Doing so will cause the labels to jam When not in use remove any DK Rolls from inside the Label Printer and close the DK Roll Compartment Cover to prevent dust and debris from accumulating in the Label Printer ...
Page 17: ... Printer On The Status LED turns green IMPORTANT Press the Feed Button to align the end of the DK Roll Off Press and hold the Power Button again to turn the Label Printer Off IMPORTANT When turning the Label Printer Off do not disconnect the AC Power Cord until the orange Status LED turns Off ...
Page 18: ...we recommend the following When you turn on the Label Printer for the first time after purchasing it or after resetting it the Label Printer enters the mode for configuring the wireless settings easily Start the installation after turning on the Label Printer Make a note of the SSID network name and password network key of the wireless network in advance If you cannot find this information ask you...
Page 19: ...before connecting the USB Cable b Connect the USB Cable to the USB Port on the back of the Label Printer and then to your computer c Turn the Label Printer On Connect Using Wi Fi 2 The following Wi Fi connection methods are available Infrastructure Mode Wireless Direct WPS Wi Fi Protected Setup Infrastructure Mode 2 Infrastructure Mode allows you to connect the Label Printer to a computer via a Wi...
Page 20: ...er turning on the Label Printer Note To achieve the best results with normal everyday printing use the Label Printer as close to the Wi Fi access point router as possible with minimal obstructions Large objects and walls between the two devices as well as interference from other electronic devices can affect communication or the data transfer speed of your printing Connect the Label Printer to you...
Page 21: ...ing green once every three seconds For more information see Communication Settings for Windows on page 26 For Mac 1 Launch the Printer Setting Tool on your computer 2 Click the Wireless LAN tab 3 Confirm that Wireless Direct is set to On 4 Click Apply to set the Label Printer to Wireless Direct mode Quit the Printer Setting Tool c Use your computer to select the SSID of the Label Printer Make sure...
Page 22: ...r The range may differ depending on your environment See the instructions provided with your Wi Fi access point router c Press the WPS Button on the Label Printer When the connection is established The Wi Fi LED is lit green Note Computers that are on the same network as the Label Printer will have access to the Label Printer The Label Printer will try to connect using WPS for two minutes If the W...
Page 23: ...the back of the Label Printer c Turn the Label Printer On Network Cable 2 Use a straight through Category 5 or greater twisted pair cable for 10BASE T or 100BASE TX Fast Ethernet Network Note Do not connect this product to any LAN connection that is subject to overvoltages Bluetooth Connection 2 a Press the Bluetooth Button on the Label Printer The Bluetooth LED is lit blue For Windows 1 Follow th...
Page 24: ...hed the Label Printer remains connected until it is turned off preventing it from connecting to another device a Press the Bluetooth button The Bluetooth LED lights in blue b Execute pairing from a destination Bluetooth device If the PIN code of the Label Printer is required the factory setting for the PIN code is the last four digits of the product serial number You can change the PIN code using ...
Page 25: ...to the latest version P touch Address Book r Prints address labels using an address database P touch Editor Lite LAN r Prints over both wireless and wired connections There is no need to install the printer driver Printer Setting Tool r r Specifies the Label Printer s device settings from a computer Wireless Device Setup Wizard r Allows you to configure the Label Printer for a wireless network BRA...
Page 26: ...h Editor or P touch Address Book and then open the document you want to print b Create a label design c Check the cutting options d Select File Print or by clicking the Print icon Cutting Options 2 The cutting options allow you to specify how the item is fed and cut when it is printed Use the printer driver to select the cutting option when printing from the computer Label Cut Option Table Auto Cu...
Page 27: ... Peel the backing from the label b Position the label and then press firmly from top to bottom with your finger to attach the label Note Labels may be difficult to attach to surfaces that are wet dirty or uneven The labels may peel off easily from these surfaces ...
Page 28: ...the Communication Settings in the General tab 4 Confirm Infrastructure and Wireless Direct or Wireless Direct is selected for Selected Interface If not select Infrastructure and Wireless Direct or Wireless Direct and click the Apply button For Mac 1 Launch the Printer Setting Tool on your computer 2 Click the Communication Settings button 3 Click the Wireless LAN tab 4 Confirm that Wireless Direct...
Page 29: ...s SSID DIRECT _QL 1110NWB where is the last five digits of the product serial number The password 111 where is the last five digits of the product serial number You can connect the Label Printer to a mobile device in the Infrastructure Mode via a wireless access point router Connect Using Bluetooth 3 a Press the Bluetooth Button The Bluetooth LED lights blue b In your mobile device s Bluetooth set...
Page 30: ...ransfer Manager For more information see Create Transfer Files and Transfer Package Files on page 103 b Use one of the following methods to use a blf file or pdz file with your mobile device Save the file using a cloud storage service and then use the sharing function of the mobile device s operating system to share the file Send the file as an email attachment from the computer to the mobile devi...
Page 31: ... the backing from the label b Position the label and then press firmly from top to bottom with your finger to attach the label Note Labels may be difficult to attach to surfaces that are wet dirty or uneven The labels may peel off easily from these surfaces ...
Page 32: ...stall the printer driver For more information see Install Printer Drivers and Software on a Computer on page 9 IMPORTANT The Printer Setting Tool is available only with compatible Brother printers Before Using the Printer Setting Tool 4 Make sure the AC Power Cord is connected to the Label Printer and to an AC power outlet Make sure the printer driver has been installed correctly and you can print...
Page 33: ...ter Setting Tool For Windows 10 Windows Server 2016 Click Start Brother Printer Setting Tool The main window appears 1 Printer Lists the connected Label Printers 2 Communication Settings Specifies wired LAN wireless LAN and Bluetooth communication settings 3 Device Settings Specifies device settings such as power settings and printer settings 4 P touch Template Settings Specifies P touch Template ...
Page 34: ...re information on the settings dialog boxes see Communication Settings for Windows on page 26 Device Settings for Windows on page 36 or P touch Template Settings for Windows on page 41 e Click Apply to apply the settings to the Label Printer f Click Exit in the main window to finish specifying settings IMPORTANT Use the Printer Setting Tool to configure the Label Printer only when the Label Printe...
Page 35: ...d appears in the tab and the settings can no longer be specified or changed Settings in a tab where appears will not be applied to the Label Printer even if Apply is clicked In addition the settings in the tab will not be saved or exported when the Save in Command File or Export command is used To apply the settings to the Label Printer or to save or export them make sure you clear the check box 2...
Page 36: ...ettings and returns to the main window of the Printer Setting Tool IMPORTANT Settings are not applied to Label Printers if Exit is clicked without clicking the Apply button after changing the settings 10 Apply Applies the settings to the Label Printer To save the specified settings in a command file select Save in Command File from the drop down list The saved command file can be used with the mas...
Page 37: ... command files such as saving them in a location that cannot be accessed by other users Do not send command files to a different printer model Import Import from the current computer wireless settings Imports the settings from the computer Note When importing the computer s wireless settings administrator privileges for the computer are needed Only personal security authentication settings open sy...
Page 38: ...u must restart the Label Printer manually Note When configuring multiple Label Printer s you can reduce the time needed to change settings by clearing this check box In this case we recommend selecting this check box when configuring the first Label Printer so that you can confirm that each setting is operating as intended Automatically detects the connected printer and retrieves the current setti...
Page 39: ...ed LAN by Default or Keep Current State Selected Interface Selects Infrastructure or Ad hoc Infrastructure and Wireless Direct or Wireless Direct Bluetooth on Power On Specifies the conditions for connecting via Bluetooth when the Label Printer is turned on Select On by Default Off by Default or Keep Current State IPv6 4 IPv6 usage Selects Enable or Disable Priority on IPv6 address Selects to give...
Page 40: ...DNS Server IPv6 Address Secondary DNS Server IPv6 Address Specifies the DNS server IPv6 addresses IPv6 Address List Displays the list of IPv6 addresses Wireless Settings 4 Communication Mode Selects Infrastructure or Ad hoc SSID Network Name Clicking Search displays the available SSID selections in a separate dialog box Channel Lists available channels Note This setting is valid only in Ad Hoc mod...
Page 41: ... Mode is set to Infrastructure IMPORTANT To specify higher level security settings When performing certificate verification with EAP FAST PEAP EAP TTLS or EAP TLS authentication methods the certificate cannot be specified from the Printer Setting Tool After the Label Printer is configured to connect to the network specify the certificate by accessing the Label Printer from a web browser For more i...
Page 42: ...characters or fewer and the network key 63 characters or fewer you want to use in the Wireless Direct mode Note The factory settings for the SSID and password are as follows SSID DIRECT _QL 1110NWB where is the last five digits of the product serial number The password 111 where is the last five digits of the product serial number Channel Specifies the channel to use for the Wireless Direct mode ...
Page 43: ...h devices compliant with Bluetooth 2 0 or earlier Display the PIN code on screen If this check box is selected your computer displays the PIN by default Request Secure Simple Pairing SSP settings during pairing If this check box is selected pairing can be performed using the Label Printer buttons for devices that are compliant with Bluetooth 2 1 or later Auto Reconnect 4 Auto re pairing Sets wheth...
Page 44: ...re applied to the second Label Printer Note We recommend selecting the Automatically restart the printer after applying new settings check box when configuring the first Label Printer so that you can confirm that a connection with the wireless access point router can be correctly established with the settings For more information see Communication Settings for Windows on page 26 d Repeat steps a c...
Page 45: ...ng settings can be specified from the printer driver however by using Device Settings in the Printer Setting Tool more advanced settings can be specified When you open Device Settings the Label Printer s current settings are retrieved and displayed If the current settings cannot be retrieved the previous settings are displayed If the current settings cannot be retrieved and previous settings were ...
Page 46: ...hese settings When this check box is selected appears on the tab and the settings can no longer be specified or changed Settings in a tab where appears will not be applied to the Label Printer even if Apply is clicked In addition the settings in the tab will not be saved or exported when you use the Save in Command File or Export commands 6 Parameters Displays the current settings 7 Exit Exits Dev...
Page 47: ...is report using the Cutter Button For more information see Confirm Label Printer Settings on page 65 Note When you print this report we recommend using a 2 4 62 mm or wider DK Roll Factory Reset Resets all the settings to the factory settings including device settings transferred data and network settings Reset only Device Settings Resets the device settings in the Basic Advanced and Management ta...
Page 48: ...nting Printer Information Report Selects the information you want to include in the Label Printer Information Report Auto Cut Sets the cutting method when printing multiple labels Serialize Mode Specifies how you want to serialize number your printed labels Management Tab 4 IMPORTANT To display this tab you must have administrator privileges for the computer or the Label Printer Check if you have ...
Page 49: ...he Printer drop down list c Click Apply The same settings that were applied to the first Label Printer are applied to the second Label Printer d Repeat steps a c for all Label Printers whose settings you want to change Note To save the current settings in a file click File Export The same settings can be applied to another Label Printer by clicking File Import and then selecting the exported setti...
Page 50: ...ble options and supplies may vary depending on your country To specify or change P touch Template functions go to the Printer Setting Tool and select P touch Template Settings Note P touch Template mode is also compatible with other input devices like a scale testing machine controller or a programmable logic device For more information on P touch Template Settings download the P touch Template Ma...
Page 51: ...fault template number that the Label Printer sets when it is turned on If you do not want to transfer a template to the Label Printer do not specify a template number 3 Data Delimiter for P touch Template Displays a symbol used to indicate the boundaries between groups of data in a file maximum of 20 characters 4 Trigger for P touch Template Printing Specifies a trigger to begin printing from a nu...
Page 52: ... Non Printed Character Characters specified here are not printed when data is received maximum of 20 characters 9 Available Return Code The line feed code is used when feeding data to indicate that the following data should be moved to the next line in a text object Select one of four line feed codes or type the line feed code you want maximum of 20 characters 10 Replace FNC1 Replaces GS codes wit...
Page 53: ...rinter driver has been installed correctly and you can print Connect the Label Printer to a computer with a USB Cable Settings cannot be specified using Wi Fi by using this tool Use the Printer Setting Tool for Mac 4 a Connect the Label Printer you want to configure to the computer b Click Macintosh HD Applications Brother Printer Setting Tool Printer Setting Tool app The Printer Setting Tool wind...
Page 54: ... data and network settings 7 Reset only Device Settings Resets the device settings in the Basic Advanced and Management tabs to the factory settings 8 Print Unit Settings Prints a report containing firmware version and device setting information You can also print this report using the Cutter Button For more information see Confirm Label Printer Settings on page 65 Note When you print this report ...
Page 55: ...Bluetooth connection Advanced Tab 4 Print Data after Printing Specifies whether or not print data is erased after printing Printer Information Report Selects the information you want to include in the Label Printer Information Report Cut Settings Sets the cutting method when printing multiple labels Serialize Mode Specifies how you want to serialize number your printed labels Management Tab 4 Comm...
Page 56: ...est Secure Simple Pairing SSP settings during pairing If this check box is selected pairing can be performed using the Label Printer buttons for devices that are compliant with Bluetooth 2 1 or later Wireless LAN Tab 4 Wireless Direct Turns the Wireless Direct function on or off SSID Network Key Generation Selects AUTO or STATIC SSID Network Name Network Key Specifies the SSID 3 to 25 ASCII charac...
Page 57: ...inter from the Printer drop down list c Click Apply Settings to the Printer The same settings that were applied to the first Label Printer are applied to the second Label Printer d Repeat steps a c for all Label Printers whose settings you want to change Note To save the current settings in a file click Export The same settings can be applied to another Label Printer by clicking Import then select...
Page 58: ...ecessary settings using the application before printing The settings that can be changed vary by application Note Before connecting a mobile device you can specify detailed settings by connecting the Label Printer to a computer and using the Printer Setting Tool For more information see Change the Label Printer Settings on page 23 ...
Page 59: ...e scanned data into a different template Database Lookup Printing see page 59 Download a database linked to a template and scan a barcode to find a record to insert into the template and print it out Advanced Features 5 Numbered Serialized Number Printing see page 62 Automatically increment printed text or barcodes in any downloaded template Note P touch Template mode is also compatible with other...
Page 60: ... computer via a USB Cable and then turn on the Label Printer b Start the Printer Setting Tool For Windows 7 Windows Server 2008 Windows Server 2008 R2 Click Start All Programs Brother Label Mobile Printer Printer Setting Tool For Windows 8 Windows 8 1 Windows Server 2012 Windows Server 2012 R2 On the Apps screen click the Printer Setting Tool For Windows 10 Windows Server 2016 Click Start Brother ...
Page 61: ...image If Received Data Size is selected with the number of bytes setting the template will automatically print after the specified number of bytes have been scanned Because the print mode setting returns to raster mode each time you print from the computer you must change the setting to template mode again If you turn off the Label Printer and then turn it on again the Label Printer starts up in t...
Page 62: ... 1 EDR Class 1 models that support SPP or OPP profiles Note For P touch Template mode templates must first be downloaded from a computer to the Label Printer using P touch Transfer Manager For more information see How to Use P touch Transfer Manager and P touch Library Windows only on page 93 The barcode scanner should be programmed to use the English keyboard For beginners the barcode scanner sho...
Page 63: ...y Expanded Tabs of Object Properties check box When the check box is cleared the object is converted back to text that can be edited b When you transfer data to Configurations in P touch Transfer Manager select the folder containing the data you want to transfer Note When a template is transferred to Configurations in P touch Transfer Manager the Key Assign number is automatically assigned For bas...
Page 64: ...s download P touch Template Manual Command Reference English only from the Brother Solutions Center at support brother com manuals To specify the number of copies you want scan the Number of copies barcode and then scan the barcodes under For entering numbers to specify a three digit number Example Specify numbers by scanning the following barcodes 7i 0 0 7 15i 0 1 5 To change the setting for the ...
Page 65: ...o design a template to meet the barcode symbology or protocol requirements especially for the label size and barcode position in the label to fit the maximum number and type of characters being inserted from the barcode scanner A barcode in the template cannot be created or scanned if the barcode with the inserted data does not fit entirely within the label printable image area b When you transfer...
Page 66: ...com manuals To specify the number of copies you want scan the Number of copies barcode and then scan the barcodes under For entering numbers to specify a three digit number The setting is automatically applied when three digits have been specified Example Specify numbers by scanning the following barcodes 7i 0 0 7 15i 0 1 5 To change the setting for the number of copies scan the Number of copies b...
Page 67: ... want inserted into the barcode object in the selected downloaded template from step f Example h Scan the Begin printing barcode to send the command to start printing i The barcode in the printed template will contain the data from the barcode scanned in step g Example CODE128 9 digit ...
Page 68: ...page 161 a Use P touch Editor to create a template and connect to a database file You can link as many columns to a text and barcode objects in the template as needed Note Make sure the keywords are included in the leftmost column A but do not link any text or barcode object in the template with field A if you do not need that data on the printed label For more information on specifying the settin...
Page 69: ...support brother com manuals To specify the number of copies you want to print scan the Number of copies barcode and then scan the barcodes under For entering numbers to specify a three digit number The setting is automatically applied when three digits have been specified Example Specify numbers by scanning the following barcodes 7i 0 0 7 15i 0 1 5 To change the setting for the number of copies sc...
Page 70: ...ep d Example i Scan the Delimiter barcode to send the command to start searching the downloaded database for the scanned keyword j Scan the Begin printing barcode to send the command to start printing Note You can use P touch Editor to create and print a label with a single barcode for steps i and j Example k The Label Printer will print the template with the data inserted from the database record...
Page 71: ...ement while printing Text Numbering Serializing 5 a Use P touch Editor to create or open a template and select a text object that you want to automatically increment while printing Example b Highlight or drag the cursor over a group of numbers and letters within the text object that you want to increment maximum of 15 The selected group is called the Numbering field c Right click the Numbering fie...
Page 72: ...ng b Right click the barcode object and select Properties The Bar Code Properties window appears c Highlight or drag the cursor over a group of numbers and letters within the barcode object that you want to increment maximum of 15 The selected group is called the Numbering field Note The Numbering button is enabled after a group of numbers and letters are highlighted d Click Numbering and then cli...
Page 73: ...er of serialized copies barcode and then scan the barcodes under For entering numbers with the number of copies you want to print three digits Example For five copies specify the three digit numbers by scanning barcodes for 0 0 5 Note Follow the P touch Template mode basic operation procedures to start printing For further information see Standard Template Printing on page 54 to Database Lookup Pr...
Page 74: ... crop and print the barcodes you specify Note The Crop Print function is available only when printing from the Windows printer driver and cannot be executed using P touch Editor Use Adobe Acrobat Reader XI DC or greater to print a pdf file Other Functions 6 Le er A4 Le er A4 A B A B C Z C D00XXU001 D00VXY004 D00ZXX003 D00XXU001 D00XXU001 D00XXU002 D00X0X001 D00ZXX004 D00XXU003 D00X0X002 D00KYX001 ...
Page 75: ...imum Horizontal width The narrowest bar 0 02 0 5 mm minimum Margin 10 times the narrowest bar width minimum Color Black Background color White Cell width widest bar 0 02 0 5 mm minimum Barcode Conditions Item Condition Total barcode amount Between 1 99 barcodes Barcode type Use only barcodes that are compatible with the Crop Print feature For more information see Barcodes Compatible with Crop Prin...
Page 76: ...entation select the Portrait radio button f Click Properties Barcode Layout Correct Barcode Layout Incorrect Barcode Layout Barcodes start in top left corner and run down the column continuing at the top of the next column to the right Not identified not aligned along the top margin D00XXU001 D00VXY004 D00ZXX003 D00XXU002 D00X0X001 D00XXU003 D00X0X002 D00XXU004 D00X0X003 D00VXY001 D00X0X004 D00VXY...
Page 77: ...Crop Print tab and select the Automatically print individual labels with barcodes check box Click the Label Paper Size drop down list and then select your Label Paper Size i Click OK Note Please select the closest DK label size to match the original size of the crop data We recommend testing a sample before printing a large number of labels j Print from the application s print screen ...
Page 78: ...of the barcode sheet The barcodes may not be identified correctly When printing from Acrobat Reader do the following In the Page Sizing Handling section deselect the Choose paper source by PDF page size radio button Under Orientation select the Portrait radio button ...
Page 79: ...re is useful for Applying printer settings saved in a command file bin file format or adding templates blf file format into the Label Printer distributed by the administrator without using any software tools Executing commands without installing the printer driver Using a device with an Operating System including non Windows operating systems that has a USB host feature to print and transmit data ...
Page 80: ...cuted and the Status LED flashes once When finished the Status LED lights in green f To turn mass storage mode off turn off the Label Printer IMPORTANT When the Label Printer is turned off mass storage mode is deactivated and any files in the mass storage area are deleted This feature supports bin and blf files Other file formats are not supported Do not create folders in the mass storage area If ...
Page 81: ...process may produce a fuzzy image To improve the image quality try to turn off any preprocessing of the JPEG image Only JPEG images can be printed Limited to files with the jpg extension The maximum file size is 5 MB 2 MB when the mass storage feature is used The maximum resolution is as follows Height Width 12000 1296 dots If these limits are exceeded the data received by the Label Printer is dis...
Page 82: ...ce printing time Note The number of pages is divided among the selected Label Printers If the specified number of pages cannot be evenly divided among the Label Printers it will be divided in the order of the Label Printers as shown a In P touch Editor click File Print b Click Properties c Click the Advanced tab select the Distributed Printing check box and then click Settings 67 67 66 200 ...
Page 83: ...ed label width is different from that displayed in the Current Paper column the icon appears Load the Label Printer with the label width specified in Set Width If multiple Label Printers are connected you can find the Label Printer you want using its port name The xxxxxxxxxxxx in BRNxxxxxxxxxxxx in the port name indicates the MAC address Ethernet address of the Label Printer The MAC address Ethern...
Page 84: ... the Set Width drop down list select the label size The same label size setting is applied to all selected Label Printers Note The settings below Printer Settings and Notes are not available f Click OK to close the label size setting window g Click OK to close the Distributed Printing Settings window Setup is completed h Click OK to close the Properties window i Start printing Note It may not be p...
Page 85: ...e P touch Address Book Windows only 83 How to Use P touch Editor Lite LAN Windows only 88 How to Use P touch Transfer Manager and P touch Library Windows only 93 How to Transfer Templates with P touch Transfer Express Windows only 110 How to Update P touch Software 118 ...
Page 86: ... Server 2012 R2 Click P touch Editor 5 2 on the Apps screen or double click the P touch Editor 5 2 icon on the desktop For Windows 10 Windows Server 2016 Click Start P touch Editor 5 2 under Brother P touch or double click the P touch Editor 5 2 icon on the desktop b When P touch Editor starts select whether you want to create a new layout or open an existing layout Note To change how P touch Edit...
Page 87: ...ck New Layout or click New Layout and then click 2 To create a new layout using a preset layout double click a category button or select a category button and then click 3 To connect a preset layout to a database select the check box next to Connect Database 4 To open an existing layout click Open 2 1 3 4 ...
Page 88: ...inting To print click File Print from the menu bar or click the Print icon Professional mode This mode allows you to create layouts using a wide range of advanced tools and options Configure the Printing Settings in the Print screen before printing To print click File Print from the menu bar or click the Print icon A In addition click the Print icon B to start printing without changing the printin...
Page 89: ...n image and save it for future use a Click the Snap mode selection button The Description of Snap mode dialog box appears b Click OK The Snap mode palette appears Transfer Data to the Label Printer 7 To transfer data to the Label Printer you must use P touch Transfer Manager For more information see P touch Transfer Manager on page 93 ...
Page 90: ...ntosh HD Applications and then double click the P touch Editor application icon Note When using a Mac you cannot transfer label data created using P touch Editor to the Label Printer When P touch Editor starts select whether you want to create a new layout or open an existing layout ...
Page 91: ...s The Standard mode consists of the following sections 1 Toolbar 2 Label Inspector 3 Database Connection Area 4 Object Inspector 5 Layout Window Transfer Data to the Label Printer 7 To transfer data to the Label Printer you must use a Windows computer For more information see P touch Transfer Manager on page 93 1 2 3 4 5 ...
Page 92: ...click the P touch Address Book 1 3 shortcut icon on the desktop For Windows 8 Windows 8 1 Windows Server 2012 Windows Server 2012 R2 Click P touch Address Book 1 3 on the Apps screen or double click the P touch Address Book 1 3 icon on the desktop For Windows 10 Windows Server 2016 Click Start P touch Address Book 1 3 under Brother P touch or double click the P touch Address Book 1 3 icon on the d...
Page 93: ...eate a New Contact is selected the Layout Window appears When Import Contacts from a CSV File or Import Contacts from Outlook is selected you can import contacts in other formats Click the Open Help button to open the P touch Address Book Help files The P touch Address Book Help offers detailed information on available features and explains how to use the P touch Address Book ...
Page 94: ...nt for text formatting 4 Layout Style Selection View Displays layout styles stored in the folder 5 Layout Work Area Used to display or edit a layout that uses the layout style in the Layout Style Selection view 6 Contact List Combo Box Displays the contact list that is currently specified You can choose from Personal Business Other1 Other2 and Other3 7 Index Tab You can search within the field in ...
Page 95: ...ss Book Windows only 86 8 Create a New Contact 8 This section explains how to create a new contact a Click File New Contact or click the New Contact button The New Contact dialog box appears b Enter the new contact information 1 2 ...
Page 96: ...ion Previous Displays the previous contact Next Displays the next contact New Contact Displays the form window for a new contact Delete Contact Deletes the contact that is currently selected Image Allows you to insert an image for a contact from a file or a camera currently connected to the computer The following file types are supported Bitmap bmp dib JPEG file jpg jpeg TIFF file uncompressed tif...
Page 97: ...nd copy it to a shared folder on the server P touch Editor Lite LAN on the server can be accessed by other network users to create labels and print from a QL 1110NWB connected to the network How to share P touch Editor Lite LAN a Copy the folder containing P touch Editor Lite LAN from your computer to a shared folder on the network b Start up P touch Editor Lite LAN from the shared folder on the n...
Page 98: ...Printer Inserts a new text box convenient when creating labels containing both single and multiple lines of text Inserts an image into your label From file Inserts an image stored on your computer Screen capture Inserts the selected area of the computer screen as a graphic Symbol Inserts one of your computer s built in symbols Inserts a frame Displays the menu The menu includes all P touch Editor ...
Page 99: ... list Icon Function Click to change the font Click to specify the font size You can adjust the font size up or down one level by clicking or Specifies the font style Bold Italic Underline Specifies the alignment of text in a text box Sets the width of the label Click to automatically detect the width of the inserted label Sets the length of the label Click to automatically adjust the length of the...
Page 100: ...ow and drag it when the pointer changes to an arrow Guidelines are sometimes displayed when moving objects They are shown when the object is aligned at the left right top or bottom edge of the Printable area or in the center In the illustration on the left the guidelines indicate that the object is centered at the top edge of the label Inserted text boxes images and frames are treated as objects O...
Page 101: ... the number or letter within your text and click Numbering to insert an incremented number or letter on each label Click to the right of the Print button and click Print Options Check the Numbering box and enter the number of labels for printing in the Count field Click the Print button Change Image Select the image and click Change Image to replace the current image with a different image Rotate ...
Page 102: ... Template to P touch Transfer Manager 10 To use P touch Transfer Manager you must first transfer templates created in P touch Editor to P touch Transfer Manager a In P touch Editor open the template you want b Click File Transfer Template Transfer When P touch Transfer Manager starts the Main window appears Note The following method can also be used to start the P touch Transfer Manager For Window...
Page 103: ... the data will be transferred to When you select a Label Printer only the data that can be sent to the selected Label Printer appears in the data list 4 Folder List Displays a list of folders and Label Printers When you select a folder the templates in the selected folder appear in the template list If you select a Label Printer the current templates and other data stored in the Label Printer appe...
Page 104: ...r the filename extension when printing labels using Mass Storage Mode USB or when transferring the data using BRAdmin Professional LAN or Wi Fi or Mobile Transfer Express Wi Fi Select PDZ when transferring the data using Transfer Express USB The available interfaces differ depending on your model Backup Retrieves the templates and other data saved in the Label Printer and saves it on the computer ...
Page 105: ... The Label Printer model name appears next to a printer icon in the folder view If you select the Label Printer in the folder view the current templates and other data stored in the Label Printer appear Note If a Label Printer is disconnected or offline it does not appear in the folder view Before transferring data check that the computer and the Label Printer are correctly connected via a USB Cab...
Page 106: ...e new folder Transfer Function Specification Data type Maximum number of transferable items Restriction details Template 255 Each template can contain a maximum of 50 objects Database 99 Only csv files can be transferred Each csv file can contain a maximum of 65000 records Image transferred symbols 99 Only bmp files can be transferred Monochrome bmp files are recommended The size limit is 1296 129...
Page 107: ... space 1 1 The available space that appears in RomFree byte may be different from the actual available space You can view the templates and other data by selecting The folder in the Configurations folder All Contents One of the categories under Filter such as Layouts When transferring multiple templates or other data drag all files you want to transfer and place them in the new folder Each file is...
Page 108: ... will overwrite the old one You can confirm the templates key number assignments saved in the Label Printer by backing up the templates or other data For more information see Back up Templates or Other Data Saved in the Label Printer on page 101 If the Label Printer memory is full remove one or more templates from the Label Printer s memory For more information see Back up Templates or Other Data ...
Page 109: ... click Transfer A confirmation message appears Note You can also transfer individual items to the Label Printer without adding them to a folder Select the template or other data that you want to transfer and then click Transfer Multiple items and folders can be selected and transferred in one operation h Click OK The selected items are transferred to the Label Printer ...
Page 110: ...ferent models a Connect the computer and the Label Printer and turn on the Label Printer The Label Printer model name appears next to a printer icon in the folder view If you select the Label Printer in the folder view the current templates and other data stored in the Label Printer appear b Select the Label Printer to back up from and then click Backup A confirmation message appears c Click OK A ...
Page 111: ... other data saved on the Label Printer a Connect the computer and the Label Printer and turn on the Label Printer The Label Printer model name appears next to a printer icon in the folder view b Right click the Label Printer and then select Delete All A confirmation message appears c Click OK All templates and other data saved in the Label Printer is deleted ...
Page 112: ... window and then select the template to save Note You can select multiple templates at the same time c Click File Save Transfer File IMPORTANT The Save Transfer File button appears only if the Label Printer is disconnected from the computer or offline Note If you click Save Transfer File after selecting Configurations all templates in the folder are saved as the Transfer file blf or Transfer Packa...
Page 113: ...indows Server 2012 R2 On the Apps screen click P touch Library 2 3 For Windows 10 Windows Server 2016 Click Start P touch Library 2 3 under Brother P touch When P touch Library starts the Main window appears Main window 10 1 Menu Bar Provides access to all available commands which are grouped under each menu title File Edit View Tool and Help according to their functions 2 Toolbar Provides access ...
Page 114: ...er 5 Preview Displays a preview of the templates selected in the templates list Explanations of the Toolbar Icons Icon Button name Function Open Opens the selected template Print Prints the selected template with the Label Printer Search Allows you to search for templates registered to P touch Library Display Style Changes the file display style ...
Page 115: ...er Manager and P touch Library Windows only 106 10 Open and Edit Templates 10 Select the template you want to open or edit and then click Open The program associated with the template launches allowing you to edit the template ...
Page 116: ...How to Use P touch Transfer Manager and P touch Library Windows only 107 10 Print Templates 10 Select the template you want to print and then click Print The connected Label Printer prints the template ...
Page 117: ...he search results are displayed Settings Details Multiple Parameters Determines how the program searches when multiple criteria are specified If you select AND the program searches for files that satisfy all of the criteria If you select OR the program searches for files that satisfy any of the criteria Name Search for a template by specifying the file name Type Search for a template by specifying...
Page 118: ... Library by dragging and dropping them into the All Contents folder or to the folder list You can also configure P touch Editor to register templates to P touch Library automatically using the following procedure 1 From the P touch Editor menu select Tools Options 2 In the Options dialog box click General Registration Settings 3 Select the timing for registering templates created with P touch Edit...
Page 119: ...g template will be overwritten with the new one This function requires a USB connection Preparing P touch Transfer Express 11 You must prepare P touch Transfer Express for transferring templates to a Label Printer IMPORTANT The printer driver must be installed before using Transfer Express P touch Transfer Express is available only in English To download the latest version of P touch Transfer Expr...
Page 120: ...uch Tools P touch Transfer Manager 2 3 to start P touch Transfer Manager and then dragging the lbx file to the P touch Transfer Manager window For Windows 8 Windows 8 1 Windows Server 2012 Windows Server 2012 R2 The template can also be transferred to P touch Transfer Manager by clicking P touch Transfer Manager 2 3 on the Apps screen to start P touch Transfer Manager and then dragging the lbx fil...
Page 121: ...112 11 Save the Template as a Transfer Package File pdz 11 To create a file in a format that can be used by P touch Transfer Express save the template as a Transfer Package file pdz a In the folder view select Configurations b Select the templates you want to distribute ...
Page 122: ...Printer is disconnected from the computer or offline Note If you click Save Transfer File after selecting Configurations or a created folder all templates in the folder are saved as the Transfer Package file pdz You can combine multiple templates into a single Transfer Package file pdz d Type the name and then click Save The template is saved as a Transfer Package file pdz ...
Page 123: ...eady have P touch Transfer Express downloaded it is not necessary for the administrator to send the Transfer Express folder In this case you can simply move the distributed Transfer Package file to the downloaded folder and then double click PtTrExp exe a Move the Transfer Package file pdz to the downloads folder b Distribute all the files in the downloads folder to others ...
Page 124: ...IMPORTANT Do not turn off the power when transferring templates a Turn on the Label Printer b Using a USB Cable connect the Label Printer to the computer c Double click PtTrExp exe which was received from the administrator d Transfer a Transfer Package file pdz to the Label Printer Transferring a single Transfer Package file pdz 1 When there is a single Transfer Package file pdz within the folder ...
Page 125: ...ws only 116 11 Transferring multiple Transfer Package files pdz 1 When there are multiple Transfer Package files pdz within the folder containing PtTrExp exe click Browse 2 Select the Transfer Package file you want to transfer and then click Open 3 Click Transfer ...
Page 126: ...How to Transfer Templates with P touch Transfer Express Windows only 117 11 4 Click Yes 5 The transfer of the Transfer Package file begins e When the transfer is complete click OK ...
Page 127: ...touch Update Software For Windows 7 Windows Server 2008 Windows Server 2008 R2 Double click the P touch Update Software icon Note The following method can also be used to start P touch Update Software Click Start All Programs Brother P touch P touch Update Software For Windows 8 Windows 8 1 Windows Server 2012 Windows Server 2012 R2 Click P touch Update Software on the Apps screen or double click ...
Page 128: ...2 b Click the Computer software update icon c Select the Printer and Language select the check boxes next to P touch Editor and P touch Address Book and then click Install d A message appears indicating that the installation has finished ...
Page 129: ...ware For Windows 7 Windows Server 2008 Windows Server 2008 R2 Double click the P touch Update Software icon Note The following method can also be used to start P touch Update Software Click Start All Programs Brother P touch P touch Update Software For Windows 8 Windows 8 1 Windows Server 2012 Windows Server 2012 R2 Click P touch Update Software on the Apps screen or double click P touch Update So...
Page 130: ...How to Update P touch Software 121 12 c Click the Machine update icon d Select the Printer make sure that The machine is connected correctly message appears and then click OK ...
Page 131: ...e during data transfer f Check the content to be updated and then click Start to begin the update The firmware update begins IMPORTANT Do not turn off the Label Printer or disconnect the cable during the update process For Mac 12 a Turn on the Label Printer and connect the USB Cable b Double click Macintosh HD Applications P touch Update Software and then double click the P touch Update Software a...
Page 132: ...OK e Select the Language select the check box next to the firmware you want to update to and then click Transfer IMPORTANT Do not turn off the Label Printer or disconnect the cable during data transfer f Check the content you want to update and then click Start to begin the update The firmware update begins Note Do not turn off the Label Printer during the update process ...
Page 133: ...Section III Network III Introduction 125 Change Your Label Printer Network Settings 126 Web Based Management 129 ...
Page 134: ... wireless network or Ethernet 10BASE T 100BASE TX Auto Negotiation wired network using the internal network print server The print server supports various functions and methods of connection on a network supporting TCP IP depending on the operating system you are running Introduction 13 ...
Page 135: ...Brother BRAdmin Professional utility available as a download from the Brother Solutions Center at support brother com If using firewall anti spyware or antivirus software temporarily disable them When you are sure that you can print re enable them The node name appears in the current BRAdmin Light window The default node name of the print server in the Label Printer is BRWxxxxxxxxxxxx or BRNxxxxxx...
Page 136: ...se a DHCP BOOTP RARP server the device appears as Unconfigured in the BRAdmin Light utility screen d Select STATIC for Boot Method Type the IP Address Subnet Mask and Gateway settings if needed for your print server e Click OK f Once you setup the IP address the Brother print server appears in the device list ...
Page 137: ...display the device status from a simple Explorer style window that changes color to represent the status of each device You can configure network and device settings along with the ability to update device firmware from a Windows computer on your Local Area Network LAN BRAdmin Professional can also log activity of Brother devices on your network and export the log data For more information and dow...
Page 138: ... TCP IP information Displaying software version information of the Label Printer and print server Changing network and Label Printer configuration details Note We recommend Microsoft Internet Explorer 9 10 11 for Windows Safari 8 or later for Mac Make sure JavaScript and cookies are always enabled in the browser you use To use Web Based Management your network must use TCP IP and the Label Printer...
Page 139: ... name is displayed on the printer settings page The NetBIOS name assigned is the first 15 characters of the node name and by default it appears as BRNxxxxxxxxxxxx where xxxxxxxxxxxx is the Ethernet address b You can now change the print server settings Note Set a password We recommend setting a logon password to prevent unauthorized access to Web Based Management a Click Administrator b Type the p...
Page 140: ...33 Troubleshooting 135 Product Specifications 147 Software Development Kit 149 Notes on Using P touch Transfer Manager 150 Network Terms and Information 152 List of Barcodes for the P touch Template Function 161 Use the Brother Barcode Scanner Optional PA BR 001 165 ...
Page 141: ...us LED lights in orange and the Wi Fi LED lights in green Press the Cutter Button six times to reset all the settings and device settings to the factory settings The Status LED lights in orange the Wi Fi LED lights in green and the Bluetooth LED lights in blue d Release the Power Button The Status LED flashes orange the Wi Fi LED flashes green and the Bluetooth LED flashes blue for four times Then...
Page 142: ...unit using a soft dry cloth Use a cloth slightly damp with water on difficult to remove marks Note Do not use paint thinner benzene alcohol or any other organic solvent These may deform or damage the Label Printer case Clean the Label Outlet 17 If a label causes the machine to jam due to adhesive residue attached to the label outlet disconnect the AC Power Cord from the machine and clean it with a...
Page 143: ...e adhesive side of the label against the roller and remove the dirt Self Cleaning Print Head 17 The DK Roll thermal recording paper type used with the machine is designed to clean the print head automatically When the DK Roll passes the print head during printing and label feeding the print head is cleaned ...
Page 144: ...d select the correct printer driver For more information see Install Printer Drivers and Software on a Computer on page 9 Connect the Label Printer to a computer or mobile device For more information see Connect the Label Printer to a Computer on page 10 Close the DK Roll Compartment Cover completely Insert a DK Roll correctly For more information see Load the DK Roll on page 5 If you still have p...
Page 145: ...be off lit or flashing in any color Indicator is off Status LED Wi Fi LED Bluetooth LED Condition Power is Off Idle mode Initializing mode Feeding mode Printing mode Cutting mode Mass storage mode Wi Fi is on and connected Once for 1 second WPS setting mode Once for 3 seconds WLAN is on but not connected Wi Fi is Off Bluetooth is On Bluetooth pairing Receiving data Canceling the print job Switchin...
Page 146: ...Label Printer is in Boot mode Contact Brother Customer Service Once for 2 seconds Roll end error No media error Wrong media error Feed error Cover open error Transferred data error Memory full error Access point connection error Security error Twice for 2 seconds Cutter error Mass storage error USB host power supply excessive voltage error USB host unsupported device connection error Three times f...
Page 147: ...n the printer head If this occurs clean the roller For more information see Clean the Roller on page 134 A data transmission error appears on the computer Is the Label Printer in cooling mode the Status LED is flashing in orange Wait until the Status LED stops flashing and then try printing again Labels are jammed in the cutter Contact Brother Customer Service The label is not ejected correctly af...
Page 148: ...y available to cool the Label Printer DK Roll errors Check the following You are using the correct DK Roll There are enough labels remaining The DK Roll is installed correctly Cutter error If a cutter error occurs keep the DK Roll Compartment Cover closed and press the Power Button The cutter moves back to the normal position and the Label Printer turns off automatically After the Label Printer is...
Page 149: ... Server 2012 Windows Server 2012 R2 Open the printer properties by clicking Control Panel in the Apps screen Hardware and Sound Devices and Printers right clicking the Label Printer you want to set up and then clicking Printing preferences Click the Other tab and select the option After one page of data is received For Windows 10 Windows Server 2016 Open the printer properties by clicking Start Se...
Page 150: ...to set up and then clicking Printing preferences For Windows 8 Windows 8 1 Windows Server 2012 Windows Server 2012 R2 To display the Quality options open the printer properties by clicking Control Panel in the Apps screen Hardware and Sound Devices and Printers right clicking the Label Printer you want to set up and then clicking Printing preferences For Windows 10 Windows Server 2016 To display t...
Page 151: ...ed using applications other than P touch Editor cannot be read If the barcode data was created using a landscape orientation change the Orientation setting in the Basic tab of the printer driver to Landscape and try again Problem Solution ...
Page 152: ...on free area If a wireless computer Bluetooth equipped device microwave oven digital cordless phone or other device is near your Label Printer or the wireless access point router move the device away from your Label Printer or wireless access point router Your Label Printer cannot print using Wi Fi or Bluetooth There are obstructions walls or furniture for example between your Label Printer and th...
Page 153: ...d LAN Check that the LAN cable is connected correctly For Bluetooth Search for the Label Printer from the device you want to connect I have checked and tried all of the above but still cannot complete the Wi Fi Bluetooth settings Turn off the Label Printer and then turn it on again Then try and configure the Wi Fi and Bluetooth settings again Your Label Printer is not connected if the Bluetooth co...
Page 154: ...s 7 Devices and Printers and select the Label Printer from Printers and Faxes Double click the Label Printer s icon and then select Cancel All Documents in the Printer menu I have checked and tried all of the above but my Label Printer does not print Uninstall the printer driver and the software and then reinstall them Problem Solution You did not select to allow access when the Security Alert dia...
Page 155: ...ge the Label Printer Settings on page 23 Problem Solution I do not know the version number of the firmware for the Label Printer To check for the latest firmware 1 Turn your Label Printer on 2 Press and hold the Cutter Button for several seconds to print the report We recommend you use a 2 4 62 mm or wider DK Roll I want to confirm whether I am using the latest version of the software Use the P to...
Page 156: ... capability width 4 101 6 mm There is a chance that you may not be able to print in full width depending on your environment For the details see our website support brother com Note We recommend designing with enough margin because there is a possibility of cut off if the paper is not fed in straight Interface USB Version 2 0 Full Speed Peripheral USB Host HID class Wi Fi Wireless Direct IEEE 802 ...
Page 157: ...50 F to 95 F 10 C to 35 C 20 to 80 Maximum wet bulb temperature 80 6 F 27 C Storage temperature humidity 4 F to 140 F 20 C to 60 C 5 to 95 Maximum wet bulb temperature 113 F 45 C Compatible operating systems See support brother com for a complete and updated list of software ...
Page 158: ...ble Visit the Brother Developer Center www brother usa com lp civ home aspx The b PAC SDK and the SDKs for mobile devices Android iPhone and iPad can also be downloaded The SDKs available are subject to change without notice Software Development Kit 20 ...
Page 159: ...dividual characters with P touch Editor styles can be applied to a block of text only with the Label Printer In addition some character styles are not available on the Label Printer Backgrounds specified with P touch Editor are not compatible with the Label Printer A P touch Editor layout that uses the split printing function enlarging the label and printing it on two or more labels cannot be tran...
Page 160: ... database csv file is transferred to update it the database may not link correctly with the template In addition the first line of data in the transferred file must be recognized by the Label Printer as field names Logos symbols and graphics downloaded to the Label Printer will automatically be scaled to the resident font or any of the resident symbols in the library ...
Page 161: ...k Common Protocol IPv4 ARP RARP BOOTP DHCP APIPA Auto IP mDNS WINS NetBIOS name resolution DNS Resolver LPR LPD Custom Raw Port Port9100 FTP Server TFTP client and server SNTP client ICMP LLMNR responder SNMPv1 v2c Protocol IPv6 NDP RA DNS Resolver LPR LPD mDNS Custom Raw Port Port9100 FTP Server TFTP client and server ICMP LLMNR responder SNMPv1 v2c Network Security Wireless WEP 64 128 bit WPA WP...
Page 162: ... to Peer environment each computer directly sends and receives data to each device There is no central server controlling file access or Label Printer sharing 1 Router In a smaller network of two or three computers we recommend the Peer to Peer printing method as it is easier to configure than the Network Shared printing method See Network Shared printing on page 154 Each computer must use the TCP...
Page 163: ...ntrol the printing of all print jobs In a larger network we recommend using a Network Shared printing environment The server or the print server must use the TCP IP print protocol Your Label Printer needs to have an appropriate IP address configuration except when the Label Printer is connected via the USB interface to the server 1 Client computers 2 Also known as Server or Print server 3 TCP IP o...
Page 164: ...ber is between 0 and 254 For example in a small network you would normally change the final number 192 168 1 1 192 168 1 2 192 168 1 3 How the IP address is assigned to your print server 22 If you have a DHCP BOOTP RARP server on your network the print server will automatically obtain its IP address from that server Note On smaller networks the DHCP server may also be the router If you do not have...
Page 165: ...n communicate with any device with an IP address that begins with 192 168 1 x where x is a number between 0 and 254 Gateway and router 22 A gateway is a network point that acts as an entrance to another network and sends data transmitted via the network to an exact destination The router knows where to direct data that arrives at the gateway If a destination is located on an external network the r...
Page 166: ...cryption methods for an enterprise wireless network on page 158 Authentication methods 22 Open system Wireless devices are allowed to access the network without any authentication Shared key A secret pre determined key is shared by all devices that will access the wireless network The Brother wireless printer uses a WEP key as the pre determined key WPA PSK Enables a Wi Fi Protected Access Pre sha...
Page 167: ...Wirelesscomms case sensitive 128 104 bit hexadecimal Uses 26 digits of hexadecimal data For example 71f2234ab56cd709e5412aa2ba WPA WPA2 PSK and TKIP with AES Uses a Pre Shared Key PSK that is eight or more characters in length up to a maximum of 63 characters Authentication and Encryption methods for an enterprise wireless network 22 An enterprise wireless network is a large network with IEEE 802 ...
Page 168: ...n encrypted SSL Secure Sockets Layer TLS Transport Layer Security tunnel between a client and an authentication server for sending a user ID and password PEAP provides mutual authentication between the server and the client The printer supports the following inner authentication methods PEAP MS CHAPv2 PEAP GTC EAP TTLS EAP TTLS Extensible Authentication Protocol Tunnelled Transport Layer Security ...
Page 169: ...ser ID and password 22 The following security methods support a user ID less than 64 characters and a password less than 32 characters in length LEAP EAP FAST PEAP EAP TTLS EAP TLS For user ID When Communication Mode is set to Infrastructure Authentication Method Encryption Mode LEAP CKIP EAP FAST NONE TKIP AES AES EAP FAST MS CHAPv2 TKIP AES AES EAP FAST GTC TKIP AES AES PEAP MS CHAPv2 TKIP AES A...
Page 170: ... Label Printer c Scan the P touch template command barcode to specify new settings or clear the previous settings d Scan the Basic settings barcode to specify the setting you want e Specify the appropriate settings A B or C A Standard Template Printing 23 1 Scan the Preset template number barcode B Advanced Template Printing 23 1 Scan the Select template barcode and then scan the barcodes under Fo...
Page 171: ...d Prefix Character to the factory settings in the P touch Template Settings tool Make sure you print the barcodes at a high resolution so that the barcode scanner can read them correctly to print the labels you want P touch template command initialize begin specifying settings Basic settings Auto cut on Cut every one label Cut at end on 23 Auto cut on Cut every two labels Cut at end on 23 Auto cut...
Page 172: ...the P touch Template Function 163 23 For entering numbers 1 Preset template number 1 23 2 23 3 23 4 23 5 23 6 23 7 23 8 23 9 23 0 23 00 23 Preset template 1 23 Preset template 2 23 Preset template 3 23 Preset template 4 23 ...
Page 173: ...its have been specified To change settings scan the Number of copies barcode again when changing the number of copies or scan the Select template barcode again when changing the template number and then scan the barcodes for the new three digit number Preset template 5 23 Preset template 6 23 Preset template 7 23 Preset template 8 23 Preset template 9 23 Preset template 10 23 Select template Numbe...
Page 174: ... Because the Brother Barcode Scanner optional PA BR 001 has been set according to the P touch Template Settings in the Printer Setting Tool you can quickly use this Barcode Scanner without changing its settings For information about using the Brother Barcode Scanner see the instruction manual included with the Barcode Scanner Use the Brother Barcode Scanner Optional PA BR 001 24 ...
Page 175: ......