LCD SCREEN
G
etting
Re
ad
y
25
1
■
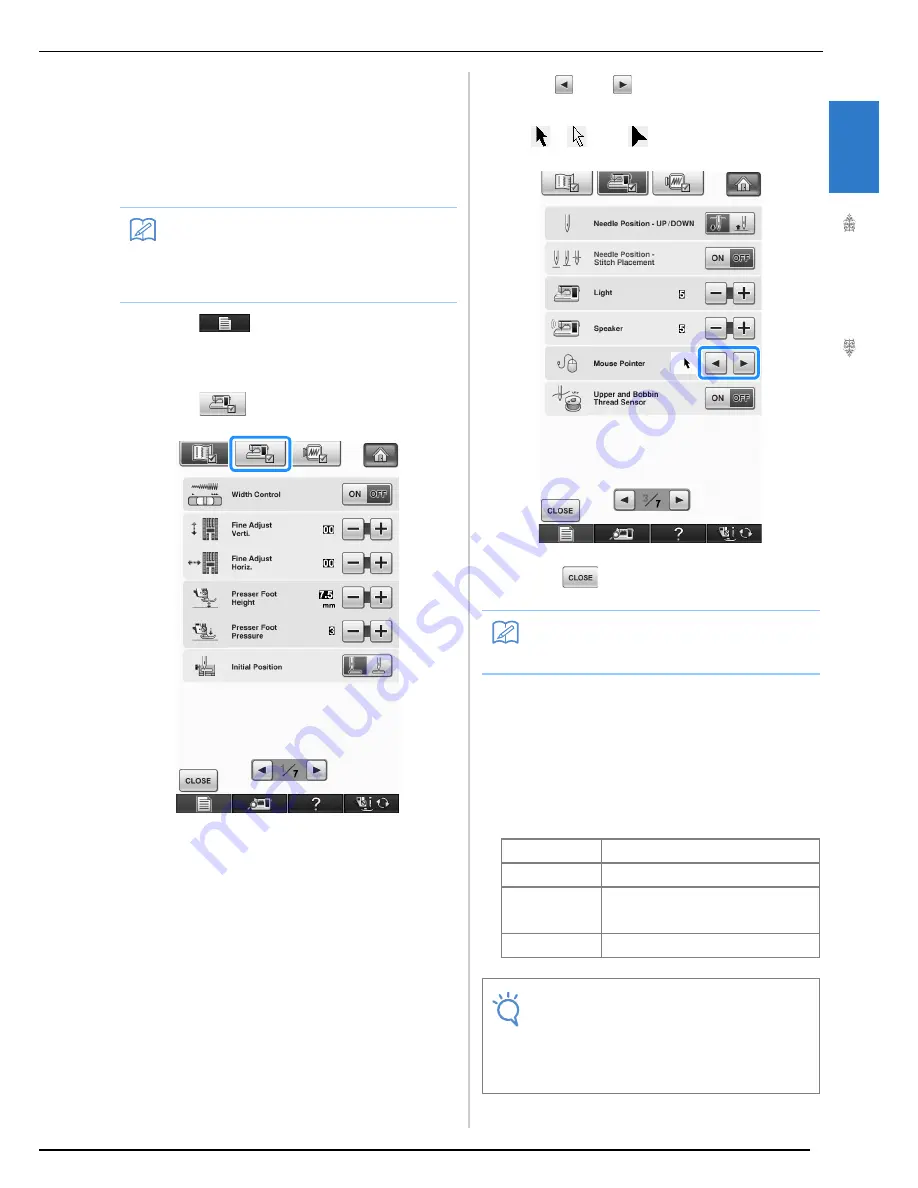
Changing the Pointer Shape When a
USB Mouse Is Used
In the settings screen, the shape can be selected for
the pointer that appears when a USB mouse is
connected. Depending upon the background color,
select the desired shape from the three that are
available.
a
Press .
→
The Sewing settings screen appears.
b
Press .
→
The General settings screen appears.
c
Display 3/7 (page 3 of 7) of the General
settings screen.
d
Use
and
to choose the pointer
shape from the three settings available
(
,
and
).
e
Press
to return to the original screen.
■
Changing the Screen Saver Image
Instead of the default image, you can select your
own personal images for the screen saver of your
machine.
Before changing the screen saver image, prepare the
image on your computer or USB media.
Compatible image files
Memo
• For details on changing the background
color, refer to “Changing the Background
Colors of the Embroidery Patterns” on page
30.
Memo
• The setting remains selected even if the
machine is turned off.
Format
JPEG format (.jpg)
File size
Max. 150 KB for each image
File dimension
480 × 800 pixels or less, (If the width is
more than 480 pixels, the image imported
will be reduced to a width of 480 pixels.)
Number allowed
5 or less
Note
• When using USB media, make sure that it
contains only your own personal images to
be selected for the screen saver.
• Folders are recognized. Open the folder that
holds your personal images.
Summary of Contents for Innov-is NV6000D
Page 1: ...Computerized Embroidery and Sewing Machine ...
Page 14: ...CONTENTS xii ...
Page 35: ...LCD SCREEN Getting Ready 21 1 ...
Page 90: ...USEFUL FUNCTIONS 76 ...
Page 269: ...USING THE MEMORY FUNCTION Embroidery 255 5 f Press o The sewing screen is displayed ...
Page 302: ...EDITING PATTERNS 288 ...
Page 326: ...PRINT AND STITCH COMBINING EMBROIDERY PATTERNS AND PRINTED DESIGNS 312 ...
Page 338: ...USING STORED CUSTOM STITCHES 324 ...
Page 373: ......
Page 374: ......
Page 375: ......


