Changing the Embroidering Position
97
3
—————————————————————————————————————————————————————————————————————————————————————
■
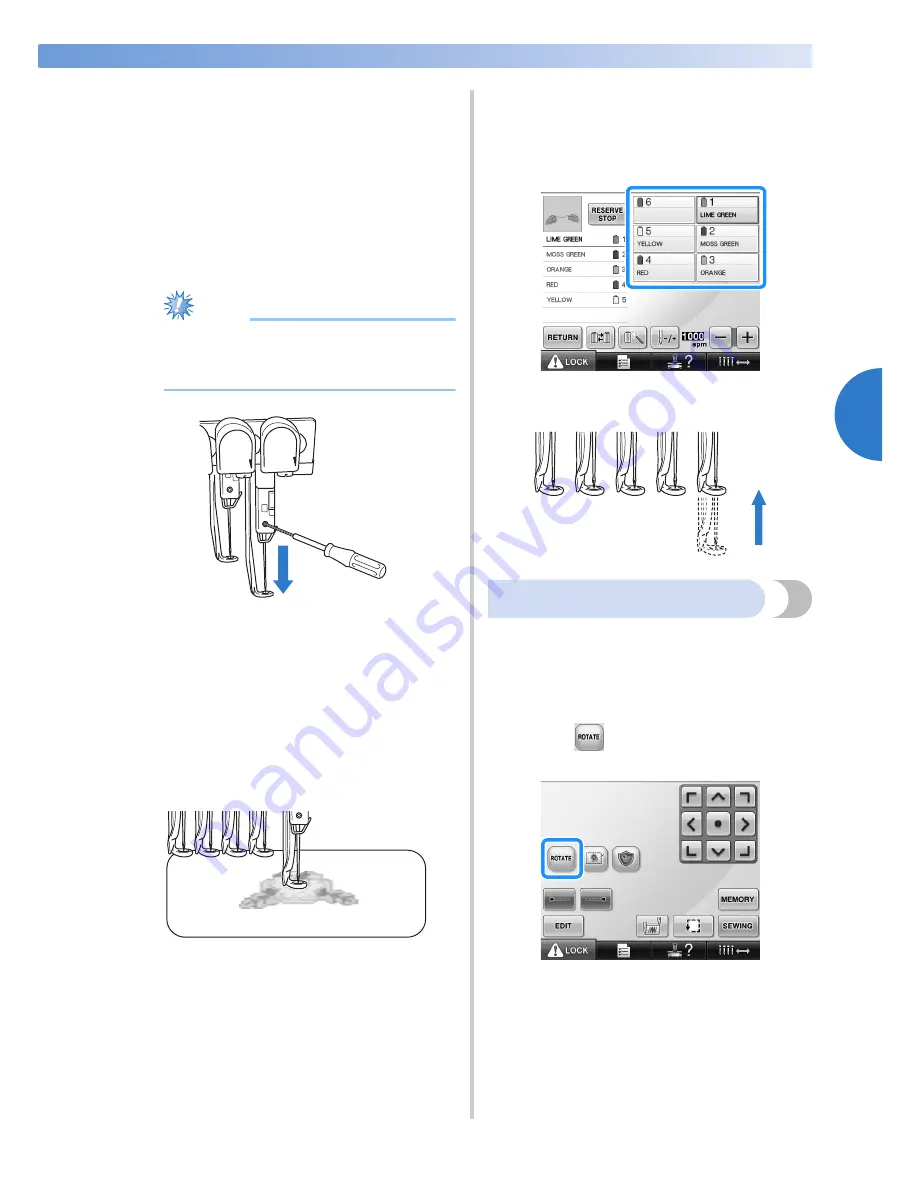
Finding the sewing position
By locking the needle bar (securing the needle
and presser foot in the down position), the
needle drop point can easily be seen.
1
As shown in the illustration, insert the Allen
screwdriver into the hole in the needle
clamp to slowly lower the needle bar down
till needle bar stops then clicks into the lock
position.
Note
●
Make sure that the needle is not lowered
beyond the positioning click into the
fabric.
X
The needle and presser foot are locked in
the down position.
2
Touch the arrow keys in the embroidery
settings screen to move the embroidery
frame so that the needle drop point is at the
center of the area where you wish to
embroider.
• With a USB mouse, your finger or the
touch pen, drag the pattern to move it.
• When specifying the starting of stitching,
align the needle drop point with the point
specified as the starting of stitching. (For
details on specifying the starting/ending of
stitching, refer to page 123.)
■
Unlocking the needle bar
1
Display the embroidering screen, and then
touch the key for any needle bar other than
the one that is locked.
X
The needle bar is unlocked.
Adjusting the angle
Depending on the type of fabric being
embroidered, it may not be possible to stretch the
fabric in the embroidery frame at the desired angle.
In this case, adjust the angle of the pattern so that it
is correctly positioned on the fabric.
1
Touch .
The screen shown below appears.
Summary of Contents for ADDENDUM 884-T07
Page 1: ...Operation Manual Embroidery Machine Product Code 884 T07 884 T07 ...
Page 20: ... 18 ...
Page 136: ...EMBROIDERING SETTINGS 134 ...
Page 194: ...SELECTING EDITING SAVING PATTERNS 192 ...
Page 270: ...APPENDIX 268 ...
Page 278: ......
Page 279: ......


