


TURNING THE MACHINE ON/OFF
G
etting
Re
ad
y
27
1
a
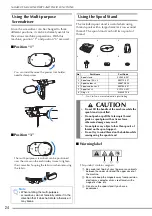
Insert the power supply cord into the power
cord receptacle, then insert the plug into a
wall outlet.
a
Main power switch
b
Power supply cord
b
Turn the main power switch to “I” to turn
on the machine.
a
OFF
b
ON
c
Turn the main power switch to “O” to turn
off the machine.
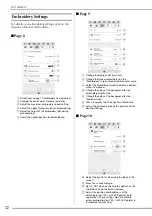
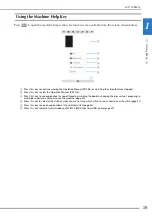
Setting Your Machine for the First
Time
When you first turn on the machine, set the
language and time/date to your language and local
time/date. Follow the procedure below when the
settings screen appears automatically.
a
Press
and
to set your local language.
b
Press .
c
The message screen, confirming if you want
to set time/date, appears. To set the time/
date, press
; to cancel the setting,
press .
The screen to set time/date appears.
d
Press
or
to set time date.
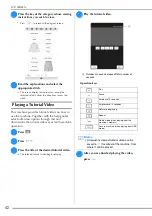
a
Press to display the time on the screen.
b
Set the year (YYYY), month (MM) and date (DD).
c
Select whether 24h or 12h setting to display.
d
Set the current time.
e
Press
to start using your machine.
The clock starts from 0 second of the time you set.
Memo
• When the machine is turned on, the needle
and the feed dogs will make sound when
they move; this is not a malfunction.
Memo
• If the machine is turned off in the middle of
sewing in the “Sewing” function, the
operation will not be continued after turning
the power on again.
a
b
Note
• The time/date you set may be cleared, if
you don't turn on the machine for an
extended period of time.
• Time setting is also available by pressing
clock button/time on the LCD screen.
b
a
c
d
Summary of Contents for 882-W30
Page 2: ......
Page 12: ...CONTENTS 10 ...
Page 13: ...Chapter 1 Getting Ready ...
Page 53: ...Chapter 2 Sewing Basics ...
Page 102: ...PROJECTOR FUNCTIONS UTILITY STITCHES AND CHARACTER DECORATIVE STITCHES 100 ...
Page 103: ...Chapter 3 Utility Stitches ...
Page 158: ...SEWING THE STITCHES 156 ...
Page 159: ...Chapter 4 Character Decorative Stitches ...
Page 179: ...COMBINING STITCH PATTERNS Character Decorative Stitches 177 4 Press Press Press ...
Page 186: ...USING THE MEMORY FUNCTION 184 ...
Page 187: ...Chapter 5 MY CUSTOM STITCH ...
Page 198: ...USING STORED CUSTOM STITCHES 196 d Select the stitch pattern you want to retrieve and press ...
Page 199: ...Chapter 6 Appendix ...
Page 232: ......
Page 233: ......
Page 234: ......
Page 235: ......


