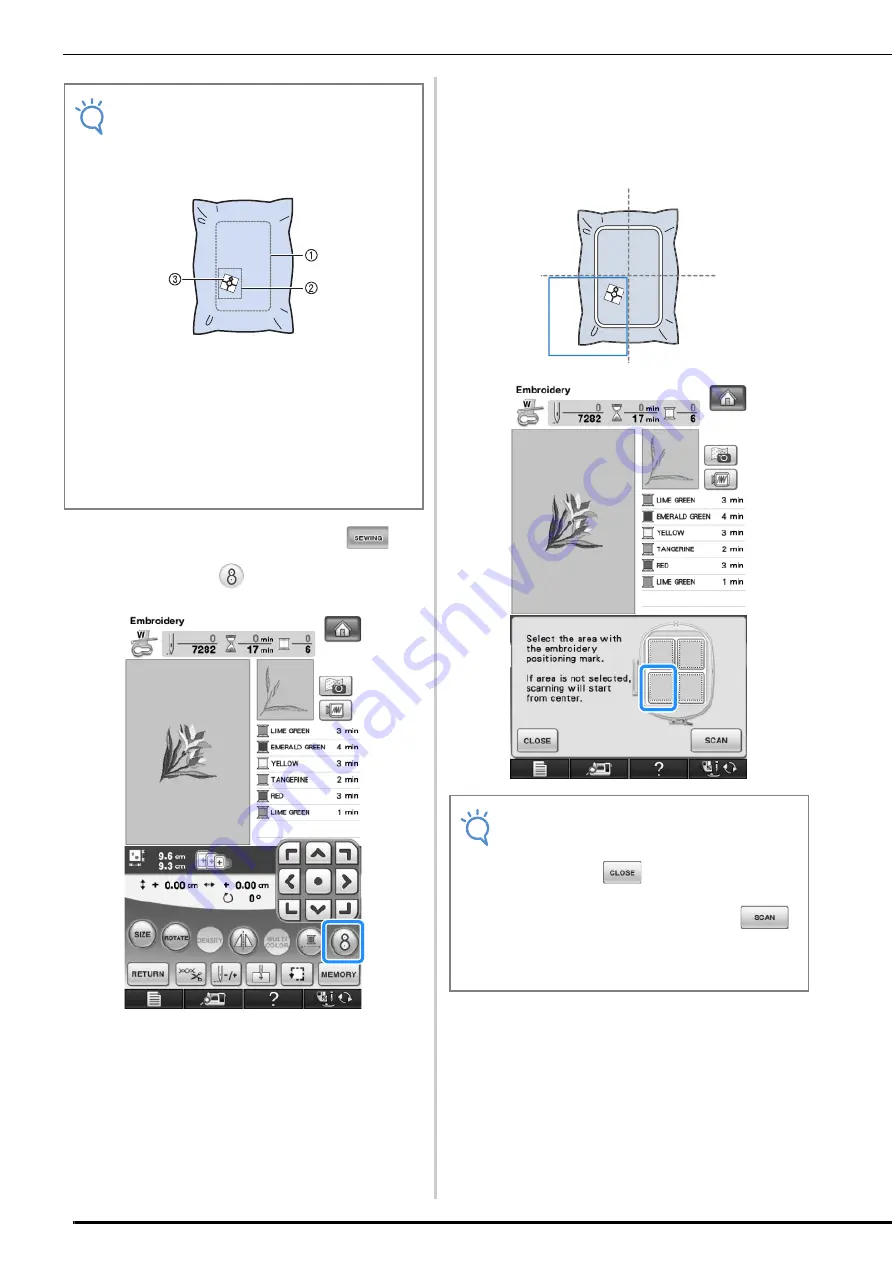
CONFIRMING THE PATTERN POSITION
214
b
After selecting the pattern, press
,
and then press
.
→
A window appears so that the area containing the
embroidery positioning sticker can be selected.
c
From the areas shown in the window, select
the area containing the embroidery
positioning sticker.
*
If an area is not selected, scanning will start from the
center.
Note
• When inserting the fabric in the embroidery
frame, check that the embroidery pattern fits
within the embroidery field for the frame that
is used.
a
Embroidery field
b
Embroidery pattern
c
Embroidery positioning sticker
• Depending on the type of fabric that is used,
a part of the embroidery positioning sticker
may remain attached when it is peeled off.
Before using the embroidery positioning
sticker, check that it can be cleanly removed
from a scrap piece of the fabric to be used.
Note
• Scanning cannot start from the center after
an area has been selected. To scan from the
center, press
to close the window,
then display the window again but do not
select an area to scan, then press
.
• If the embroidery positioning sticker
overlaps two areas, select either of the two
areas.
Summary of Contents for 882-W07
Page 72: ...CHANGING THE NEEDLE 70 ...
Page 90: ...USEFUL FUNCTIONS 88 ...
Page 186: ...USING THE MEMORY FUNCTION 184 ...
Page 326: ...TROUBLESHOOTING 324 ...
Page 338: ...USING STORED CUSTOM STITCHES 336 ...
Page 379: ......


