4. Press the
SeT
button to apply changes.
Note
The startup image will still be displayed when you turn on your camera even if the
selected image was deleted.
DPof
The Digital Print Order Format (DPOF) function allows you to mark image in your memory
card for printing and allows you to specify the number of copies that you want to print at
a later date.
When all images to be printed are marked, take the memory card to a digital printing service,
or use a DPOF compatible printer.
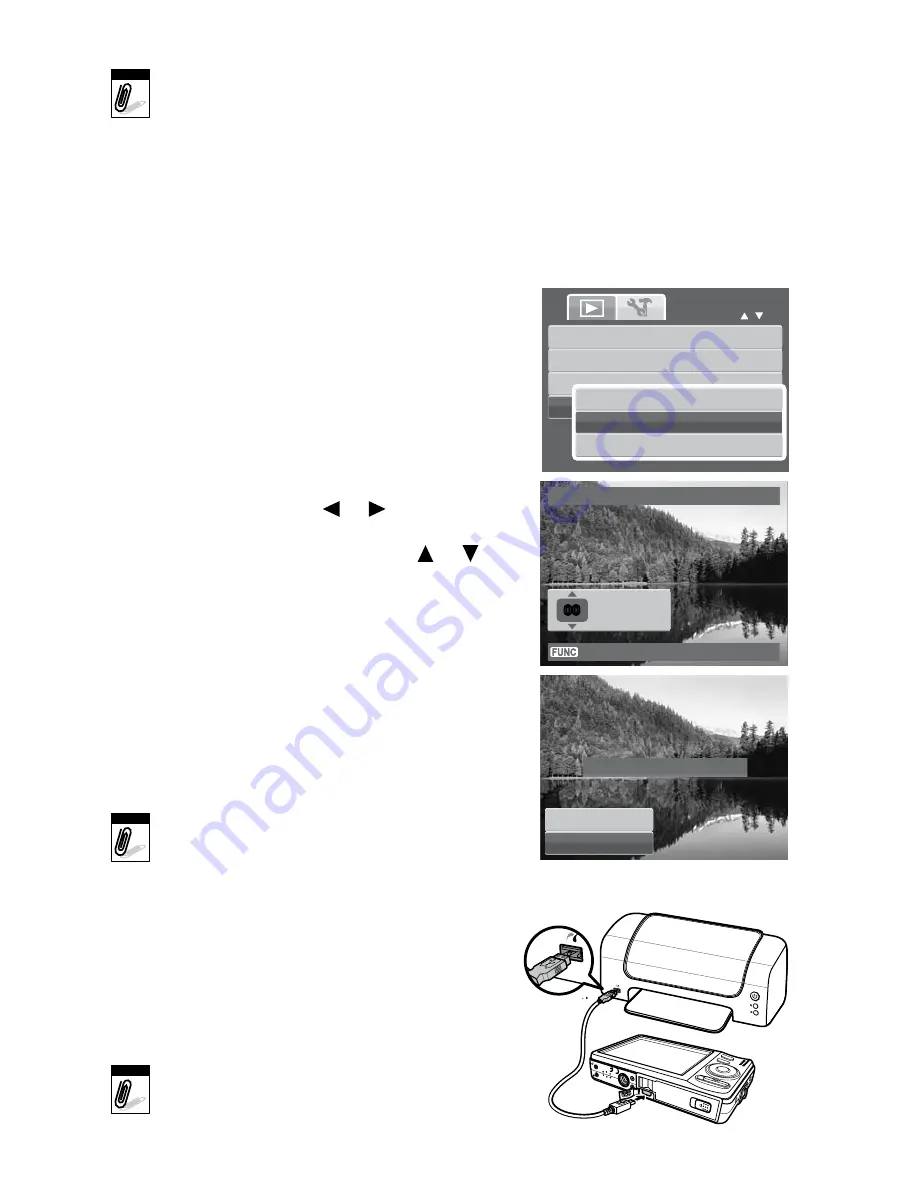
To set DPOF:
1. Press the
MenU
button to launch the Playback menu.
2. Select
DPof
. The submenu appears.
Available settings are as follows:
Single
. Select a single image to mark.
All
. Mark all images in the memory card.
Reset.
Reset all DPOF settings to initial default settings.
To set DPOF on a single image/all images:
1. Select
Single
or
All
on the DPOF submenu.
2. For single image, use the
or
keys to scroll
and select an image to mark for printing.
3. Specify the number of copies. Use the
or
to
increase/decrease number.
4. Press the
fUnC
button to toggle between turning
on/off the date stamp.
5. Press the
SeT
button to save DPOF settings.
To reset DPOF:
1. Select
Reset
on the DPOF submenu.
A confirmation message appears.
2. Select
yes
.
3. Press the
SeT
button to reset DPOF settings.
Note
You can specify up to 99 copies for DPOF.
If you specify 0 copies, the DPOF setting
of that image is automatically disabled.
PICTbRIDGe
The PictBridge function allows you to print images
captured by your camera without connecting the
camera to a PC. Print images with a PictBridge
compatible printer directly.
To activate PictBridge:
Connect your camera to a PictBridge compatible printer
using the USB cable. See illustration to the right.
Note
If the printer does not support date stamp, the date
stamp function will be disabled in PictBridge.
•
•
•
DPOF
Date stamp off
00
00
Copies
Trim
Resize
Startup Image
DPOF
Single
All
Reset
Yes
Cancel
Reset DPOF?
37


