background image

bromic.com

9

Section 4 (optional) - Setup Scenario(s)

The Scenario feature allows multiple Heater Controllers to be commanded with a single 
press. E.g. All Heaters to 50%, or Patio Heaters Off etc.

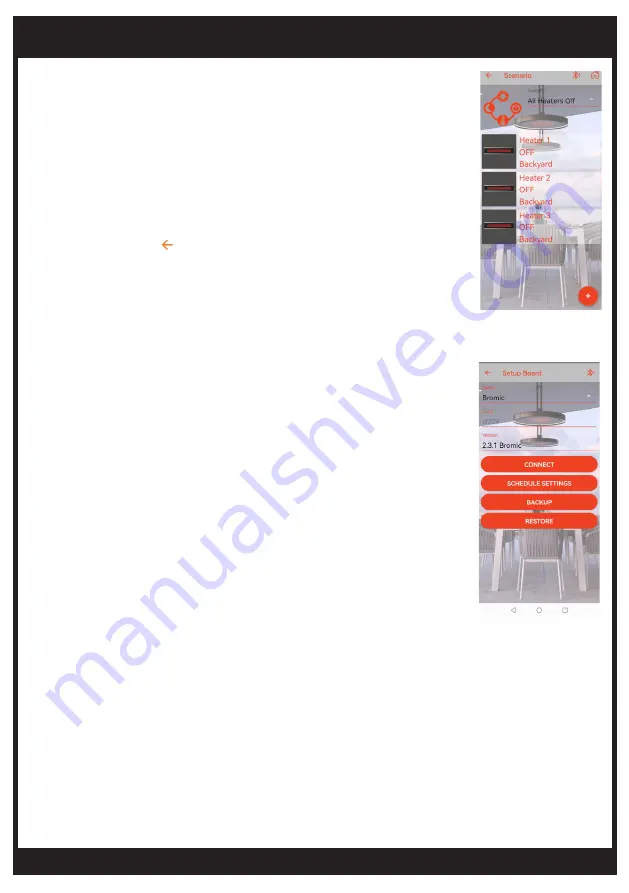
Follow the steps below to create a Scenario:

1.   Create a new Scenario by accessing the menu “SCENARIOS” in Setup. 
2.   Tap “ + ” to add a Scenario. Enter a name for the new Scenario. 
3.   Tap “ + ” to add each Heater and select the intended operation under the new Scenario. 
4.   Once completed, click “      “ to save the new Scenario.
Note:  Multiple Scenarios can be created for easy operation. 

Section 5 (Strongly Recommended) – Backup Function

Note: this function enables the App settings to be saved in order to be transferred onto 
a new device without repeating the device setup process.

Note: The smart device must have an active internet connection during this procedure. 

1. Open Setup menu and tap on “INSTALLATIONS”.

2.  Choose the Installation and tap on “BACKUP”.

3.  Choose an email method (e.g., outlook) to share the file with the intended device. 

Note: A small file with .tbackup extension will be generated as an attachment. 

4.  Send it to the intended recipient. The email should also be sent to oneself as backup.

Section 6 (Optional) – Restore Function

Note: this function can only be performed if section 5 was completed previously. 
Note: Ensure the smart device has an active internet connection and Bluetooth enabled. 
Note: Ensure the Smart-Heat Connect is powered and within 10m range. 

1. Download and install the Bromic Heating App onto the new smart device.

2.  Open the email (refer to section 5)  and click on the attachment.

Note: If the file did not open automatically, save it to the device. Find the file in download section and choose using 
the Bromic App to open.

3. Open Setup menu and click on “INSTALLATIONS”. Name the Installation. 

4. Enter the unique 4-character code and click “CONNECT”. The version will appear to indicate successful connection.

Note: The Smart-Heat Connect can only be connected to one smart device at a time. Ensure Bluetooth is disabled on 
other pre-paired devices.

5. click on the “RESTORE” button,  tap “OK” to confirm. 

6. Return to the device operation menu to verify if the App setting is successful (refer to section “USER OPERATION“).

DEVICE SETUP

Summary of Contents for SMART-HEAT CONNECT

Page 1: ...1 0 AU UK BROMIC SMART HEATTM CONNECT SETUP AND USER MANUAL IMPORTANT READ THIS MANUAL CAREFULLY SEE INSIDE COVER FOR IMPORTANT INFORMATION ABOUT THIS MANUAL KEEP INSTRUCTION WITH APPLIANCE FOR FUTURE...

Page 2: ...reproduced in any form without prior written consent from Bromic Pty Ltd This manual contains important information about the configuration and operation of the Bromic Smart HeatTM Connect Please pay...

Page 3: ...like Arrange cord away from traffic area and where it will not be a trip hazard This Setup and User manual should not be removed from the site of installation Installer should leave man ual with the...

Page 4: ...Radio Range to Controllers max 30m Radio Transmission frequency AU 916 MHz UK 868 MHz Bluetooth Module Bluetooth 4 1 at 2 4GHz Bluetooth Range to Smart device max 10m Number of Heaters per Smart Heat...

Page 5: ...ng instructions in section 3B under DEVICE SETUP and the instruction manual supplied with the Controller Note Test the Remote in the same location where the Smart Heat Connect will be permanently loca...

Page 6: ...ner of the screen to enter setup section Note The unique 4 character code can be found on the label at the back of the Smart Heat Connect 7 Successful pairing is indicated once the version is automati...

Page 7: ...e according to the Heater and Controller installed i e ON OFF Dimmer Eclipse ON OFF 2CH Note For a split element Heater choose Device ON OFF 2CH Note Multiple Heaters connected to a single Controller...

Page 8: ...trician only after they have reviewed the appropriate Heater Controller Manual Follow the Controller installation manual to pair the App with the Controller Substitute the remote with corresponding Ap...

Page 9: ...A small file with tbackup extension will be generated as an attachment 4 Send it to the intended recipient The email should also be sent to oneself as backup Section 6 Optional Restore Function Note t...

Page 10: ...eater Important Note Always verify the device status after any operation The App does not provide feedback on the status of the Heater s Important Note Ensure the Bluetooth symbol is on This indicates...

Page 11: ...re the operation is successful Note Communication can be affected by radio interference or Bluetooth range Always verify the status of all Heaters after any operation especially when turning Heaters o...

Page 12: ...Heat Connect with no obstacles Check if the Bluetooth symbol on the top right corner is present to indicate device connected Device out of range Connect the Smart Heat Connect to a power supply closer...

Reviews: