background image

bromic.com

8

Section 3A - Pairing with Remote

Each App Heater needs be paired with the respective Controller. 

To pair your App Heater with the Controller, follow the steps below: 

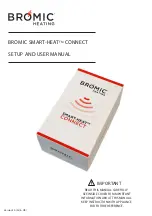
1. Locate the P3 Button on the Remote. 

Note: For standard ON/OFF or Dimmer Remote, the P3 button is located inside the Remote. Open the Remote 

cover by inserting a small flat screwdriver into bottom recess left and right side tabs. Turn the screwdriver to 

release cover and access the P3 button as shown in the image below.

Note: For the Master (42 Channel) or Eclipse Remote, the P3 button is located at the back of the Remote.

Use a pin to access.

Section 3B (FOR ELECTRICIAN ONLY) - Pairing without Remote

If the Remote is not present or not functional, the programming must be done through accessing 
the Controller. The procedure must be carried out by a qualified electrician only after they have 
reviewed the appropriate Heater Controller Manual.

Follow the Controller installation manual to pair the App with the Controller. Substitute the remote 
with corresponding App buttons for pairing.

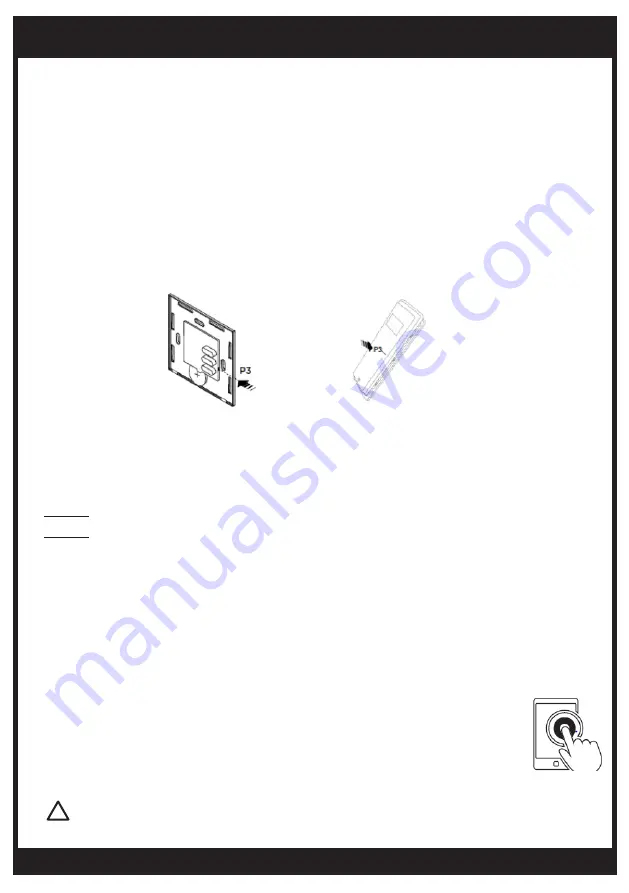
2. Open the operation screen of the corresponding Heater in the App (see section 1 in “USER OPERATION”).
3.Short press button P3 gently on the Remote, the Controller emits a continuous sound indicating learning 
mode. 
4. Within 5s, press a button on the Remote. The sound stops for 1 second and then continues. 
5. Within 5s, press the corresponding button on the App. Successful pairing is indicated by an intermittent sound 
from the Controller.
6. Test the function of all the other buttons in the App for the same Heater to verify operation.
7. Repeat step 2 & 3 for any button that is not working. 
8. Repeat the above steps for all the other Heater(s). 
Note: Keep all the Remote(s) in a secure place. Do not discard.

    Electrical hazard when connected to 240V AC.

!

DEVICE SETUP

ON/OFF or Dimmer Remote

Master (42 Channel) or Eclipse Remote 

Summary of Contents for SMART-HEAT CONNECT

Page 1: ...1 0 AU UK BROMIC SMART HEATTM CONNECT SETUP AND USER MANUAL IMPORTANT READ THIS MANUAL CAREFULLY SEE INSIDE COVER FOR IMPORTANT INFORMATION ABOUT THIS MANUAL KEEP INSTRUCTION WITH APPLIANCE FOR FUTURE...

Page 2: ...reproduced in any form without prior written consent from Bromic Pty Ltd This manual contains important information about the configuration and operation of the Bromic Smart HeatTM Connect Please pay...

Page 3: ...like Arrange cord away from traffic area and where it will not be a trip hazard This Setup and User manual should not be removed from the site of installation Installer should leave man ual with the...

Page 4: ...Radio Range to Controllers max 30m Radio Transmission frequency AU 916 MHz UK 868 MHz Bluetooth Module Bluetooth 4 1 at 2 4GHz Bluetooth Range to Smart device max 10m Number of Heaters per Smart Heat...

Page 5: ...ng instructions in section 3B under DEVICE SETUP and the instruction manual supplied with the Controller Note Test the Remote in the same location where the Smart Heat Connect will be permanently loca...

Page 6: ...ner of the screen to enter setup section Note The unique 4 character code can be found on the label at the back of the Smart Heat Connect 7 Successful pairing is indicated once the version is automati...

Page 7: ...e according to the Heater and Controller installed i e ON OFF Dimmer Eclipse ON OFF 2CH Note For a split element Heater choose Device ON OFF 2CH Note Multiple Heaters connected to a single Controller...

Page 8: ...trician only after they have reviewed the appropriate Heater Controller Manual Follow the Controller installation manual to pair the App with the Controller Substitute the remote with corresponding Ap...

Page 9: ...A small file with tbackup extension will be generated as an attachment 4 Send it to the intended recipient The email should also be sent to oneself as backup Section 6 Optional Restore Function Note t...

Page 10: ...eater Important Note Always verify the device status after any operation The App does not provide feedback on the status of the Heater s Important Note Ensure the Bluetooth symbol is on This indicates...

Page 11: ...re the operation is successful Note Communication can be affected by radio interference or Bluetooth range Always verify the status of all Heaters after any operation especially when turning Heaters o...

Page 12: ...Heat Connect with no obstacles Check if the Bluetooth symbol on the top right corner is present to indicate device connected Device out of range Connect the Smart Heat Connect to a power supply closer...

Reviews: