Mounting the access point
2
14
Brocade Mobility 7131 Series Access Point Installation Guide
53-1001935-02
Suspended ceiling T-bar installations
A suspended ceiling mount requires holding the access point up against the T-bar
of a suspended ceiling grid and twisting the access point chassis onto the T-bar.
The mounting tools (customer provided) and hardware required to install the access
point on a ceiling T-bar consists of:
•
Safety wire (recommended and customer supplied)
•
Security cable (optional and customer supplied)
To install the access point on a ceiling T-bar:
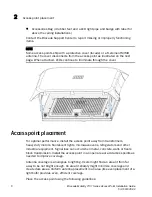
1. Brocade recommends you loop a safety wire — with a diameter of at least 1.01
mm (.04 in.), but no more than 0.158 mm (.0625 in.) — through the tie post
(above the access point’s console connector) and secure the loop.
2. If desired, install and attach a security cable to the access point lock port.
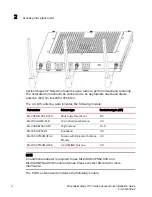
3. Attach the antennas to their correct connectors.
For information on the antennas available to the access point, see
“Antenna
options”
on page 7.
CAUTION
Ensure you are placing the antennas on the correct connectors
(depending on your single or dual-radio model and frequency used) to
ensure the successful operation of the access point.
4. Cable the Mobility 7131 Series Access Point using either the Power over
Ethernet (PoE) or an approved line cord and power supply.
For POE installations, connect an RJ-45 CAT5e (or CAT6) Ethernet cable
between a PoE switch port and the Mobility 7131 Series Access Point GE1/POE
port.
For standard power adapter and line cord installations:
a. Connect a RJ-45 Ethernet cable between the network data supply (host)
and the Mobility 7131 Series Access Point GE1/POE or GE2 port.
b. Verify the power adapter is correctly rated according the country of
operation.
c. Connect the power supply line cord to the power adapter.

