background image


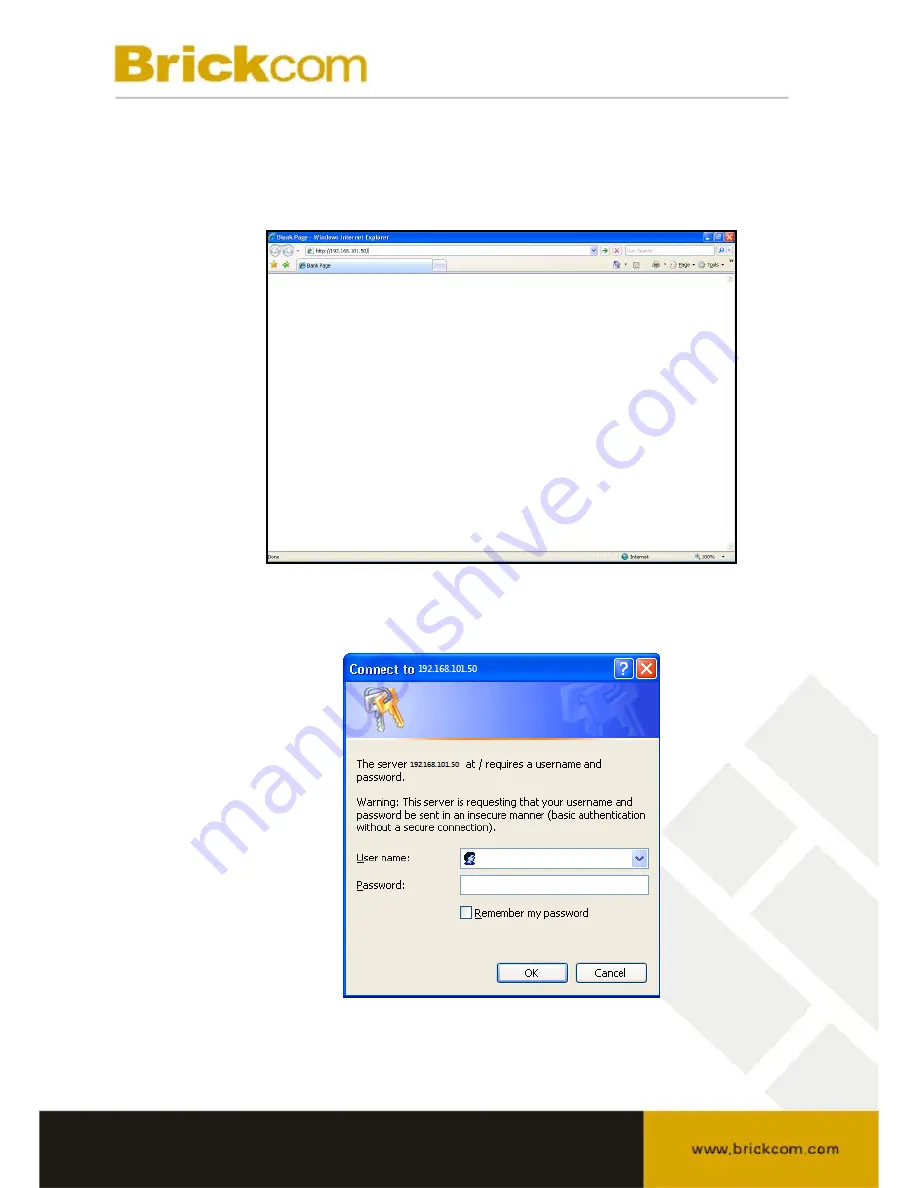
Once the PC is connected to the NR-04A, open a web browser and enter the 

IP  address:  192.168.101.50.    The  computer  will  automatically  connect  to  the 

NR-04A. 


The  user  will  be  prompted  to  enter  the  NR-04A’s  username  and  password.  

The default username and password are 

admin/admin.  

Click “OK” to continue.


Summary of Contents for NR-04A

Page 1: ...Network Video Recorder NR 04A User s Manual Quality Service Group...

Page 2: ...oduct name Network Video Recorder NR 04A Release Date 2010 07 Manual Revision V1 00 Web site www brickcom com Email technical brickcom com info brickcom com 2010 Brickcom Corporation All Rights Reserv...

Page 3: ...ies listed on the Package Contents are included Before installing the NR 04A read the warnings in the Quick Installation Guide to avoid misuse When installing the NR 04A carefully read and follow the...

Page 4: ...ontents NR 04A Network Video Recorder Power Adapter Input 100 240V Output 12V 4A Ethernet Cable Printed Quick Installation Guide Printed Warranty Card CD ROM Quick Installation Guide User s Manual Set...

Page 5: ...l to the operation of the NR 04A For easy set up and scalability the NVR is able to automatically search and access the available cameras on the network Operation of the IP cameras and NVR is managed...

Page 6: ...ics Adapter AGP or PCI Express minimum 1024 768 16 bit colors Note It is highly recommended to use a graphics adaptor that provides higher than 1024 x 768 resolution in order to experience the full be...

Page 7: ...ll Hard Disk Once a hard disk has been installed in the NR 04A it must be initialized in preparation for recording Basic information about the installed hard disk can be viewed under Disk Setup on pag...

Page 8: ...Hardware Illustration Front Hardware Illustration Rear...

Page 9: ...04A to a network If the NR 04A is added to a network with a DHCP server connect to the NR 04A using the Setup Wizard Utility If the NR 04A is added to a network without a DHCP server or it is being ac...

Page 10: ...onto a computer that is connected to the network This utility is available on the provided CD Once the utility has been installed located the NR 04A with the IP address that is assigned by the top le...

Page 11: ...ayed The utility will located the NR 04A and display its IP address Double click to access the NR 04A The NR 04A web administration page will automatically open in the default web browser The NR 04A I...

Page 12: ...ge the device s IP address The default username and password is admin admin To search again for the NR 04A click on the button highlighted below To access the NR 04A s web administrationpage double cl...

Page 13: ...NR 04A s web administration page user will be prompted for the NR 04A username and password For first time use the default username and password are admin admin Enter the username and password and cl...

Page 14: ...here is no DHCP server present in the network If there is no server the NR 04A will turn on its DHCP server function and act as the DHCP server in the network Users have two options to connect to the...

Page 15: ...web browser and enter the IP address 192 168 101 50 The computer will automatically connect to the NR 04A The user will be prompted to enter the NR 04A s username and password The default username and...

Page 16: ...e following functions Retrieve Camera s Video Stream Retrieve Camera s Status View Live Sequence PTZ Control View PTZ Preset Sequence Perform Manual Recording Take Snapshot Receive Audio of a Video St...

Page 17: ...en Click All to display the video from all cameras in 4 video display mode Click on any camera to display video in single view display mode 1 2 Retrieve Camera s Status The camera list will show each...

Page 18: ...sequence 1 To perform Sequence View select Sequence from the upper left hand corner 2 Select the interval time from the drop down menu 3 Select one or more camera s for Sequence Viewing a Click All C...

Page 19: ...ns of a PTZ camera The user can also adjust the camera s focus and iris The camera s which are available for PTZ Control will be displayed in the PTZ drop down menu Select a camera to control the pan...

Page 20: ...itions for a camera Auto pan a camera View preset point sequence Preset Point Viewing 1 Select a PTZ camera from the drop down list 2 Its available PTZ preset points will be listed in the drop down li...

Page 21: ...button for such cameras Pan right Preset Point Sequence Viewing This function allows the user to view multiple preset points of a camera without having to select them one by one 1 Define the preferre...

Page 22: ...ideo Control Buttons Take a snapshot of the live view monitor Turn audio on off Start stop recording of live view Audio post function View the Live View in full screen Display the Live View in its ori...

Page 23: ...ake a snapshot of the live video monitor 2 The snapshot will be displayed in a pop up window 3 Right click anywhere on the image and select Save Image As from the pull down menu 4 Name the image file...

Page 24: ...g of a live video by using the button The button will change color when the NR 04A is recording Audio Post Function This function allows the user to transmit audio through the camera using the compute...

Page 25: ...A window will open displaying the user information The user can select a language from the Language drop down menu Click Apply to save the new settings...

Page 26: ...tached to the NR 04A The NR 04A offers synchronized playback from up to 4 channels and various types of search methods are provided to help the user sort through the recorded videos quickly Playback v...

Page 27: ...r search through the recorded videos Search by time Search by event Play by start time Search by Time Select channel s to search through the recorded videos Selected channels will be marked in red Sel...

Page 28: ...e recorded video from that date If a camera recorded multiple video clips on a certain day click on the blue cell to open an hour channel table Videos from other cameras that are recorded on the same...

Page 29: ...ill be marked in red Select Search by event from the Search mode drop down list and click Go to start the search The results will be displayed in a list with the newest recordings displayed first Clic...

Page 30: ...time and date The user can set the number of recorded videos to be displayed to 30 or less Search by Event Most Recent This function displays the most recent event recordings from the selected channel...

Page 31: ...rding took place and would like to view this recording select By Specific Time from the Search mode drop down menu The user will be prompted to enter a specific time and date Use the button to select...

Page 32: ...party media player such as VLC player or Windows Media player 1 Locate the recorded videos using any method in section 2 1 2 Hit the Export AVI button on a recorded video window to export the video 3...

Page 33: ...nder the C partition 4 Whenthe recorded video is exported a windowwill pop up notifyingthe userthat the AVI file was successfully exported 5 The exported AVI file will be saved under the C partition a...

Page 34: ...with the network Adjusting the system time and date so that videos will be recorded with correct timestamp Setting up user accounts and group privileges to prevent settings from being altered by user...

Page 35: ...the NR 04A 1 Choose Static IP from the Connection Type drop down menu 2 Enter the IP address subnet mask default gateway address and DNS server address for the recorder 3 Enable the DHCP Server by se...

Page 36: ...ccur After selecting the time zone choose an option below to set the recorder time Manual Use the drop down list and configure the time manually Sync with NTP server enter the hostname or IP address o...

Page 37: ...admin account 1 Click and highlight the admin account in the account list and click Edit 2 Its information should be displayed in User Account Information 3 Enter a new password in the Password field...

Page 38: ...access instead of full administration rights The recorder comes with seven built in groups and five built in privilege profiles Other than the admin and guest groups the other five groups the other f...

Page 39: ...lege level for the group by selecting a level from the Privilege Type drop down menu The access privileges will be displayed Add or restrict access to cameras and settings by checking or unchecking pr...

Page 40: ...hard disk has been installed in the NR 04A it must be initialized in preparation for recording To initialize it click the Format button The firmware can be upgrading through the recorder s external US...

Page 41: ...ormation and add it Automatic Search 1 Click the Search button to perform the camera search The user may be prompted to install the Active Control component in order for the search function to operate...

Page 42: ...Enter its username and password Select the channel ID and name the camera 5 Click on Detect to establish the connection between the recorder and the camera If connection establishes successfully the c...

Page 43: ...n that camera is already configured and connected to the NR 04A Add a Camera Manually From the Channel Settings page manually enter the camera s IP address and information into the Camera Information...

Page 44: ...ons show time show frames per second or to show a custom text message which can be a maximum of 32 characters 3 Define the text display position on the video screen The user can define the position by...

Page 45: ...e camera 1 To set up PTZ preset points select a camera from the Camera drop down menu and click Add 2 Select a position number for the preset point from the Position Number drop down menu and fill in...

Page 46: ...a from the Camera drop down menu 2 The available preset points will be listed in the Preset Position column 3 Pick preset points for sequence viewing and click the button to move them to the Preset Se...

Page 47: ...amera has detected an event and where this event is happening This function works by incorporating the event detection function as well as the recording function which as a result helps the user to ta...

Page 48: ...mera icon the camera s appropriate location When the NR 04A receives an event notification from any of the cameras their videos will be displayed on the E Map and you can double click on the video to...

Page 49: ...Trigger Duration This setting is used to define the time period during which events can be triggered Choose Always or Only During For the Only During option choose the days by using the check box and...

Page 50: ...camera or a disk failure the recorder can send a notification with the acceptable format image txt to a designated event server Configuring an FTP Server To add an FTP server 1 Enter a name for the FT...

Page 51: ...ve it unchecked to use active mode 6 Click Test to verify that the information was entered correction and the connection to the FTP can be established successfully 7 Click Apply to save the new settin...

Page 52: ...the SMTP server 2 Enter the port of the SMTP server 3 Specify the sender s name in the Sender s name field 4 Enter the sender s e mail address 5 Check Enable Authentication and enter the username and...

Page 53: ...Channels to Enable Event Trigger and Which Type of Event Should be Triggered Check the boxes to enable the event trigger for desired channels Define which system events should trigger the recorder to...

Page 54: ...with adjustable recording frame rate 3 4 1 General Settings GeneralSettings can be used to define the following Pre Alarm Post Alarm recording length Recording frame rate Enable disable different rec...

Page 55: ...predefined frame rates The predefined frame rates include 1 5 10 15 20 and full Camera Recording Setting allows the user to enable continuous schedule or event recording on any channel 3 4 2 Schedule...

Page 56: ...ecutive recording 3 Instead of the Schedule Table the user can use the Quick Configuration to define the recording time range Check the days to record and specify the duration by choosing either All D...

Page 57: ...ware restore backup device settings or reboot device 3 5 1 Device Information The Device Information provides the general information of the device such as the firmware version system time and current...

Page 58: ...rd drive Restore the NR 04A s settings from a previously saved configuration file Reset the NR 04A s settings to their factory default values Reboot the NR 04A Click Restart to begin the reboot proces...

Page 59: ...Factory Default Settings To reset the recorder back to its factory default click the Default button A progress window will be displayed When the reset process is complete the NR 04A will return to th...

Page 60: ...3 5 4 Disk Status The Disk Status provides detailed information about the hard drive currently installed in the NR 04A...

Reviews: