manuale d’uso
operator’s manual
s i s t e m i d i f i s s a g g i o
®
w w w . b o s s o n g . c o m
9
IT
EN
4.
Una volta eseguito il caricamento dei chiodi e delle cartucce l’attrezzo è pronto
per l’operazione di sparo. Posizionare l’apparecchio perpendicolarmente
alla superficie di lavoro. Tenere l’apparecchio in posizione bilanciata.
L’operatore dovrà essere posizionato dietro l’apparecchio in allineamento
con l’asse della guida della chiodatrice. Il personale di assistenza dovrà
essere posto dietro l’operatore. Premere l’apparecchio fermandolo contro
la superficie e premere il grilletto. Lo sparo potrà essere eseguito solo
quando nessuno si trovi in una posizione pericolosa nell’intorno dell’area di
lavoro dell’operatore. Una volta eseguito lo sparo rilasciare l’apparecchio,
l’operatore dovrà essere conscio che subirà un inevitabile rinculo.
Non posizionare mai le mani sulla parte terminale dell’apparecchio da cui
fuoriescono i chiodi.
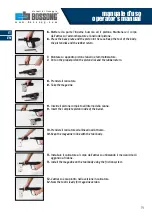
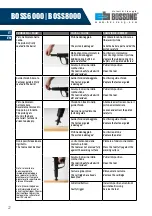
4. Once loaded, the tool is ready to shoot. Place the muzzle of the fastening
tool against the work surface at a right angle (perpendicularly to the work
surface). Keep it balanced. The worker should position himself behind the
tool, in range with the axis of the tool guide. The assistance personnel should
be behind the worker. Push the tool completely against the surface and pull
the trigger. Please shoot only if no one is in a dangerous position around or
inside the working area. After the shot release the tool; the worker will be
aware of the fact that it will inevitably recoil. Never put your hand over the
muzzle.
5.
La potenza dell’attrezzo può essere regolata in funzione del lavoro da
eseguire.
5. The power of the tool can be adjusting in function of the fixing to make.
6.
È tassativamente proibito lasciare le cartucce ed i chiodi all’interno
dell’attrezzo a lavoro finito. Rimuoverli a lavoro finito. Per rimuovere gli
ultimi 3 chiodi dal caricatore, è necessario utilizzare la chiave a brugola M3
in dotazione - vedi disegno.
6. It is strictly forbidden to leave cartridges and nail inside the tool once the
work is finished. Remove the cartridges and nail from the tool after the work.
To remove the last 3 nails from the magazine, you must use the supplied key
M3 - see drawing.


