background image

Please read and save these instructions. Read carefully before attempting to assemble, install, operate or maintain the product described. 
Protect yourself and others by observing all safety information. Failure to comply with instructions could result in personal injury and/or 
property damage! Retain instructions for future reference.

See Warranty on page 8 for important information about commercial use of this product.

Operating Instructions   

SB303000

REMINDER: Keep your dated proof of purchase for warranty purposes! 

Attach it to this manual or file it for safekeeping.

IN724801AV 7/09

© 2009 Campbell Hausfeld/Scott Fetzer

Campbell Hausfeld Nailers meet or exceed Industries’ Standards as set forth by the American 
National Standard Institute/International Staple, Nail and Tool Association in ANSI/ISANTA 
SNT-101-2002. 

For parts, product & service information

visit 

www.chpower.com

Table of Contents

Description  . . . . . . . . . . . . . . . . . . . . . .1
Unpacking . . . . . . . . . . . . . . . . . . . . . . .1
Safety Guidelines  . . . . . . . . . . . . . . . . .1
Important Safety Instructions  . . . . . . .1
Tool Components and 
Specifications. . . . . . . . . . . . . . . . . . . . .2
Operating Instructions  . . . . . . . . . . . . .4
   Lubrication . . . . . . . . . . . . . . . . . . . . .4
   Recommended Hookup. . . . . . . . . . .5
   Operational Mode . . . . . . . . . . . . . . .5
   Work Contact Element (WCE) . . . . . .5
   Loading/Unloading The Tool. . . . . . .6
   Adjusting the Fastener 
   Penetration. . . . . . . . . . . . . . . . . . . . .6
   Adjusting the Direction 
   of the Exhaust  . . . . . . . . . . . . . . . . . .6
User-Maintenance Instructions  . . . . . .6
   Clearing A Jam From The Tool  . . . . .6
   Technical Service  . . . . . . . . . . . . . . . .6
   Fastener And Replacement Parts  . . .6
   Tool Repair . . . . . . . . . . . . . . . . . . . . .6
   Assembly Procedure For Seals . . . . . .6
Fasteners  . . . . . . . . . . . . . . . . . . . . . . . .7
Troubleshooting Chart . . . . . . . . . . . . .7
Warranty  . . . . . . . . . . . . . . . . . . . . . . . .8

Description

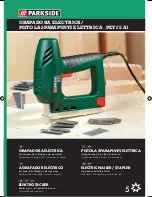
This tool is designed for decorative 
trim, molding, window casings, 
furniture trim, picture frame assembly, 
cabinetry, casebacks, and crafts. 
Features include: convenient top 
loading magazine which holds up to 
100 brads or staples, adjustable depth 
control, adjustable exhaust.

Unpacking

 After unpacking the unit, inspect 
carefully for any damage that may 
have occurred during transit. Make sure 
to tighten fittings, bolts, etc., before 
putting unit into service.

Model SB303000

Safety Guidelines

This manual contains information 
that is very important to know and 
understand. This information is 
provided for SAFETY and to PREVENT 
EQUIPMENT PROBLEMS. To help 
recognize this information, observe the 
following symbols.

 Danger 

indicates

 an imminently 

hazardous situation which, if not 
avoided, WILL result in death or serious 
injury.

 Warning 

indicates

 a potentially 

hazardous situation which, if not 
avoided, COULD result in death or 
serious injury.

 Caution 

indicates


 a potentially 

hazardous situation which, if not 
avoided, MAY result in minor or 
moderate injury.

 Notice 

indicates

 important 

information, that if not followed, may 
cause damage to equipment.

NOTE:

 Information that requires special 

attention.

Important Safety Instructions

INSTRUCTIONS PERTAINING TO A 
RISK OF FIRE, ELECTRIC SHOCK, OR 
INJURY TO PERSONS

This manual contains safety, operational 
and maintenance information. Contact 
your Campbell Hausfeld representative 
if you have any questions.


When using tools, 

 basic 

precautions 

should always be followed, including 
the following:

Locate model and date code on 
tool magazine and / or body, and 
record below:

Model No.: _____________________

Date Code: _____________________

Retain these numbers for

future reference.

CALIFORNIA PROPOSITION 65


This product or 

  its power cord may 

contain chemicals known to the State 
of California to cause cancer and birth 
defects or other reproductive harm. 
Wash hands after handling.

 
You can create dust when 
you cut, sand, drill or grind 
materials such as wood, 
paint, metal, concrete, cement, or other 
masonry. This dust often contains 
chemicals known to cause cancer, birth 
defects, or other reproductive harm. 
Wear protective gear.

2-in-1  Nailer / Stapler

Summary of Contents for IN724801AV

Page 1: ...stable exhaust Unpacking After unpacking the unit inspect carefully for any damage that may have occurred during transit Make sure to tighten fittings bolts etc before putting unit into service Model SB303000 Safety Guidelines This manual contains information that is very important to know and understand This information is provided for SAFETY and to PREVENT EQUIPMENT PROBLEMS To help recognize th...

Page 2: ...RK AREA a Keep the work area clean and well lighted Cluttered benches and dark areas increase the risks of electric shock fire and injury to persons b Do not operate the tool in explosive atmospheres such as in the presence of flammable liquids gases or dust The tool is able to create sparks resulting in the ignition of the dust or fumes c Keep bystanders children and visitors away while operating...

Page 3: ...e tool to the air supply with the switch on d Do not overreach Keep proper footing and balance at all times Proper footing and balance enables better control of the tool in unexpected situations e Use safety equipment A dust mask non skid safety shoes and a hard hat must be used for the applicable conditions f Always wear eye protection g Always wear hearing protection when using the tool Prolonge...

Page 4: ...on from the pusher before attempting to clear jams because fasteners can be ejected from the front of the tool Personal injury may occur AIR SOURCE a Never connect to an air source that is capable of exceeding 200 psi Over pressurizing the tool is able to result in bursting abnormal operation breakage of the tool or serious injury to persons Use only clean dry regulated compressed air at the rated...

Page 5: ...t the tool before another nail can be driven WORK CONTACT ELEMENT WCE Check the operation of the Work Contact Element WCE trip mechanism before each use The WCE must move freely without binding through its entire travel distance The WCE spring must return the WCE to its fully extended position after being depressed Do not operate the nailer if the WCE trip mechanism is not operating properly Perso...

Page 6: ...ist the deflector to any direction desired User Maintenance Instructions CLEARING A JAM FROM THE TOOL 1 Disconnect the air supply from the tool 2 Remove all fasteners from the magazine see Loading Unloading Failure to do so will cause the nails to eject from the front of the tool 3 Loosen cap screws on nose of tool Slide nose downward and remove from tool to expose jammed fastener 4 Reinstall nose...

Page 7: ...eplace bumper Air leaking between housing and cap 1 Loose screws 1 Tighten screws 2 Damaged seal 2 Replace seal Tool skips driving fastener 1 Worn bumper 1 Replace bumper 2 Dirt in nose piece 2 Clean drive channel 3 Dirt or damage prevent fasteners or pusher from moving freely in magazine 3 Clean magazine 4 Damaged pusher spring 4 Replace spring 5 Inadequate air flow to tool 5 Check fitting hose o...

Page 8: ...glect or failure to operate products in accordance with instructions shall also include the removal or alteration of any safety devices If such safety devices are removed or altered this warranty is void D Normal adjustments which are explained in the owner s manual s provided with the product E Items or service that are normally required to maintain the product i e o rings springs bumpers debris ...

Page 9: ...ages en transit S assurer de resserrer tous les raccords boulons etc avant de le mettre en service Directives de Sécurité Ce manuel contient de l information très importante qui est fournie pour la SÉCURITÉ et pour ÉVITER LES PROBLÈMES D ÉQUIPEMENT Rechercher les symboles suivants pour cette information Danger indique une situation dangereuse imminente qui MÈNERA à la mort ou à des blessures grave...

Page 10: ...n éclairée Les établis encombrés et les coins sombres augmentent les risques de chocs électriques d incendie et de blessures aux personnes b Ne pas faire fonctionner l outil dans une atmosphère explosive comme en présence de liquides gaz ou poussières inflammables L outil peut produire des étincelles menant à une inflammation de poussières ou de fumées c Garder les spectateurs les enfants et les v...

Page 11: ...l alimentation d air Ne pas transporter l outil avec le doigt sur l interrupteur ni brancher l outil à l alimentation d air avec l interrupteur en marche d Ne pas trop se pencher Garder bon pied et bon équilibre en tout temps Ceci permet d avoir un meilleur contrôle de l outil dans les situations imprévues e Utiliser l équipement de sécurité Il faut utiliser un masque antipoussières des souliers d...

Page 12: ...bord obtenir une approbation écrite de Campbell Hausfeld N utilisez pas d outil si les écrans ou protecteurs ont été enlevés ou altérés Ne pas utiliser l outil comme marteau Cela peut entraîner des blessures ou endommager l appareil Pour éviter l expulsion d une attache débrancher la source d air et relâcher la tension du poussoir avant de procéder au déblocage Sinon il y a risque de blessures SOU...

Page 13: ...ISME DE DÉCLENCHEMENT PAR CONTACT WCE Vérifier le fonctionnement du mécanisme de déclenchement par contact WCE avant chaque usage Le WCE doit fonctionner avec un mouvement libre sans restrictions Le ressort WCE doit se retourner au WCE à sa position complètement allongée après le surbaissement Ne pas faire fonctionner la cloueuse si le mécanisme de déclenchement WCE ne fonctionne pas correctement ...

Page 14: ...de la source d air 2 Retirer tous les clous du chargeur Voir Déchargement Chargement de la cloueuse Si cette précaution n est pas prise l éjection accidentelle de clous peut se produire lorsque l on démonte le nez de l appareil 3 Oter les 3 vis à tête cylindrique du nez de l appareil et déposer la plaque de garniture la plaque d espacement et le mécanisme de déclenchement par contact WCE afin que ...

Page 15: ...La cloueuse saute un clou pendant l expulsion 1 Amortisseur usé 1 Remplacer l amortisseur 2 Saleté dans la pièce du nez 2 Nettoyer la rainure du chassoir 3 Saleté ou dommage qui empêche le fonctionnement libre des clous ou du poussoir dans le chargeur 3 Nettoyer le chargeur 4 Ressort de poussoir endommagé 4 Remplacer le ressort 5 Circulation d air insuffisante à la cloueuse 5 Inspecter le raccord ...

Page 16: ...ctionner les produits selon les instructions comprend aussi l enlevage ou la modification de n importe quel appareil de sûreté Si ces appareils de sûreté sont enlevés ou modifiés la garantie sera annulée D Réglages normaux qui sont expliqués dans le s manuel s d utilisation accompagnant le produit E Articles ou services qui sont exigés pour l entretien du produit Joints torique ressorts amortisseu...

Page 17: ...mpacar este producto revíselo con cuidado para cerciorarse de que esté en perfecto estado Cericiórese de apretar todas las conexiones pernos etc antes de comenzar a utilizar la unidad Medidas de Seguridad Este manual contiene información que es muy importante que sepa y comprenda Esta información se la suministramos como medida de SEGURIDAD y para EVITAR PROBLEMAS CON EL EQUIPO Debe reconocer los ...

Page 18: ...n iluminada Los bancos desordenados y las áreas oscuras aumentan el riesgo de choque eléctrico incendio y lesiones personales b No haga funcionar la herramienta en entornos explosivos como por ejemplo cuando haya polvo líquidos o gases inflamables La herramienta puede crear chispas y provocar la ignición de polvo o vapores c Mantenga alejados a los observadores niños y visitantes mientras hace fun...

Page 19: ...herramienta correcta hará el trabajo mejor y en forma más segura a la velocidad para la cual fue diseñada c No use la herramienta si el interruptor no la enciende o no la apaga Cualquier herramienta que no pueda ser controlada con el interruptor es peligrosa y debe repararse d Desconecte la herramienta del suministro de aire antes de hacer cualquier ajuste realizar el mantenimiento de la herramien...

Page 20: ...No haga ninguna modificación a la herramienta sin obtener primero la aprobación por escrito de Husky No use la herramienta si le faltan alguna de las tapas protec toras o si éstas han sido modifi cadas No use la herramienta como un martillo Se pueden producir lesiones personales o daños a la herramienta Desconecte la fuente de suministro de aire y elimine la tensión del disparador antes de tratar ...

Page 21: ...olocada en la posición de seguro sólo un jalón del gatillo puede disparar un sujetador Después de comprobar de que no hayan sujetadores en la herramienta verifique la seguridad del funcionamiento de la traba del gatillo activada para prevenir que la herramienta dispare un sujetador antes de guardarla Desconecte siempre la herramienta del aire comprimido cuando no esté en uso ELEMENTO DE CONTACTO C...

Page 22: ...irección deseada INSTRUCCIONES DE USO Y MANTENIMIENTO CÓMO DESOBSTRUIR LA HERRAMIENTA 1 Desconecte la herramienta de la fuente de suministro de aire 2 Remueva todos los clavos del depósito vea Para Cargar Descargar la Clavadora De lo contrario hará que los clavos se expulsen desde la parte delantera de la clavadora cuando se remueve el conjunto de la boca 3 Remueva 3 tornillos de cabeza de la boca...

Page 23: ... 1 Debe reemplazar la defensa 2 La boquilla está sucia 2 Debe limpiar el canal del sistema de impulso 3 La suciedad o daños evitan el desplazamiento libre de los sujetadores o el mecanismo de impulso en el cargador 3 Debe limpiar el cargador 4 El resorte del mecanismo de impulso está dañado 4 Debe reemplazar el resorte 5 El flujo de aire hacia la herramienta es inadecuado 5 Chequée las conexiones ...

Page 24: ...ir la desconexión o modificación de los instrumentos de seguridad Si dichos instrumentos de seguridad son desconectados la garantía quedaría cancelada D Los ajustes normales explicados en el los manual es suministrado s con el producto E Artículos o servicios normalmente requeridos para el mantenimiento del producto tales como anillos en O resortes amortiguadores defensas hojas de impulsor fusible...

Reviews: