MIC Series IP Power Supply
Installation | en
13
Bosch Security Systems, Inc.
User Manual
F.01U.265.804 | 1.6 | 2012.08
3.2
Dimensions and Layout of MIC IP Power Supplies
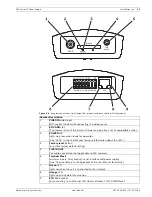
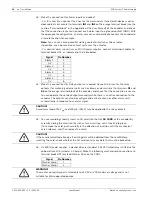
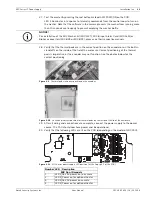
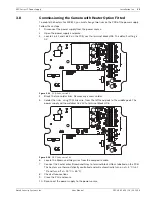
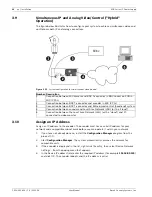
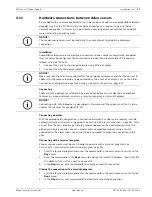
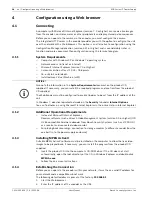
The figures below display the dimensions and the layout of the enclosures of the MIC IP PSUs.
Figure 3.1
Layout of MIC IP PSU (Model numbers: MIC-IP-PS-115, MIC-IP-PS-230, MIC-IP-PS-24)
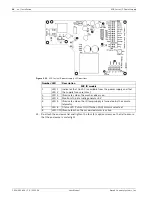
Figure 3.2
Layout of MIC IP IR PSU (Model numbers: MIC-IPIR-PS-115, MIC-IPIR-PS-230, MIC-IPIR-PS-24)
Number Description
1
Two (2) metal stand-offs for fiber optic module (module sold separately)
2
Transformer
3
Encoder
4
Power board for encoder
5
Main PCB (Different configuration for IR and non-IR models)
6
Blanking plug over hole in enclosure for power cable
7
Cable gland for RJ45 / Fiber cable
8
Cable gland for optional washer drive
9
Cable gland for composite cable (analog connection)
10
For non-thermal cameras: Blanking plug over hole for optional cable gland for alarms
For thermal cameras: Blanking plug over hole for output for optional switch video
11
Hole for lid screw
12
Hole for mounting screw
13
Slot for SD card (card is user-supplied)
14
Thermal pads between encoder and inside of lid of enclosure
(13 in.)
330 mm
(7.87 in.)
200 mm
(9.84 in.)
250 mm
(12.2 in.)
310 mm
(13 in.)
330 mm
(7.87 in.)
200 mm
(9.84 in.)
250 mm
(12.2 in.)
310 mm


