background image

MIC Series IP Power Supply

 Configuration using a Web browser | en

61

Bosch Security Systems, Inc.

User Manual

F.01U.265.804 | 1.6 | 2012.08

Settings for selected recordings

The settings in this settings group only refer to the recordings selected in the list field. You 

can select both recordings.

Recording includes

You can specify whether, in addition to video data, metadata (for example alarms, VCA data 

and serial data) should also be recorded. Including metadata could make subsequent 

searches of recordings easier but it requires additional memory capacity.

Standard recording

Here you can select the mode for standard recordings. 

If you select Continuous, the recording proceeds continuously. If the maximum memory 

capacity is reached, older recordings will automatically be overwritten. If you select the Pre-

alarm option, the unit uses a special recording mode for optimal usage of storage capacity: As 

soon as a time window for alarm recording begins, recording takes place continuously on one 

segment that corresponds in size to a complete alarm sequence (pre- and post-alarm time).

This segment functions in a similar manner to a ring buffer and is overwritten until an alarm is 

actually triggered. Then, recording occurs on the segment only for the duration of the preset 

post-alarm time and a new segment is subsequently used in the same manner.

If you select Off, no automatic recording takes place.

Stream

Here you can select the data stream that is to be used for standard recordings. You can select 

the data stream for alarm recordings separately and independently of this (see 

Section Alarm 

stream, page 61

).

Pre-alarm time

You can select the required pre-alarm time from the list field. This parameter is only 

accessible if you have selected the Pre-alarm option under Standard recording.

Post-alarm time

You can select the required post-alarm time from the list field.

Alarm stream

Here you can select the data stream that is to be used for alarm recordings. You can select the 

data stream for standard recordings separately and independently of this (see 

Section Stream, page 61

).

encoding interval and bit rates from profile:

You can select an alternative encoding interval for the data stream for alarm recordings. 

Otherwise the encoding interval of the selected encoder profile is used (see 

Section 4.20 Encoder Profile, page 44

).

CAUTION! 

Without metadata, it is not possible to include video content analysis in recordings.

CAUTION! 

You can specify limitations for overwriting older recordings in Continuous mode by 

configuring the retention time (see 

Section 4.34 Retention Time, page 62

).

Summary of Contents for MIC IP PSU

Page 1: ...MIC Series IP Power Supply MIC IP PSU en User Manual ...

Page 2: ......

Page 3: ...5 3 6 Fuse Ratings 16 3 7 Installation Instructions 17 3 8 Commissioning the Camera with Heater Option Fitted 25 3 9 Simultaneous IP and Analog Video Control Hybrid Operation 26 3 10 Assign an IP Address 26 3 11 Hardware connections between video servers 27 4 Configuration using a Web browser 28 4 1 Connecting 28 4 1 1 System Requirements 28 4 1 2 Additional Operational Requirements 28 4 1 3 Insta...

Page 4: ...31 Advanced Mode Recording 57 4 32 Storage Management 57 4 33 Recording Profiles 60 4 34 Retention Time 62 4 35 Recording Scheduler 63 4 36 Recording Status 64 4 37 Advanced Mode Alarm 65 4 38 Alarm Connections 65 4 39 VCA 67 4 40 Alarm E Mail 71 4 41 Alarm Task Editor 72 4 42 Advanced Mode Network 73 4 43 Network Access 73 4 44 Advanced 75 4 45 Multicast 77 4 46 FTP Posting 79 4 47 IPv4 Filter 80...

Page 5: ...ers 90 6 Maintenance and upgrades 91 6 1 Testing the network connection 91 6 2 Unit reset 91 6 3 Troubleshooting 91 6 4 General malfunctions 92 6 5 Fiber Optic Module 93 6 6 Malfunctions with iSCSI connections 94 6 7 LEDs 94 6 8 Processor load 94 6 9 Network connection 94 6 10 Terminal block 95 6 11 Communication with terminal program 95 6 12 Transfer and disposal 97 6 13 Repairs 97 6 14 Copyright...

Page 6: ...es used in this document are likely to be registered trademarks and must be treated accordingly Notice of Regulatory Compliance This product complies with the following EC directives EMC Directive 89 336 EC as amended LV Directive 73 23 EC RoHS Restriction of Hazardous Substances 2002 95 ECEMC CISPRA B and CTIC DANGER This symbol indicates an imminently hazardous situation such as Dangerous Voltag...

Page 7: ...pt to service this unit yourself Opening or removing covers may expose you to dangerous voltage or other hazards Refer all servicing to qualified service personnel If any of the following conditions occur unplug the unit from the main AC power source and refer servicing to qualified service personnel the power supply cord or plug is damaged exposure to moisture water and or inclement weather rain ...

Page 8: ... harmful interference in a residential installation This equipment generates uses and can radiate radio frequency energy and if not installed and used in accordance with the instructions may cause harmful interference to radio communications However there is no guarantee that interference will not occur in a particular installation If this equipment does cause harmful interference to radio or tele...

Page 9: ...trice Éloigner l appareil du récepteur Brancher l appareil sur une prise située sur un circuit différent de celui du récepteur Consulter le revendeur ou un technicien qualifié en radio télévision pour obtenir de l aide Toute modification apportée au produit non expressément approuvée par la partie responsable de l appareil est strictement interdite Une telle modification est susceptible d entraîne...

Page 10: ...nt encoding the data rate remains low even with high image quality and can also be adapted to local conditions within wide limits Audio encoding The encoder uses the G 711 and L16 audio compression standards G 711 is the default setting both for live transmission and recording When configuring with a Web browser you can select L16 for recording Using video management systems L16 is also available ...

Page 11: ... 2 Summary of Functions The encoder provides the following main functions Video and data transmission over IP data networks Dual Streaming function for the encoder for simultaneous encoding with two individually definable profiles Multicast function for simultaneous image transmission to multiple receivers One analog BNC composite video input PAL NTSC 75 ohm Video encoding to international standar...

Page 12: ...le glands for telemetry and ancillary equipment One 1 M16 gland for connection of RJ45 or Fiber cable One 1 1 2 in NPT cable gland for connection of the shielded composite cable to the MIC camera One 1 1 2 in NPT cable gland for the power cable connection One 1 1 2 in NPT and one 1 M12 blanking plug 3 1 1 User Supplied Parts Installers must provide the following parts to complete installation of a...

Page 13: ...2 Transformer 3 Encoder 4 Power board for encoder 5 Main PCB Different configuration for IR and non IR models 6 Blanking plug over hole in enclosure for power cable 7 Cable gland for RJ45 Fiber cable 8 Cable gland for optional washer drive 9 Cable gland for composite cable analog connection 10 For non thermal cameras Blanking plug over hole for optional cable gland for alarms For thermal cameras B...

Page 14: ...B Description Function of Connection Terminal Type of Connection Terminal 1 HD1 AC Power input Screw terminal 2 HD3 Shielded composite cable analog connections to camera Screw terminal 3 HD5 RS 485 control Screw terminal 4 HD4 USB to RS 485 converter Molex connector 5 HD8 NOT USED Molex connector 6 HD6 Optional Auxiliary heater Screw terminal 7 HD7 Video composite cable Screw terminal 8 HD2 Tamper...

Page 15: ... copper connected systems where all of the copper video coaxes are taken back to the control room to be connected to a central earth point If fiber optics or other indirect connections are used to get data and video to and from the control room then the Earth Link should be left intact as long as it is the only camera end earth reference point Number Connection Terminal ID Description Function of ...

Page 16: ...s anti surge T FS2 Primary protection Glass normal 250V 0 5A 5x20mm normal 250V 0 8A 5x20mm 2 5 A quick blow FS3 Heater protection 1 Glass 1 6 A anti surge T 1 6 A glass anti surge T 1 6 A glass anti surge T FS5 Heater protection 2 Glass 1 6 A anti surge T 1 6 A glass anti surge T 1 6 A glass anti surge T Fuse ID Fuse Function Type Ratings for 240 V Primary Ratings for 115 V Primary Ratings for 24...

Page 17: ...l block HD1 Only suitably qualified persons should remove this shield and connect the mains power cable The shield MUST be re installed and fully secured before connecting the power The power supply cable shall have conductors of a maximum size of 12 AWG Branch circuit protection is required A readily accessible 2 pole disconnect device with a contact separation of at least 3mm must be incorporate...

Page 18: ... not stretch or cut or otherwise disturb the earth core cable to the inside of the lid and to the earth termination post See Figure 3 6 Note the position of the thermal pads They should be sticking onto either the built in stand offs on the inside of the lid of the enclosure or onto designated spots on the encoder If the pads are not positioned correctly they can cause the encoder to stop function...

Page 19: ...opper washer Secure with the brass nut 16 Replace the internal shield taking care to avoid pinching the cables Tighten the screws If connecting a heater MIC612 only see Section 3 8 Commissioning the Camera with Heater Option Fitted 17 On non IR models only If necessary connect a tamper switch to terminal block HD2 18 If simultaneous video IP and analog PAL or NTSC is desired follow these steps a D...

Page 20: ...he hole for the bottom left M12 cable gland item 3 Figure 3 7 Attach the supplied M12 gland Make the appropriate connections to plug in terminal CN2 20 Through the top right hole item 2 Figure 3 7 of the enclosure install conduit necessary to protect standard UTP category 5 cable Note You may need to remove the cable gland first 21 Feed the category 5 cable through the conduit and into the enclosu...

Page 21: ...ds 3 POWER LED lights up green when ready for operation See LEDs in the User Manual for more information about the LEDs 4 Factory reset button to restore factory default settings 5 LINE IN OUT For audio connection not applicable to MIC cameras 6 Terminal Block for alarm inputs relay outputs serial interface and power supply See Terminal block in the Appendix of the User Manual for details 7 Green ...

Page 22: ...oder and check that the connection is secure You can operate these relay outputs manually while there is an active connection to the encoder The outputs can also be configured to activate sirens or other alarm units automatically in response to an alarm signal 25 To save recordings locally insert an SD card into the slot SD CARD of the encoder by carefully sliding the card into the slot as far as ...

Page 23: ...n See the photos below for the correct positioning Figure 3 9 Thermal pads in correct position on the encoder Figure 3 10 Location of correct position for thermal pads on the inside of the lid of the enclosure 29 After all wiring and connections are complete connect the power supply to the power source The PSU should now have power and be operational 30 Verify that the following LEDs are lit on th...

Page 24: ... enclosure is watertight Number LED Description MIC IR models 1 LED 1 LED 2 Indicates that 18 VAC is available from the power supply and that the supply fuses are intact 2 LED 3 Illuminates when the washer drive is on 3 LED 4 Monitors the internally generate 5 V 4 LED 5 Illuminates when the IR lamp supply is turned on by the camera telemetry 5 LED 6 Status LED Pulses On Off when Multi Alarm is sel...

Page 25: ...t setting is 0V Figure 3 13 PCB links set to 0V 4 Break the two solder links Remove any excess solder 5 Solder the links using TCW link wire from the left hand pads to the middle pads The power supply will now deliver 18 VAC to terminal block HD6 Figure 3 14 PBC links set to 18V 6 Locate the Brown and Grey wires from the composite cable 7 Connect the heater wires Brown and Grey to terminal block H...

Page 26: ...nager program from the product CD 2 Start Configuration Manager The system automatically searches the network for compatible units 3 If the encoder is displayed in the list right click the entry then select Device Network Settings from the popup menu that appears 4 In the Device IP address field enter the required IP address for example 192 168 0 100 and click OK The encoder reboots and the IP add...

Page 27: ... appears on the connected monitor This option can also be used to connect a sender and a compatible receiver using a switch connected to the alarm input You do not need a computer to make the connection in this case Connecting with a terminal program Various requirements must be met in order to operate with a terminal program see Section 6 11 Communication with terminal program page 95 1 Start the...

Page 28: ...ible hardware decoder from Bosch Security Systems such as VIP XD HD as a receiver and connected video monitor For playing back recordings connection to storage medium a different encoder from the one built in to the power supply enclosure 4 1 3 Installing MPEG ActiveX Suitable MPEG ActiveX software must be installed on the computer to allow the live video images to be played back If necessary you ...

Page 29: ...rresponding message and prompts you to enter the password when you attempt to access protected areas 1 Enter the user name and associated password in the corresponding text fields 2 Click OK If the password is entered correctly the Web browser displays the page that was called up Protected network If a RADIUS server is employed in the network for managing access rights 802 1x authentication the en...

Page 30: ...eration Advanced Mode is recommended for expert users or system support personnel You can access all device parameters in this mode Settings that affect the fundamental functionality of the device such as firmware updates can only be altered in Advanced Mode All parameter groups are described in this chapter in the order in which they are listed in the configuration menu from the top of the screen...

Page 31: ...easier to identify The name makes the task of administering multiple units in larger video monitoring systems easier for example using the Bosch Video Management System The camera name is used for the remote identification of a unit in the event of an alarm for example For this reason enter a name that makes it as easy as possible to quickly identify the location Password The encoder is generally ...

Page 32: ...ping mistakes 4 4 Basic Mode Date Time Device date Device time Device time zone If there are multiple devices operating in your system or network it is important to synchronize their internal clocks For example it is only possible to identify and correctly evaluate simultaneous recordings when all units are operating on the same time If necessary you can synchronize the unit with your computer s s...

Page 33: ... DHCP If a DHCP server is employed in the network for the dynamic assignment of IP addresses you can activate acceptance of IP addresses automatically assigned to the encoder Certain applications for example Bosch Video Management System use the IP address for the unique assignment of the unit If you use these applications the DHCP server must support the fixed assignment between IP address and MA...

Page 34: ...e encoder profiles High resolution 1 High quality for connections with the highest bandwidth resolution 704 576 480 pixels High resolution 2 High quality for high bandwidth connections resolution 704 576 480 pixels Low bandwidth High resolution for low bandwidth connections resolution 704 576 480 pixels DSL For DSL connections with 500 kbps resolution 704 576 480 pixels ISDN 2B For ISDN connection...

Page 35: ...ode System Overview The data on this page are for information purposes only and cannot be changed Keep a record of these numbers in case technical assistance is required NOTICE You can select all required text on this page with the mouse and copy it to the clipboard with the Ctrl C key combination for example if you want to send it via e mail ...

Page 36: ...aracter is inserted into the Result field 3 In the character map click the and icons to move between the different pages of the table or select a page from the list field 4 Click the icon to the right of the Result field to delete the last character or click the X icon to delete all characters 5 Now click the OK button to apply the selected characters to the second line of the Camera 1 parameters ...

Page 37: ...e It can only be used to view the live video image and switch between the different live image displays You can define and change a password for each authorization level if you are logged in as service or if the unit is not password protected Enter the password for the appropriate authorization level here The maximum password text length is 19 characters Confirm password In each case enter the new...

Page 38: ...ylight saving time DST The unit already contains the data for DST switch overs up to the year 2018 You can use these data or create alternative time saving data if required 1 First check whether the correct time zone is selected If it is not correct select the appropriate time zone for the system and click the Set button 2 Click the Details button A new window will open and you will see the empty ...

Page 39: ...4 12 Display Stamping Various overlays or stamps in the video image provide important supplementary information These overlays can be enabled individually and are arranged on the image in a clear manner Camera name stamping This field sets the position of the camera name overlay It can be displayed at the Top at the Bottom or at a position of your choice that you can then specify using the Custom ...

Page 40: ... message Enter the message to be displayed in the image in the event of an alarm The maximum text length is 31 characters Video watermarking Choose On if you wish the transmitted video images to be watermarked After activation all images are marked with an icon The icon indicates if the sequence live or saved has been manipulated see Section Display stamping page 85 4 13 Advanced Mode Web Interfac...

Page 41: ...u can adapt the LIVEPAGE functions to your requirements You can choose from a variety of different options for displaying information and controls 1 Check the box for the items that are to be made available on the LIVEPAGE The selected items are indicated by a check mark 2 Check whether the required functions are available on the LIVEPAGE Lease time s The lease time in seconds determines the time ...

Page 42: ... a field next to the video image and provide information about establishing and ending connections for example Allow snapshots Here you can specify whether the icon for saving individual images should be displayed below the live image Individual images can only be saved if this icon is visible Allow local recording Here you can specify whether the icon for saving video sequences on the local memor...

Page 43: ...he terminating resistance must be deactivated for the video signal to be looped through Every video input is closed at the time of delivery 75 Ohm termination Select Off if the video signal is to be looped through 4 18 Advanced Mode Encoder 4 19 Picture Settings You can set the video image of the camera to suit your requirements The current video image is displayed in the small window next to the ...

Page 44: ...ndicator that appears at the top of the window near the manufacturer s logo see Section 6 8 Processor load page 94 4 20 Encoder Profile You can change the names and individual parameter values for the encoder profiles You can use this to adapt the video data transmission to the operating environment for example network structure bandwidth data load Pre programmed profiles are available each giving...

Page 45: ...ny circumstances Depending on the video quality settings for the I and P frames this fact can result in individual images being skipped The value entered here must be at least 10 higher than the value entered in the Target bit rate field If the value entered here is too low it will automatically be adjusted Encoding interval The setting selected here determines the interval at which images are enc...

Page 46: ...rvals in which the I frames will be coded With the Auto setting the encoder inserts I frames as necessary An entry of 3 indicates that only every third image is an I frame the frames in between are coded as P frames Note that if you have selected IBP as GOP structure only even values are supported If you have selected IBBP as GOP structure only 3 or multiples of 3 are supported as value Min P fram...

Page 47: ...this setting when using hardware decoders or the Divar XF digital video recorder The bit rate is limited to 1 2 Mbps CABAC off CAVLC on GOP structure IP I frame distance 15 Deblocking filter on H 264 MP SD Select this setting when using software decoders PTZ and for rapid movements in the images CABAC on CAVLC off GOP structure IP I frame distance 30 Deblocking filter on 1 Select the required enco...

Page 48: ...ixel Counter Counts the number of pixels in a defined image area The pixel counter allows the installer toeasily verify that the camera installation fulfills any regulatory or specific customerrequirements for example calculating the pixel resolution of the face of a person passing adoorway monitored by the camera 4 23 Advanced Mode Camera 4 24 Camera Options Camera options are sorted into Setting...

Page 49: ...um gain level type a value between 1 and 6 The default setting is 4 Sharpness Adjusts the sharpness of the picture To set the sharpness type a value between 1 and 15 inclusive The default setting is 12 Settings Group 2 has the following settings Shutter Mode Off turns the Auto SensUP Off AutoSensUp increases camera sensitivity by increasing the integration time on the camera This is accomplished b...

Page 50: ... extreme high contrast environments Select from Off On or Auto Mode Settings Group 4 has the following settings Wiper Controls the wiper of the MIC cameras Options are CONTINUOUS Wiper wipes continuously until deactivated manually or by the five minute timeout built in to the system INTERMITTENT Wipes twice then turns off after 15 seconds ONE SHOT Wipes five times then turns off WASH WIPE Wiper wa...

Page 51: ...ols how fast the Iris will be Focus Speed Controls how fast the Auto focus will readjust when the focus becomes blurred Select from the following options Super Slow Slow default Medium Fast Maximum Zoom Speed Controls the zoom speed The default setting is Medium Settings Group 2 has the following settings Digital Zoom Digital zoom is a method of decreasing narrowing the apparent angle of view of a...

Page 52: ...vity Period Determines the behavior of the camera when the control for camera is inactive Select a time period from the pull down list 3 sec 10 min The default setting is 2 minutes Auto Pivot The Auto Pivot tilts the camera through the vertical position as the camera is rotated to maintain the correct orientation of the image Set the Auto Pivot to On default to rotate the camera 180º automatically...

Page 53: ...itle The title of the sector Blanking Select On to activate sector blanking Select Off to deactivate sector blanking Settings Group 3 has the following settings Custom Tour Period Select the amount of time that the custom tour should run Options are 3s 4s 5s default 10s 15s 20s 25s 30s 40s 50s 1 min 2 min 3 min 4 min 5 min 10 min Added Scenes This column displays the list of added scenes To reorde...

Page 54: ...Bosch Security Systems Inc 4 28 Alarm 4 28 1 Input Options Type Select the name of the alarm input Alarm input Select N O if the alarm is to be triggered when the contact closes Select N C if the alarm is to be triggered when the contact opens 4 28 2 Output Options Type Select the name of the alarm output ...

Page 55: ...ecify one input from either a physical connection a motion detection trigger or from a connection to the camera s Livepage The physical input connection can be activated by dry contact devices such as pressure pads door contacts and similar devices Next specify up to two 2 rule outputs or the camera s response to the input Outputs include a physical alarm relay an AUX command or a preposition scen...

Page 56: ...ining commands is scheduled for a future release Shot defines a preset scene from shot 1 99 Transmit Transmits a message back to the head end available with RS 232 serial and Bilinx connections 5 Select the Output period which controls the length of time the output relay is activated Follow Alarm output will remain activated for the same amount of time the alarm input is activated Latched Alarm st...

Page 57: ...g information populates the Logs window 2 Click Save 3 Navigate to the directory in which you want to store the log information 4 Type a name for the log file and click Save 4 31 Advanced Mode Recording 4 32 Storage Management You can record the images from the camera connected to the encoder on the local SD card or on an appropriately configured iSCSI system SD cards are the ideal solution for sh...

Page 58: ... corresponding logical drives Local Media The supported local recording media are displayed in the Storage overview field Activating and configuring storage media The storage overview displays the available storage media You can select individual media or iSCSI drives and transfer these to the Managed storage media list You can activate the storage media in this list and configure them for storage...

Page 59: ...dings in the storage medium 4 Click OK to close the window Deactivating storage media You can deactivate any storage medium from the Managed storage media list It is then no longer used for recordings 1 Click a storage medium in the Managed storage media list to select it 2 Click the Remove button below the list The storage medium is deactivated and removed from the list CAUTION If older recording...

Page 60: ...ings button if you want to copy the currently visible settings to other profiles A new window will open and you can select the profiles in which you want to copy the settings 4 For each profile click the Set button to save the settings in the unit Stream profile settings You can select the profile setting that is to be used for each data stream in the event of recordings This selection is independ...

Page 61: ...red Then recording occurs on the segment only for the duration of the preset post alarm time and a new segment is subsequently used in the same manner If you select Off no automatic recording takes place Stream Here you can select the data stream that is to be used for standard recordings You can select the data stream for alarm recordings separately and independently of this see Section Alarm str...

Page 62: ...s If the available memory capacity of a medium has been used older recordings are only overwritten if the retention time entered here has expired Recording 1 Recording 2 Enter the required retention time in hours or days for each recording NOTICE The alarm inputs are configured and activated on the Alarm Inputs page see Section 4 28 1 Input Options page 54 The numbering of the checkboxes for the a...

Page 63: ...days to other days with dates that fall on varying weekdays 1 Click the profile you want to link in the Time periods field 2 Click in a field in the table hold down the mouse button and drag the cursor over all the periods to be assigned to the selected profile 3 Use the right mouse button to deselect any of the intervals 4 Click the Select All button to link all time intervals to the selected pro...

Page 64: ... the table and the window will close 4 The process must be repeated for deleting additional days Time periods You can change the names of the recording profiles 1 Click a profile and then the Rename button 2 Enter your chosen name and then click the Rename button again Activating the recording After completing configuration you must activate the recording scheduler and start the recording The conf...

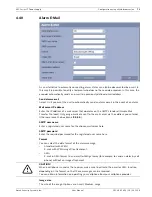
Page 65: ...as been automatically established for as long as an alarm exists on alarm input 1 Number of destination IP address Specify the numbers of the IP addresses to be contacted in the event of an alarm The unit contacts the remote stations one after the other in the numbered sequence until a connection is made Destination IP address For each number enter the corresponding IP address for the desired remo...

Page 66: ...gnal should be switched If the destination unit is unknown it is advisable to select the First available option In this case the image is placed on the first free video output This is an output on which there is no signal The connected monitor only displays images when an alarm is triggered If you select a particular video output and a split image is set for this output on the receiver you can als...

Page 67: ...lect the On option to automatically re establish a connection to one of the previously specified IP addresses after each reboot after a connection breakdown or after a network failure Audio Select the On option if you wish to additionally transmit a standalone G 711 encoded audio stream with alarm connections 4 39 VCA NOTICE Please note that the SSL encryption must be activated and configured at b...

Page 68: ...onfiguration Select one of the profiles here to activate it or edit it The Silent MOTION configuration is active by default In this configuration metadata is created to facilitate searches of recordings however no alarm is triggered You can rename the profile 1 To rename the file click the icon to the right of the list field and enter the new profile name in the field 2 Click the icon again The ne...

Page 69: ... an alarm A minimum value of 4 is recommended This value corresponds to four sensor fields Debounce time 1 s MOTION only The debounce time is intended to prevent very brief alarm events from triggering individual alarms If the Debounce time 1 s option is activated an alarm event must last at least one second to trigger an alarm Select Area MOTION only The areas of the image to be monitored by the ...

Page 70: ... sensor fields need to change to trigger an alarm With a low value it is necessary for changes to occur simultaneously in a large number of sensor fields to trigger an alarm This option allows you to detect independently of motion alarms manipulation of the orientation or location of a camera resulting from turning the camera mount bracket for instance Global change Activate this function if the g...

Page 71: ...ail Transfer Protocol Outgoing e mails are sent to the mail server via the address you entered Otherwise leave the box blank 0 0 0 0 SMTP user name Enter a registered user name for the chosen mailserver here SMTP password Enter the required password for the registered user name here Format You can select the data format of the alarm message Standard with JPEG E mail with JPEG image file attachment...

Page 72: ...by clicking the Send Now button An alarm e mail is immediately created and sent 4 41 Alarm Task Editor As an alternative to the alarm settings on the various alarm pages you can enter your desired alarm functions in script form here This will overwrite all settings and entries on the other alarm pages 1 Click the Examples link under the Alarm Task Editor field to see some script examples A new win...

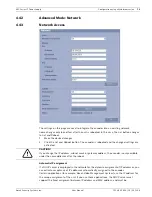
Page 73: ...e encoder is rebooted and the changed settings are activated Automatic IP assignment If a DHCP server is employed in the network for the dynamic assignment of IP addresses you can activate acceptance of IP addresses automatically assigned to the encoder Certain applications for example Bosch Video Management System use the IP address for the unique assignment of the unit If you use these applicati...

Page 74: ...addresses in a database ready for use It allows you to select the encoder via the Internet using a host name without having to know the current IP address of the unit You can enable this service here To do this you must have an account with DynDNS org and you must have registered the required host name for the unit on that site Host name Enter the host name registered on DynDNS org for the encoder...

Page 75: ...or information purposes You cannot change any of these settings 4 44 Advanced The settings on this page are used to implement advanced settings for the network Some changes only take effect after the unit is rebooted In this case the Set button changes to Set and Reboot 1 Make the desired changes 2 Click the Set and Reboot button The encoder is rebooted and the changed settings are activated ...

Page 76: ... in the network for managing access rights authentication must be activated here to allow communication with the unit The RADIUS server must also contain the corresponding data To configure the unit you must connect the encoder directly to a computer This is because communication via the network is not enabled until the Identity and Password parameters have been set and successfully authenticated ...

Page 77: ... and the Alarm Video settings Post alarm time The length of time post alarm Options range from 0s to 3h 4 45 Multicast In addition to a 1 1 connection between an encoder and a single receiver unicast the encoder can enable multiple receivers to receive the video signal from an encoder simultaneously The device either duplicates the data stream itself and then distributes it to multiple receivers M...

Page 78: ...e copying of data streams in the unit The encoder supports multi unicast connections for up to five simultaneously connected receivers Port Assign a different port to each data stream if there are simultaneous data streams at the same multicast address Enter the port address of the required stream here Streaming Click the checkbox to activate multicast streaming mode for the relevant stream An ena...

Page 79: ...Large File name You can select how file names will be created for the individual images that are transmitted Overwrite The same file name is always used and any existing file will be overwritten with the current file Increment A number from 000 to 255 is added to the file name and automatically incremented by 1 When it reaches 255 it starts again from 000 Date time suffix The date and time are aut...

Page 80: ...ation of an IPv4 filter that allows or blocks network traffic that matches a specific IP address and subnet mask IP address 1 The IP address of the network from which the network traffic is coming Mask 1 The subnet mask that corresponds to IP address 1 IP address 3 The IP address of the network to which the network traffic is going Mask 2 The subnet mask that corresponds to IP address 2 4 48 Encry...

Page 81: ... bar allows you to monitor the transfer The new firmware is unpacked and the Flash EPROM is reprogrammed The time remaining is shown in the message going to reset Reconnecting in seconds The unit reboots automatically once the upload has successfully completed If the CONNECT LED then flashes red the upload has failed and must be repeated To perform the upload you must now switch to a special page ...

Page 82: ...SL certificate To be able to work with an SSL encrypted data connection both ends of a connection must hold the relevant certificates You can upload the SSL certificate comprising one or multiple files onto the encoder If you wish to upload multiple files onto the encoder you must select them consecutively 1 Enter the full path of the file to upload or click Search to select the required file 2 Ne...

Page 83: ...2 System Overview The data on this page are for information purposes only and cannot be changed Keep a record of these numbers in case technical assistance is required NOTICE The activation key cannot be deactivated again and is not transferable to other units NOTICE You can select all required text on this page with the mouse and copy it to the clipboard with the Ctrl C key combination for exampl...

Page 84: ...s functioning correctly after installation and configuration The function test is the only way to ensure that the encoder operates as expected in the event of an alarm Your check should include the following functions Can the encoder be called up remotely Does the encoder transmit all the required data Does the encoder respond to alarm events as required Do the recordings occur as intended Is it p...

Page 85: ...amping Various overlays or stamps in the video image provide important status information The overlays provide the following information Image selection You can view the image of the camera in different displays Click one of the tabs Stream 1 Stream 2 or M JPEG below the video image to toggle between the different displays of the camera image Decoding error The frame might show artefacts due to de...

Page 86: ...r Digital I O The alarm icons Input 1 and Input 2 are for information purposes and indicate the status of an alarm input When an alarm is triggered the corresponding icon lights up blue The unit s configuration determines whether the alarm is displayed as well as additional details see Section 4 15 LIVEPAGE Functions page 41 Triggering relay You can switch connected units using the relays in the e...

Page 87: ... Section Path for JPEG and video files page 42 5 4 Recording video sequences You can save sections of the video sequence currently shown on the LIVEPAGE on your computer s hard drive The icon for recording video sequences is only visible if the unit is configured to enable this process see Section Allow local recording page 42 1 Click the icon to start recording The storage location depends on the...

Page 88: ... can be accessed from the LIVEPAGE and from the SETTINGS menu The RECORDINGS link is only visible if a storage medium has been selected see Section 4 32 Storage Management page 57 Click the RECORDINGS link in the navigation bar in the upper section of the window The playback page appears Selecting recordings All recordings that are saved are displayed in the list A running number track is assigned...

Page 89: ...played back within the sequence The time bar offers various options for navigation Red bars indicate the points in time where alarms were triggered Drag the green arrow to navigate to these points quickly 1 You can change the time interval by clicking the zoom keys magnifying glass icons The display can span a range from two months to a few seconds 2 Drag the green arrow to the point in time at wh...

Page 90: ...ts into a simple to control system or into the entire Bosch range benefiting from a complete security solution based on the latest technology and years of experience The video server is also designed for use with the DiBos 8 digital recorder DiBos 8 records up to 32 video streams and is available as IP software or hybrid DVR with additional analog camera inputs DiBos supports the most diverse func...

Page 91: ...iguration page see Section 4 50 Maintenance page 81 2 Using a pointed object press the Factory Reset button located below the SD slot until the POWER LED flashes red see Figure 3 8 All settings will revert to their defaults 3 Change the IP address of the encoder if necessary 4 Configure the unit to meet your requirements 6 3 Troubleshooting If you are unable to resolve a malfunction please contact...

Page 92: ...set for connection to hardware decoder Select the H 264 BP bit rate limited option on the Encoder Streams configuration page No connection established no image transmission The unit s configuration Check all configuration parameters Faulty installation Check all cables plugs contacts and connections Wrong IP address Check the IP addresses terminal program Faulty data transmission within the LAN Ch...

Page 93: ...ent No Power Check power to the module If Green LED is present then Check power to CNFE2MC If Power LED is Green then check data link Invalid Fiber Link Check fiber connection to the module If Red LED is present then the fiber link is missing If the LED is Flashing Red then Check the fiber connection to the CNFE2MC If the Link Act LED is not lit then the fiber link is missing No Video present RJ 4...

Page 94: ...ction To do this move the cursor over the i icon Malfunction Possible causes Recommended solution After connecting to the iSCSI target no LUNs are displayed Incorrect LUN mapping during iSCSI system configuration Check the iSCSI system configuration and reconnect After connecting to the iSCSI target LUN FAIL appears below a node The LUN list could not be read as it was assigned to the wrong networ...

Page 95: ...to the terminal block of the encoder see Section Pin assignment serial interface page 95 HyperTerminal a communications accessory included with Microsoft Windows can be used as the terminal program 1 Disconnect the encoder from the Ethernet network before working with the terminal program 2 Connect the serial interface of the encoder using any available serial interface on the computer Configuring...

Page 96: ...your network The following default address is preset at the factory 192 168 0 1 1 Start a terminal program such as HyperTerminal 2 Enter the user name service The terminal program displays the main menu 3 Enter command 1 to open the IP menu 4 Enter 1 again The terminal program displays the current IP address and prompts you to enter a new IP address 5 Enter the desired IP address and press Enter T...

Page 97: ...logy specialists In case of doubt contact your dealer s technical service center 6 14 Copyrights The firmware uses the fonts Adobe Helvetica Bold R Normal 24 240 75 75 P 138 ISO10646 1 and Adobe Helvetica Bold R Normal 12 120 75 75 P 70 ISO10646 1 under the following copyright Copyright 1984 1989 1994 Adobe Systems Incorporated Copyright 1988 1994 Digital Equipment Corporation Permission to use co...

Page 98: ...98 en Maintenance and upgrades MIC Series IP Power Supply F 01U 265 804 1 6 2012 08 User Manual Bosch Security Systems Inc ...

Page 99: ......

Page 100: ...Bosch Security Systems Inc 850 Greenfield Road Lancaster PA 17601 U S A www boschsecurity com Bosch Security Systems Inc 2012 ...

Reviews: