background image

11

FRANÇAIS

ENGLISH

ESP

AÑOL

PORTUGUÊS

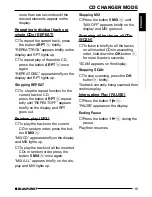
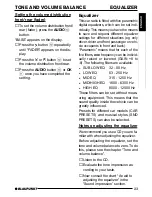
Switching to radio mode

If you are in CD, CD changer/Compact
Drive MP3 or AUX mode,

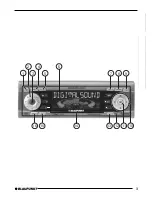
press the FM TS button 

5

 for FM

radio mode.

or

press the AM button 

?

 for AM ra-

dio mode.

Switching the RDS function on/
off

To use the RDS functions, press
the RDS button 

4

.

The RDS function is active when RDS
lights up in the display with a symbol.

Selecting the waveband /
memory bank

This unit can receive programmes
broadcast over the FM and AM wave-
bands. There are three memory banks
(FM1, FM2 and FMT) for the FM wave-
band and two memory banks (AM and
AMT) for the AM waveband.

Six stations can be stored in each mem-
ory bank.

To  switch between the FM memory
banks,

briefly press the FM TS button 

5

repeatedly until the required mem-
ory bank appears in the display.

To  switch between the AM memory
banks,

briefly press the AM button 

?

 re-

peatedly until the required memory
bank appears in the display.

Tuning into a station

There are various ways of tuning into a
station.

Automatic seek tuning

Press the   or   button 

:

.

The unit tunes into the next receivable
station.

Tuning into stations manually

You can also tune into stations manual-
ly.

Press the    or   button 

:

.

Note:
You can only tune into stations manual-
ly on the FM waveband if the RDS and
PTY functions are deactivated.

Setting the sensitivity of station
seek tuning

You can choose whether to only tune
into stations with a strong reception or
to also tune into those with a weak re-
ception.

Press the MENU button 

8

.

Keep pressing the   button 

:

 un-

til “SENS” appears in the display.

Press the   button 

:

.

The display shows the currently set sen-
sitivity level. “SENS 6” means that the
tuner is set to the highest sensitivity
setting. “SENS 1” is the lowest setting.

Set the required sensitivity using
the    or   button 

:

.

RADIO MODE

Summary of Contents for CASABLANCA CD52

Page 1: ...Radio CD Casablanca CD52 Heidelberg CD52 US version Operating instructions http www blaupunkt com ...

Page 2: ...2 Open here Ouvrir s v p Por favor abrir Favor abrir ...

Page 3: ...3 FRANÇAIS ENGLISH ESPAÑOL PORTUGUÊS 3 2 10 1 4 5 11 6 7 9 8 12 13 14 15 16 ...

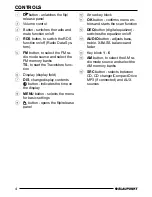
Page 4: ...nge display contents button indicates the time on the display 8 MENU button selects the menu for basic settings 9 button opens the flip release panel CONTROLS Arrow key block OK button confirms menu en tries and starts the scan function DEQ button digital equalizer switches the equalizer on off AUDIO button adjusts bass treble X BASS balance and fader Key block 1 6 AM button to select the AM ra di...

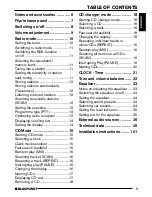
Page 5: ... a track 15 Quick track selection 15 Fast search audible 15 Random play MIX 16 Scanning tracks SCAN 16 Repeating a track REPEAT 16 Interrupting play PAUSE 16 Changing the display 16 Naming CDs 17 Displaying CD text 17 Removing a CD 18 CD changer mode 18 Starting CD changer mode 18 Selecting a CD 18 Selecting a track 18 Fast search audible 18 Changing the display 18 Repeating individual tracks or w...

Page 6: ... Hotline Robert Bosch Str 200 D 31139 Hildesheim NOTES AND ACCESSORIES Road safety Road safety has priority Only op erate your car radio if road and traf fic conditions allow Familiarise your self with the unit before setting off on your journey You should always be able to hear police fire and ambulance sirens in good time For this reason set the volume of your car radio at a suita ble level Inst...

Page 7: ... provides connections for connecting external amplifiers and a subwoofer We recommend you use well matched products from the Blaupunkt or Velocity product ranges NOTES AND ACCESSORIES FLIP RELEASE PANEL Flip release panel Theft protection Your car radio is fitted with a flip release panel to guard against theft Without this panel the unit is worthless to the thief Protect your unit from theft by t...

Page 8: ...ced Switching on off There are various ways of switching the car radio on and off as described be low Switching on off using the ignition If the car radio is correctly connected to the ignition and has not been switched off using the button 3 it is switched on off simultaneously with the ignition You can also switch on your car radio when the vehicle ignition is off To do so press the button 3 Not...

Page 9: ...e Press the MENU button 8 Press the button repeatedly until TEL NAVI VOL appears on the display Use the buttons to set the desired volume When you have completed the set tings press either the MENU but ton 8 or OK Volume adjustment The system volume can be adjusted in steps from 0 off to 66 maximum To raise the system volume turn the volume control 2 to the right To lower the system volume turn th...

Page 10: ...he receivable FM sta tions transmit a signal that not only car ries the programme but also additional information such as the station name and programme type PTY The station name appears in the dis play as soon as the radio is able to re ceive it and the RDS function is activat ed You can optionally display the pro gramme type For further details please read the section entitled Programme type PTY...

Page 11: ...switch between the AM memory banks briefly press the AM button re peatedly until the required memory bank appears in the display Tuning into a station There are various ways of tuning into a station Automatic seek tuning Press the or button The unit tunes into the next receivable station Tuning into stations manually You can also tune into stations manual ly Press the or button Note You can only t...

Page 12: ...cess is completed the station stored in location 1 of the FMT or AMT memory bank will be played Listening to stored stations Select the memory bank or wave band Press the station button 1 6 that corresponds to the station you want to listen to Scanning receivable stations SCAN You can briefly play scan all the re ceivable stations You can set the scan ning time scantime to between 5 and 30 seconds...

Page 13: ... starting seek tuning Press the or button The current programme type appears in the display If you want to select another pro gramme type you can do so by pressing the or button whilst this display is visible Or Press one of the buttons 1 6 to select a programme type that is stored on one of these buttons The selected programme type is dis played briefly Press the or button to start seek tuning Th...

Page 14: ... SHARX ON means it is activated Press the MENU button 8 or OK Displaying scrolling text Some radio stations use the RDS sig nal to transmit advertising or other in formation instead of their station name These scrolling texts appear in the dis play You can deactivate the scrolling text display for stations that you have stored on the station buttons Keep the RDS button 4 pressed until NAME FIX app...

Page 15: ...e drive Press the button 9 The flip release panel opens Gently insert the CD into the CD compartment with the printed side uppermost until you feel some re sistance The CD will be drawn into the drive Do not hinder or assist the drive as it draws the CD in Close the panel using light pres sure until you feel it latch into place CD playback begins If there is already a CD in the drive press the SRC...

Page 16: ...anning The current track will then continue to play Repeating a track REPEAT If you would like to repeat a track press button 4 RPT REPEATTRCK appears briefly on the display the RPT symbol lights up The track is then repeated until RPT is de activated Stopping REPEAT If you would like to end repeat press the button 4 RPT once again REPEAT OFF appears briefly on the display the RPT symbol goes out ...

Page 17: ...me you wish to clear Press the MENU button 8 Use the buttons to select CD NAME Press the or button Hold down the MENU button 8 A beep sounds at the end of four seconds and DELETE NAME ap pears on the display Release the MENU button 8 The CD name is now deleted Press the OK button to return to the menu Displaying CD text Some CDs feature so called CD text The CD text may include the name of the per...

Page 18: ... with the first CD the CD changer recognises Selecting a CD To change up or down to a different CD press the or button once or several times Selecting a track To move up down from one track to another on the current CD press the or button once or several times Fast search audible For a fast search backwards or forwards keep the buttons pressed until the fast search backwards or forwards begins Cha...

Page 19: ...e current CD in random order press the but ton 5 MIX MIX CD appears briefly on the display and MIX lights up To play the tracks of all the inserted CDs in random order press the button 5 MIX once again MIX ALL appears briefly on the dis play and MIX lights up Stopping MIX Press the button 5 MIX until MIX OFF appears briefly on the display and MIX goes out Scanning all tracks on all CDs SCAN To lis...

Page 20: ... input position Press the MENU button 8 or OK to save the name entered Clearing a CD name Listen to the CD whose name you wish to clear Press the MENU button 8 Use the buttons to select CDC NAME Press the or button Hold down the MENU button 8 A beep sounds at the end of four sec onds and DELETE NAME ap pears on the display Release the MENU button 8 The CD name is now deleted Press the OK button to...

Page 21: ...mpleted the setting As soon as a station with the RDS time function RDS CT is received the clock is set automatically Setting the time manually To set the time manually press the MENU button 8 Press the button repeatedly until CLOCKSET appears on the display Press the button The time appears on the display The minutes flash and can now be set Set the minutes using the but tons Once the minutes hav...

Page 22: ... a comfortable level at lower volume levels You can adjust the X BASS func tion individually for all audio sources When X BASS is activated the X BASS symbol lights up on the display Press the AUDIO button BASS appears on the display Press the button repeatedly until X BASS appears on the dis play Press the or button to se lect X BASS XBASS 0 means that X BASS is switched off After completing the ...

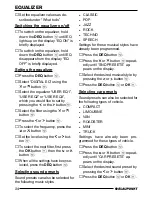
Page 23: ...or each of the five filters one frequency can be individ ually raised or lowered GAIN 8 to 8 The following filters are available SUB LOW EQ 32 50 Hz LOW EQ 63 250 Hz MID EQ 315 1250 Hz MID HIGH EQ 1600 6300 Hz HIGH EQ 8000 12500 Hz These filters can be set without meas uring equipment This means that the sound quality inside the vehicle can be greatly influenced Presets for different car models CA...

Page 24: ...ter first press the OK button then the or button When all the settings have been se lected press the DEQ button Selecting sound presets Sound presets can also be selected for the following music styles CLASSIC POP JAZZ ROCK TECHNO SPEECH Settings for these musical styles have already been programmed Press the DEQ button Press the or button repeat edly until SND PRESETS ap pears on the display Sele...

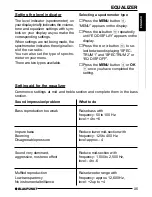
Page 25: ...ppears on the display Press the or button to se lect between displaying SPEC TRUM 1 and SPECTRUM 2 or EQ DISP OFF Press the MENU button 8 or OK once you have completed the setting Setting aid for the equalizer Commence settings at mid and treble section and complete them in the bass section Sound impression problem Bass reproduction too weak Impure bass Booming Disagreeable pressure Sound very dom...

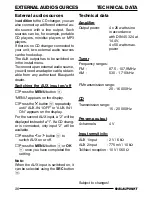
Page 26: ...y until AUX IN 1 OFF or AUX IN 1 ON appears on the display For the second AUX input a 2 will be displayed instead of a 1 If a CD chang er is connected only input 2 will be available Press the or button to switch AUX on or off Press the MENU button 8 or OK once you have completed the setting Note When the AUX input is switched on it can be selected using the SRC button EXTERNAL AUDIO SOURCES Techni...

Page 27: ... 8394 Greece GR 0800 550 6550 01 576 9473 Ireland IRL 01 4149400 01 4598830 Italy I 02 369 6331 02 369 6464 Luxembourg L 40 4078 40 2085 Netherland NL 023 565 6348 023 565 6331 Norway N 66 817 000 66 817 157 Portugal P 01 2185 00144 01 2185 11111 Spain E 902 120234 916 467952 Sweden S 08 7501500 08 7501810 Switzerland CH 01 8471644 01 8471650 Czech Rep CZ 02 6130 0441 02 6130 0514 Hungary H 01 333...

Page 28: ...Radio CD Casablanca CD52 Heidelberg CD52 US version Installation instructions Notice de montage Instrucciones de instalación Instruções de montagem http www blaupunkt com ...

Page 29: ...l damages If the information provided here is not suitable for your specific installation requirements please contact your Blaupunkt dealer your vehicle manufacturer or our telephone hotline F Consignes de sécurité Respecter les consignes de sécurité suivantes pendant la durée du montage et du branchement Débrancher le pôle de la batterie Respecter les consignes de sécurité du constructeur automob...

Page 30: ... vehículo póngase en contacto con su proveedor de artículos Blau punkt o con el fabricante del vehículo o llame a nuestro teléfono de atención al cliente P Instruções de segurança Durante a montagem e a ligação do aparelho queira respeitar as seguintes instruções de segurança Separar o pólo negativo da bateria Respeitar ao mesmo tempo as instruções de segurança do fabricante do automóvel Quando se...

Page 31: ...DEUTSCH FRANÇAIS ESPAÑOL PORTUGUÊS ENGLISH 1 2 C D A 12V 53 182 165 1 20 Supplied Mounting Hardware Materiel de montage fourni Ferretería de montaje suministrada Elementos de fixação fornecidos D C E F A J G H I B ...

Page 32: ... spécifique au véhicule disponible dans le commerce Adaptador específico del vehículo el cual se puede adquirir en el comercio especializado Cabo de adaptação específico do automóvel que pode ser adquirido no comércio especializado 12V 1 2 3 3 2 B B uninstalling 8 601 910 003 Amplifier Sub out cable 7 607 609 093 ...

Page 33: ...9 3 6 9 12 15 18 2 5 8 11 14 17 20 C 1 C 2 C 3 2 D 1 3 4 5 6 7 8 9 10 C C1 C2 C3 1 Line Out LR 7 Telefon Navi NF in 13 Bus In 2 Line Out RR 8 Telefon Navi NF in 14 Bus Out 3 Line Out Masse Ground 9 Radio Navi Mute 15 Permanent 12V 4 Line Out LF 10 FB 12V RC 12V 16 12V 5 Line Out RF 11 Fernbedienung Remote Control 17 Bus Masse GND 6 12V Amplifier 12 FB Masse RC GND 18 AF Masse GND 19 Line In L 20 L...

Page 34: ...l 15 12V Amplifier 7 607 609 093 Sub out cable This information is subject to change without notice Sous réserve de modifications Modificaciones reservadas Sob reserva de alterações G H I Relais 12V 1 3 5 7 2 4 6 8 A RR RF LF LR 4 Ohm 4 Ohm 4 Ohm 4 Ohm ...

Reviews: