


Bionova® IC10/20FR
9
incubating an exposed SCBI. Please refer to the sterilizer
instructions for use for more information.
If a negative result is obtained when incubating an exposed SCBI
(green light
), this indicates that the sterilization process
to which the SCBI was exposed has been successful. This result is
valid if a positive result is obtained for the positive control SCBI.
!
A positive result should always be obtained by the incubator
when incubating a positive control SCBI. Refer to the
Positive
control
section for more information.
Positive control
A positive control is a non-sterilized SCBI used as a reference
during the incubation process. The use of a positive control is
a recommended practice as it helps to ensure:
The correct incubation temperature is reached.
Viability of spores has not been altered due to improper
storage temperature, humidity, or proximity to chemicals.
The aptitude of the media to promote rapid growth and
fluorescence generation.
Proper functioning of the incubator.
For the incubation of a positive control SCBI, first press the
cap to seal the SCBI and crush the ampoule, making sure
the media completely wets the spore carrier. Identify the
control SCBI on its label. Place the positive control in an empty
incubation position and incubate as described in the SCBI
instructions for use.
!
The positive control and the exposed SCBI should belong to
the same batch.
Disposal
Discard the SCBIs according to your country’s sanitary
regulations. Positive SCBIs can be sterilized before discarding
following the SCBI instructions for use. It is not possible to use
or incubate an SCBI more than once.
Reprinting of results
The auto-reader allows reprinting of the last 13 results. For
printing the results, press the button for 5 seconds.
Audible alarm
An audible alarm will sound every time a positive result is
detected by the incubator. The alarm allows the user to
immediately detect a positive result without the need to
Instructions for use
visually check the device. The alarm can be canceled by
pressing the button.
Temperature monitoring
The Bionova
®
IC10/20FR Auto-reader features an automated
internal temperature control. If the incubation temperature
falls outside of the specified range of 37 ± 2 ºC or 60 ± 2 ºC, the
temperature stability indicator light will start to blink.
The incubation temperature can be externally monitored
by placing an external thermometer in the hole for external
temperature control located at the back of the device.
Thermal paper specifications
Recommended paper: JUJO AF50KSE3 or similar (order code
ICTP).
Paper width : 57 mm
Maximum paper thickness: 60 g/m
2
Maximum diameter size: 50 mm
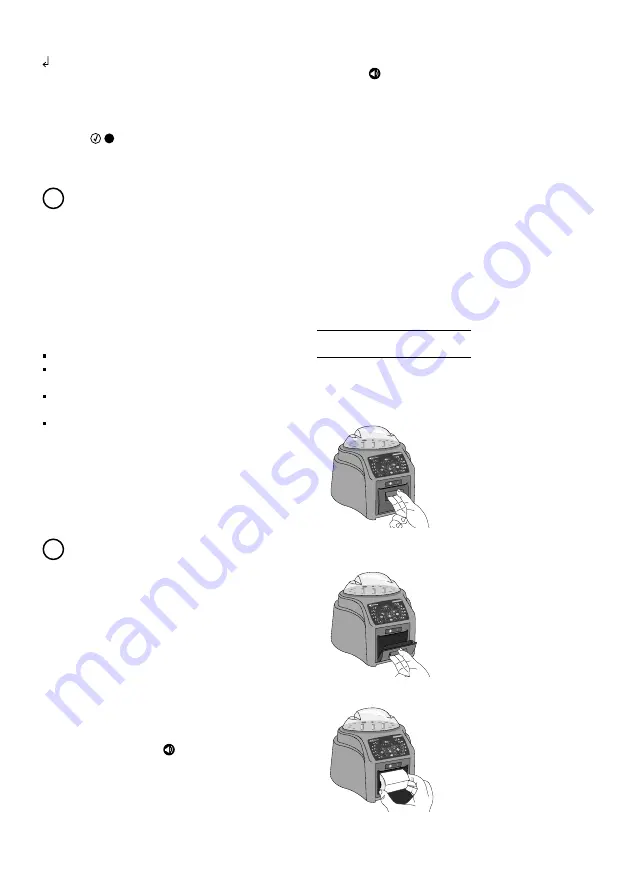
Replacement of the paper roll
1|To replace the paper roll, pull the handle of the printer’s
door.
2|Open the printer’s cover and remove the spent roll.
3|Place the new paper roll with the outer side up.


