User’s Guide
Step 4
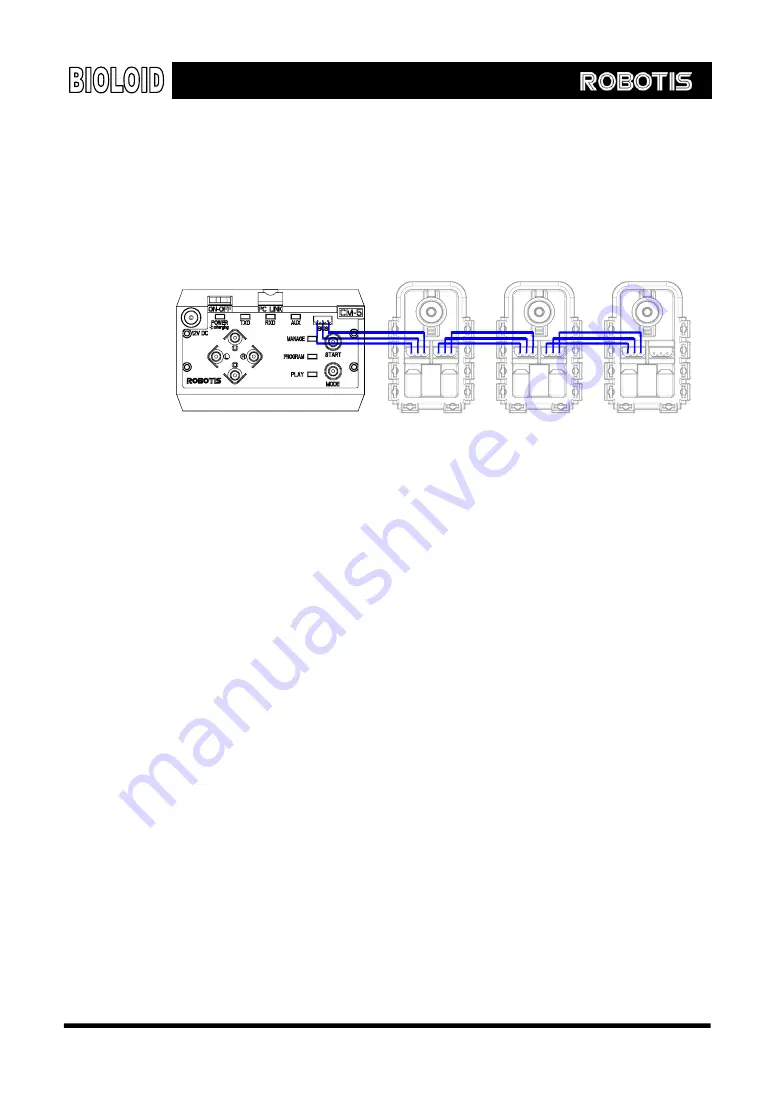
After the configuration of the robot is completed, the next step is to connect the
cables. Having the CM-5 unit as the center, the wires are connected to, and
through the Dynamixel units. Each cable is made up of three wires. Two of the
wires are for power and one is for communication. Make sure the cables are long
enough so that they allow the joints to bend all the way in either direction.
Connect the cables in a daisy chain fashion as shown in the figure below.
Control Box “CM-5”
The steps up to here complete the building of the robot hardware. The
configuration of the robot is decided in Steps 1, 2, 3, 4 and the function of the
robot will be decided through programming in Steps 5, 6, 7.
Step 5
After you are done building the robot, use the motion editor program to make
sure the robot is properly put together. Make sure all the Dynamixels are
communicating with the CM-5 unit properly. To check if the joints are working
properly, test them by moving each of the joints slightly.
Step 6
In step 6, you will create the behavior control program of the robot. Behavior
control is simply telling the robot to take some kind of action when it enters a
certain state. For example, when the robot is walking forward through a narrow
path, you can make it walk through the center of a path. Or, if there is something
blocking the way, you can make it turn around and go the other way. The behavior
control program takes the form of rules which defines the appropriate motion the
robot should output for specific input information it receives from the sensors.
Step 7
In step 7, you will create the motion of the robot. For robots that use wheels, step
7 is unnecessary because all you have to do to move the wheels is to set the
position or velocity settings of the Dynamixel. But it would be difficult to make a
puppy robot sit or a humanoid robot walk by changing each of its joint angles
individually. In order to move a complicated multi-jointed robot, you have to
“call” a pre-made movement.” This “pre-made movements” (motions) are
what you will create here in step 7. The behavior control program of step 6 will be
able to “ call ” these “ pre-made movement ” (motions) of step 7. Step 7
shouldn
’
t be taken after you are done with step 6, but rather together with step 6.
9
Summary of Contents for Robotis
Page 1: ...Ver 1 00 BIOLOID User s Guide Closer to Real...
Page 55: ...User s Guide Portion that will be ignored Enable Disable Code Portions that will be ignored 55...
Page 73: ...User s Guide Move routine Stop Backward Left turn Right turn Melody sound routine 73...
Page 100: ...User s Guide Transmitter behavior control program Receiver behavior control program 100...


