


234
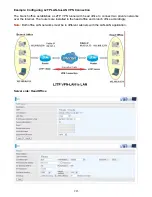
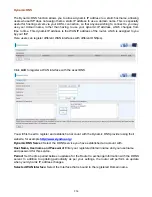
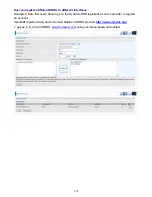
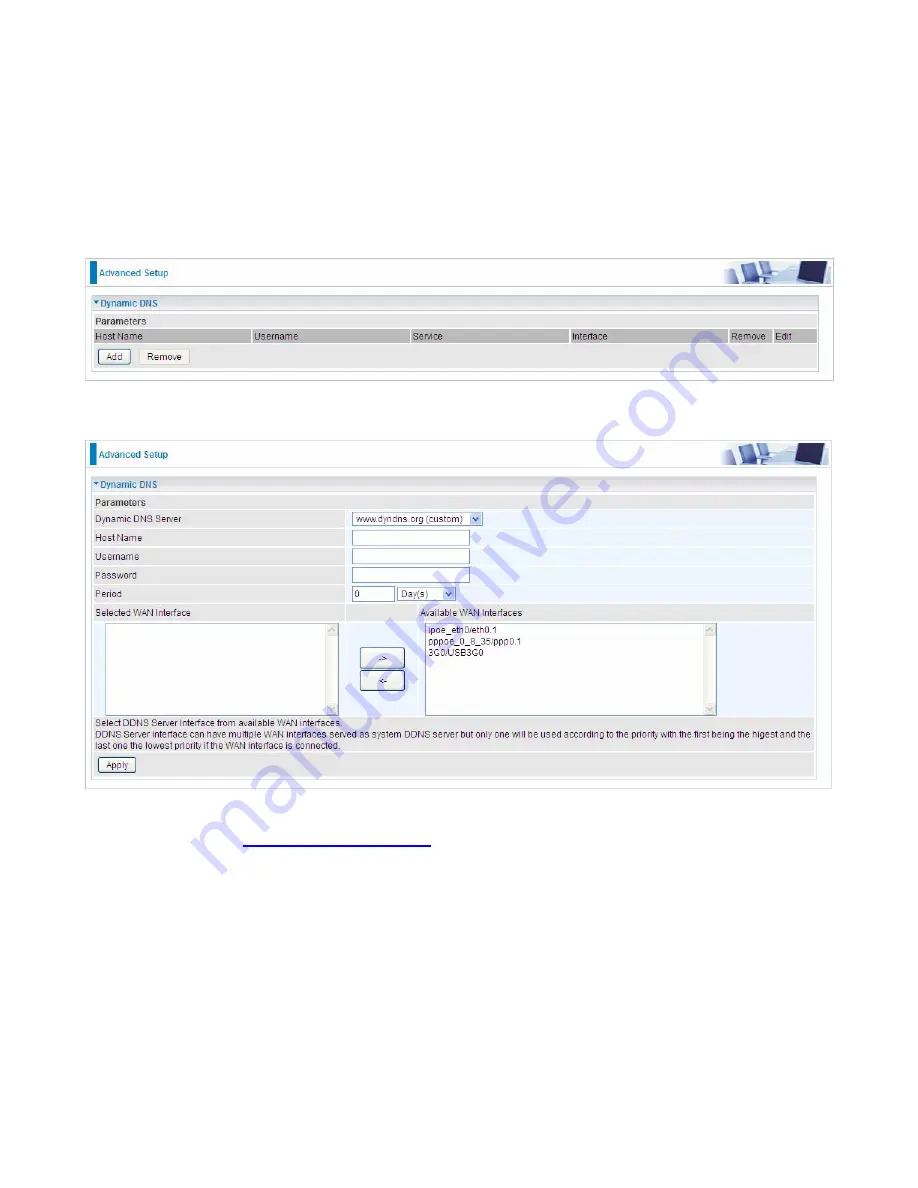
Dynamic DNS
The Dynamic DNS function allows you to alias a dynamic IP address to a static hostname, allowing
users whose ISP does not assign them a static IP address to use a domain name. This is especially
useful for hosting servers via your ADSL connection, so that anyone wishing to connect to you may
use your domain name, rather than having to use your dynamic IP address, which changes from
time to time. This dynamic IP address is the WAN IP address of the router, which is assigned to you
by your ISP.
Here users can register different WAN interfaces with different DNS(es).
Click
Add
to register a WAN interface with the exact DNS.
You will first need to register and establish an account with the Dynamic DNS provider using their
website, for example
http://www.dyndns.org/
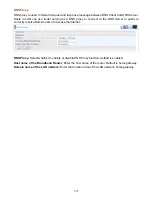
Dynamic DNS Server:
Select the DDNS service you have established an account with.
Host Name, Username and Password:
Enter your registered domain name and your username
and password for this service.
Period:
Set the time period between updates, for the Router to exchange information with the DDNS
server. In addition to updating periodically as per your settings, the router will perform an update
when your dynamic IP address changes.
Selected WAN Interface:
Select the Interface that is bound to the registered Domain name.
Summary of Contents for BiPAC 6900AX(L)-2400
Page 20: ...15 3G LTE Router mode ...
Page 66: ...61 7 Success ...
Page 94: ...89 Configure AP as Enrollee Add Registrar with PIN Method 1 Set AP to Unconfigured Mode ...
Page 144: ...139 Accessing mechanism of Storage In your computer Click Start Run enter 192 168 1 254 ...
Page 146: ...141 Access the folder public ...
Page 149: ...144 Step 2 Click Add a Printer Step 3 Click Add a network wireless or Bluetooth printer ...
Page 160: ...155 Rule inactive ...
Page 196: ...191 ...
Page 199: ...194 ...
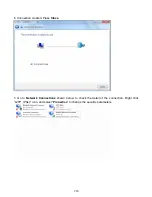
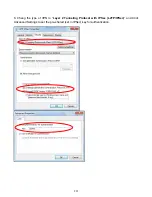
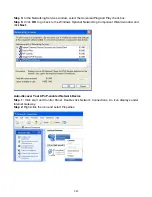
Page 208: ...203 4 Input Internet address and Destination name for this connection and press Next ...
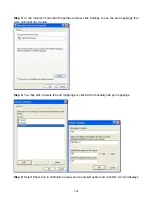
Page 209: ...204 5 Input the account user name and password and press Create ...
Page 210: ...205 6 Connect to the server ...
Page 212: ...207 ...
Page 223: ...218 4 Input Internet address and Destination name for this connection and press Next ...
Page 224: ...219 5 Input the account user name and password and press Create ...
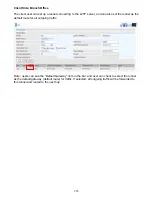
Page 241: ...236 2 ipoe_eth0 with DDNS www hometest1 com using username password test test ...
Page 253: ...248 Click Apply to confirm your settings ...
Page 261: ...256 Mobile Network User can press Scan to discover available 3G LTE mobile network ...
Page 267: ...262 Example Ping www google com ...
Page 268: ...263 Example trace www google com ...


