


113
useful when saving internet fees.
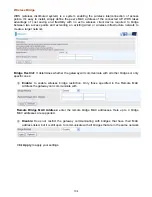
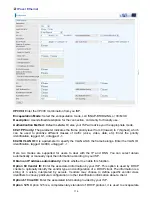
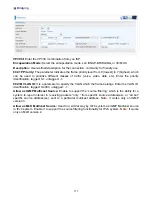
Inactivity Timeout:
The set Inactivity timeout period, unit: minutes. It is combined use with Dial on
Demand, users should specify the concrete time interval for dial on demand.
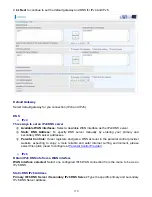
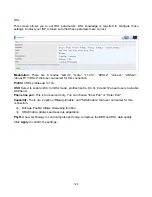
IPv6 for this service:
Enable to use IPv6 service.
IPv6 Address:
Select whether to set static IPv6 address or obtain automatically.
IP Address:
If
Static
is enabled in the above field, enter the static IPv4 address.
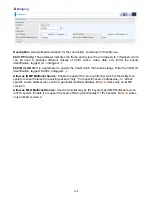
MTU:
Maximum Transmission Unit, the size of the largest datagram (excluding media-specific
headers) that IP will attempt to send through the interface.
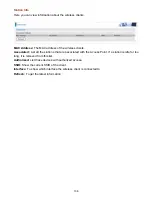
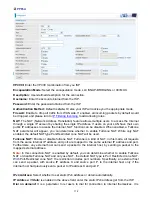
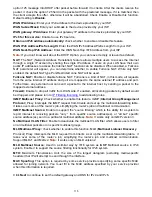
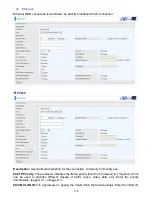
IGMP Multicast Proxy:
Check whether to enable this feature. IGMP (
Internet Group Management
Protocol
) Proxy intercepts the IGMP request from Clients and set up the multicast-forwarding table,
it takes over some of the router’s job, simplifying the router’s job and multicast communication.
IGMP Multicast Source:
Enable to support the “source filtering” which is the ability for a system to
report interest in receiving packets “only ” from specific source address(es), or “all but” specific
source address(es), sent to a particular multicast address.
Note:
It works only on IGMP version 3.
MLD Multicast Proxy:
check whether to enable this function. MLD (
Multicast Listener Discovery
Protocol) Proxy intercepts the MLD request from Clients a set up the multicast-forwarding table. it
takes over some of the router’s job, simplifying the router’s job and multicast communication.
Support MLDv1 and MLDv2.
MLD Multicast Source:
Used in a similar way by IPv6 system as IGMP Multicast source in IPv4
system. Enable it to support the source filtering functionality for IPv6 system.
Note:
It works only on
MLD version 2.
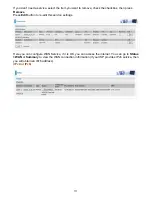
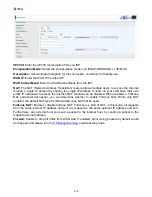
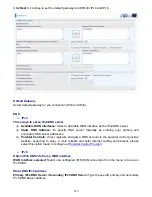
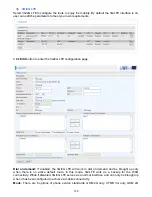
Click
Next
to continue to set the default gateway and DNS for IPv4 and IPv6.
Summary of Contents for BiPAC 6900AX(L)-2400
Page 20: ...15 3G LTE Router mode ...
Page 66: ...61 7 Success ...
Page 94: ...89 Configure AP as Enrollee Add Registrar with PIN Method 1 Set AP to Unconfigured Mode ...
Page 144: ...139 Accessing mechanism of Storage In your computer Click Start Run enter 192 168 1 254 ...
Page 146: ...141 Access the folder public ...
Page 149: ...144 Step 2 Click Add a Printer Step 3 Click Add a network wireless or Bluetooth printer ...
Page 160: ...155 Rule inactive ...
Page 196: ...191 ...
Page 199: ...194 ...
Page 208: ...203 4 Input Internet address and Destination name for this connection and press Next ...
Page 209: ...204 5 Input the account user name and password and press Create ...
Page 210: ...205 6 Connect to the server ...
Page 212: ...207 ...
Page 223: ...218 4 Input Internet address and Destination name for this connection and press Next ...
Page 224: ...219 5 Input the account user name and password and press Create ...
Page 241: ...236 2 ipoe_eth0 with DDNS www hometest1 com using username password test test ...
Page 253: ...248 Click Apply to confirm your settings ...
Page 261: ...256 Mobile Network User can press Scan to discover available 3G LTE mobile network ...
Page 267: ...262 Example Ping www google com ...
Page 268: ...263 Example trace www google com ...


