40
NOTE:
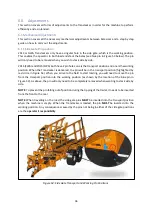
If there is only one tied/not tied layer on the top, depending on the grab style it can be very
difficult to dissemble the stack. Alternatively, you can have just a single bale as the final layer which
reduces the risk of a bale falling of the back of the stack.
If you are building a large stack, it is recommended to tie the first two stacks and to stack them all the
same way. If the stack is going to stand for a significant period of time, the final stack can also be tied
to secure the entire stack.
If you
’
re stacking on sloping ground,
it’s
much easier to build the stack working up the hill where
possible. This way the bales will naturally want to lean backwards and keep the stack standing.
With 1.2x1.3m bales, you will only get 5 layers on the trailer unless the bales are rolled through 90
degrees so the strings are around the sides of the bales instead of being around the top and bottom
of the bales. You may find stacking the bales with the strings on the side much easier as the bales tend
to be much more level and even over the length of the bale.
6.3 Settings Explained
This section explains the functions of all the settings. Should you wish to adjust any setting, this section
explains the effects and the possible unexpected side effect that could disrupt the behaviour of the
Transtacker.
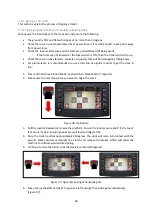
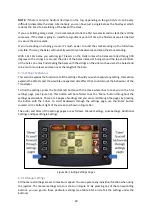
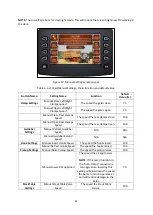
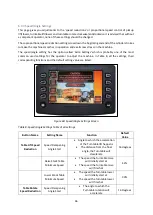
To find the settings, press the bottom left button with the three white lines to take you to the first
settings page (see Figure 56). This button will be referred to as the
‘
Menu
’
button throughout the
settings explanations. There are 4 pages of settings and you can scroll through the pages by pressing
the button with the 3 lines. To scroll backwards through the settings page,
use the ‘
E
nter’ button
located on the bottom right of the screen (as shown in Figure 56).
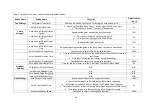
The order and titles of the settings pages are as follows: Manual Settings, Auto Settings, Additional
Settings and Speed/Angle Settings.
Figure 56: Finding Settings Pages
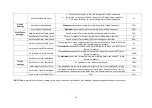
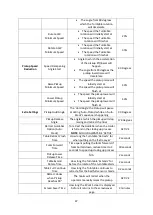
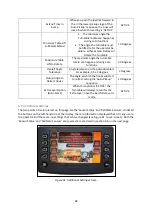
6.3.1 Manual Settings
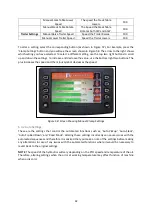
All the manual settings are set to maximum speed. You can operate any individual function when using
the joystick. The manual settings screen is shown in Figure 57. By pressing any of the corresponding
buttons, you can go into those particular settings (see Table 6 for a list of all the settings under the
buttons).
Summary of Contents for Transtacker
Page 7: ...7 3 0 Machine Overview Figure 1 Transtacker Overview...
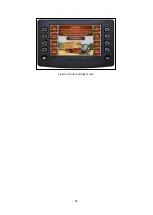
Page 43: ...43 Figure 59 Auto Settings Screen...
Page 57: ...57 8 1 Auto Pickup Sequence Figure 69 Auto Pickup Diagram...
Page 58: ...58 8 2 Auto Stack Sequence both with and without tie Figure 70 Auto Stack Diagram...
Page 59: ...59 8 3 Auto Lower Turntable Figure 71 Auto Lower Turntable Diagram...
Page 60: ...60 8 4 Auto Open Sequence Figure 72 Auto Open Diagram...
Page 61: ...61 8 5 Auto Tip Bed Down Sequence Figure 73 Auto Tip Bed Down Diagram...
Page 62: ...62 8 6 Road Mode Sequence Figure 74 Road Mode Diagram...

