20
Chapter 3. Hardware assembly
While we did ensure that the case is simple as possible for handling, the part where
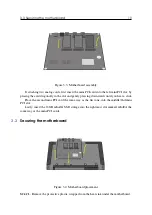
you insert the motherboard into the case can be a bit tricky. Take the motherboard, turn its
connectors to the back of the case, tilt it towards the front end of the case so you could slide
it slightly under the front slotted aluminium sheet which protrudes from the bottom plate.
S
TEP
2.
Gently slide it under the slot, just enough so its back end can pass under the
aluminium lip, which is used for T-frame attachment.
W
While sliding the motherboard in the case, be very careful with the heat sink under the
motherboard and do not let it stick to the bottom plate until you have positioned the
motherboard so that you can secure it with four screws in the corners.
STEP 3.
When the corner screw holes on the motherboard align with the bottom plate
threads, fasten the motherboard with four screws that came with it.
3.4
Preparing X1 sockets
X1 sockets come in two varieties:
•
GH-EMLX1 - attached to the T-frame,
•
GH-EMRX1 - attached to the inner side of the right side panel.
The nomenclature references Left and Right orientation, when looking from the back of the
device.
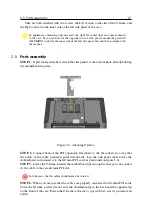
Figure 3.5: Attaching X1 socket.
As you can see on figure 3.5, the GH-EMLX1 is positioned in such a way that white
power connector comes on top while the PCIx1 socket is bottom oriented. The GH-EMRX1
is positioned rotated by 180 degrees, so that white power connector points to the bottom
while card connector is on top.


