


3
88
M
O
TO
R C
H
EC
k
S AN
d
ASS
EM
B
LY
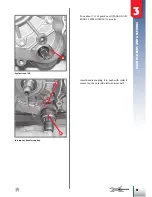
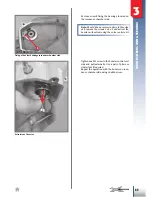
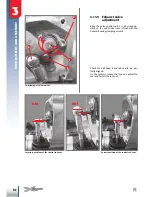
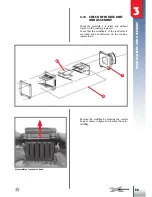
Apply spacer
4
and the complete stroke end
lever on the control side
5
.
Then apply all other parts. Screw
6
must be
covered with medium strength threadlocker and
fastened at 6Nm.
Try moving the unit and check the entire
mechanism perfectly slides, once assembly is
completed.
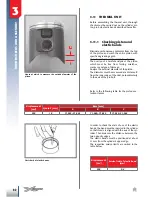
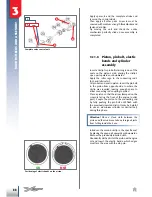
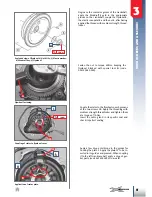
positioning of elastic bands on the piston.
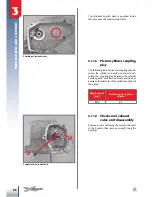
3.11.6 Piston, pin bolt, elastic
bands and cylinder
assembly
Insert a circlip for pin bolt retaining in one of the
seats on the piston's side, placing the circlip's
open part upwards or downwards.
Apply the roller cage in the connecting rod's
foot, and lubricate it.
Oil pin bolt and seat in piston. Insert the pin bolt
in the piston from opposite side to where the
circlip was inserted, leaving enough space to
allow connecting rod coupling to piston.
Place a piston so that the arrow stamped on the
crown is facing the front of the engine (outlet
port). Couple the piston to the connecting rod
by fully pushing the pin bolt until flush with
the previously inserted circlip. It may be helpful
to use an aluminium cylinder (or similar tool)
during this phase.
Attention!
Place a clean cloth between the
piston and the crankcase to keep foreign objects
from falling inside the base.
Introduce the second circlip in the specific seat
by placing the open part upwards or downwards.
Remove the previously inserted cloth.
Abundantly oil the skirt of the piston with engine
oil and insert the elastic bands, which edges
must face the area with the stop pin.
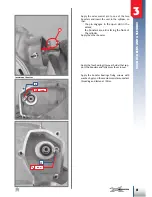
Ok
NO!
complete valve control unit.
6Nm
6
4
5
Summary of Contents for X Trainer 300 2T 2015
Page 1: ...CODE 036440030 000...
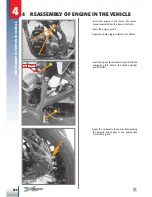
Page 19: ...2 17 Engine disassembly Remove the four collar nuts 9 9 Extract the cylinder and base gaskets...
Page 116: ...114 NOTES...
Page 117: ......