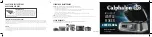
OPERATION
The appliance is intended only for domestic use, not for professional use.
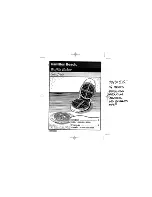
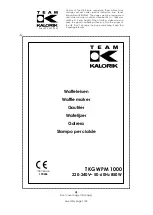
The following description is associated with the image on page 2:
1. Unpack the device and remove all packaging parts.
2.
Clean the baking tray before using for the first time (see ‘Cleaning and maintenance’).
3.
Plug in the power cord and let the waffle maker heat for 10 minutes. This will remove any packaging
odor from the device.
PLEASE NOTE:
•
The first time you use the appliance, it may produce slight smoke and a specific odour. This is normal
and will disappear on its own. Ensure sufficient ventilation.
•
Keep birds away from the appliance when the appliance is in operation. When heating the non-stick
coating on the baking tray, a substance can be released that is a nuisance to birds.
Preheating
1.
Place the appliance on a flat, level surface.
2.
This appliance must be connected to an earthed socket.
3.
Plug the power cord into the wall outlet. The indicator lights come on and the appliance heats up.
4.
Wait for the green indicator light to turn off. The baking trays are then at the right temperature and the
waffle maker is ready for use.
Baking waffles
1.
Prepare the waffle dough according to the recipe on the dough packaging.
2. Preheat the appliance as described in ‘Preheating’.
3. Grease both baking trays. Use a brush to spread the oil or butter.
4.
Fill the bottom baking tray with dough/batter. Prevent the dough from running over the edge of the
baking tray. Close the lid.
5.
Bake the waffles until they are the desired colour.
6.
Open the appliance when the waffles are ready.
7.
Carefully remove the waffles with a heat resistant wooden or plastic spatula so as not to damage the
non-stick coating.
8.
When you have finished baking waffles, unplug the appliance and open the appliance to allow the
baking trays to cool.
PLEASE NOTE:
•
Normal cooking time is approximately 3 - 5 minutes. This depends on the dough used and your
personal taste. Leave the appliance closed while baking because opening it during use can adversely
affect the appearance of the waffles.
•
Do not use sharp forks or knives!
CLEANING AND MAINTENANCE
Clean the waffle maker after each use.
1. Disconnect from mains power supply and let the appliance cool down.
2.
Clean the waffle iron with a damp cloth. If necessary, you can clean the waffle iron with soapy water.
Do not allow liquid to enter the device.
3. Dry the device thoroughly after cleaning.
4.
Store the waffle maker.
PLEASE NOTE:
•
Do not use aggressive or abrasive cleaning agents or sharp objects (such as knives or hard brushes)
when cleaning.
SERVICE
If an unexpected problem occurs, please visit
www.bestron.com/service
for assistance.
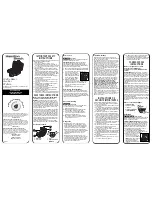
1.
Housing
2.
Baking trays
3.
Indicator light “heating up”
4.
Indicator light “switched on”
5.
Handle
10
EN