STEP 12: LINER PREPARATION
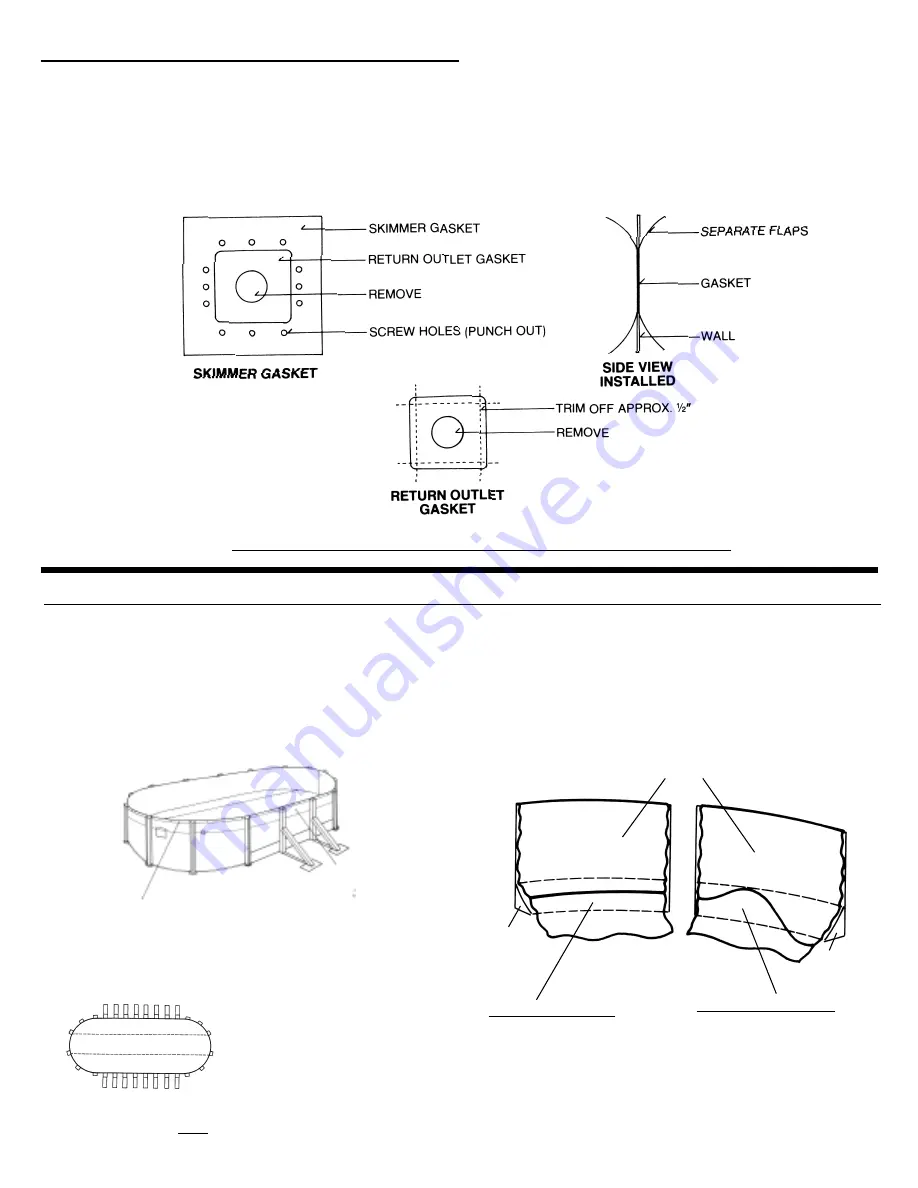
After cove and base are in place, tamp and rake the entire pool area. Make sure that no sand is allowed to remain on the wall
above the coving. This may cause pinholes in your liner. Before installing the liner, punch out skimmer and skimmer return holes
using using a hammer and a screwdriver. Duct tape or silicone the raw edges of the metal at the skimmer and return cutouts to
protect the raw edges against corrosion. Locate your safety envelope, take out the double-side vinyl gasket and install skimmer
and skimmer return gaskets as shown on included instruction sheet. THIS MUST BE DONE! You must also periodically inspect
the gaskets for leaks to validate warranty.
*SEE ADDITIONAL INSTRUCTIONS INCLUDED IN YOUR SAFETY ENVELOPE
STEP 13: HANGING LINER AND COPING INSTALLATION
Starting at the liner wall seam, hang the liner over the wall, making sure that the seam is straight up and down, perpendicu-
lar to the floor. This will assure you that your liner begins going over the wall straight. (If you have a border print liner simply
pick a mark and hold it all the way around the pool). As you put the liner over the wall, you can secure it using the plastic cop-
ing to keep it in place. If you end up with excess material, continue around the pool, pulling excess liner evenly, and distribute
over the wall until the excess is gone.
PLASTIC COPING INSTALLED AT THIS
TIME TO HOLD LINER IN PLACE
LINER OVERLAPPING
POOL WALL
CORRECT LINER SEAM
RESTING EVENLY ON THE
COVE OF THE POOL.
INCORRECT LINER SEAM
SHIFTED UP WALL. THIS
SHOULD NOT BE DONE.
CORRECT THIS SITUATION
IF IT OCCURS.
POOL WALL
COVE
COVE
NOTE: LINER WALL SEAM STRAIGHT UP AND DOWN, AWAY FROM SKIMMER AND SKIMMER RETURN.
*MAKE SURE FLOOR SEAMS OF LINER
ARE PARALLEL WITH THE POOL WALL
TO ENSURE THAT LINER IS STRAIGHT.


