6 720 611 443 GB (05.04)
Maintenance
39
8.3.2
Fan Assembly
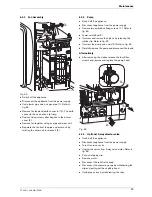
Fig. 62
B
Switch off the appliance.
B
Disconnect the appliance from the power supply.
B
Undo lower pipe union on gas pipe (1.). Refer to
fig. 62.
B
Remove fan lead and earth connector (2.). The earth
connector has a positive clip fixing.
B
Remove fixing screws attaching fan to the burner
cover (3.).
B
Remove fan together with gas pipe and mixer unit.
B
Separate the fan from the pipe and mixer unit by
twisting the mixer unit to release it (4.).
8.3.3
Pump
B
Switch off the appliance.
B
Disconnect appliance from the power supply.
B
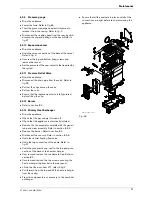
Remove two switchbox fixing screws (1.). Refer to
fig. 63.
B
Lower switchbox (2.).
B
Unscrew and remove the siphon by releasing the
jubilee clip. Refer to fig. 59.
B
Unscrew the pump union nuts (3). Refer to fig. 63.
B
Carefully remove the pump and disconnect the leads.
Alternatively
B
After removing the siphon release the four Allen
screws and remove and replace the pump head.
Fig. 63
8.3.4
Optional 3-way diverter valve
B
Switch off the appliance.
B
Disconnect appliance from the power supply.
B
Turn off service cocks.
B
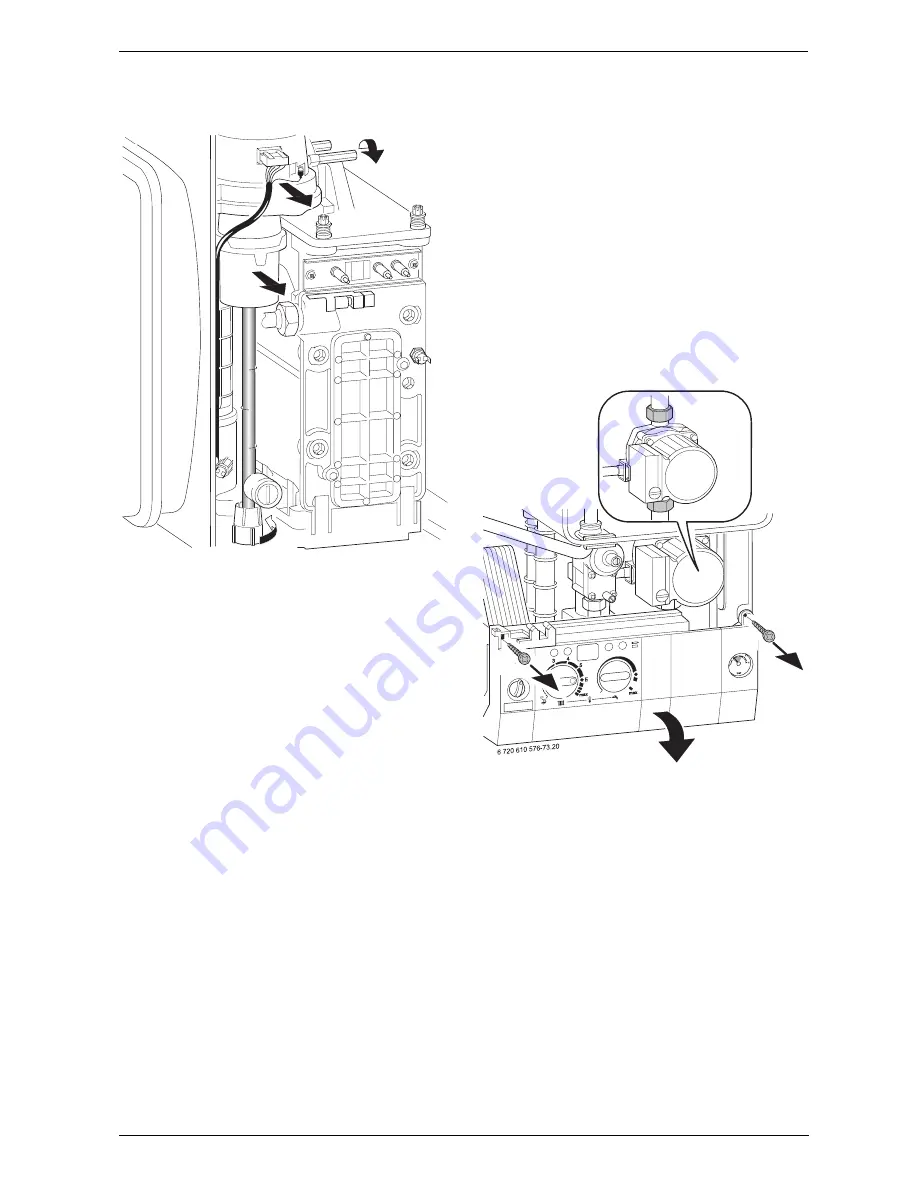
Unplug connector from 3-way valve motor. Refer to
fig. 64.
B
Pull out retaining clip.
B
Remove motor.
B
Disconnect the relief valve drain.
B
Disconnect the pressure gauge by withdrawing the
clip and pulling out the capillary head.
B
Undo pipe unions by withdrawing the clips.
1.
2.
3.
4.
7 181 465 330-05.1R
2.
3.
1.
1.


