background image

www.beko.com

CEG7425B

Fully Automatic 

Espresso Machine

User Manual

EN

01M-8835733200-4116-03

Summary of Contents for 8690842090431

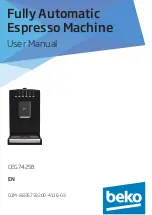
Page 1: ...CEG7425B Fully Automatic Espresso Machine User Manual EN 01M 8835733200 4116 03 ...

Page 2: ... to someone else give the user manual as well Follow all warnings and information in the user manual Explanation of symbols Throughout this user manual the following symbols are used C Important information or useful hints about usage A Danger Warning for hazardous situations with regard to life and property AWarning Warning indicates a potentially dangerous situation ACaution Warning indicates po...

Page 3: ... 5 Limitation of liability 11 1 6 Compliance with WEEE regulation and dis posal of the waste product 12 1 7 Package information 13 1 8 Compliance with RoHS Directive 13 1 9 Plug Wiring 13 2 Your coffee machine 13 2 1 Overview 15 2 2 Technical data 16 3 Display 17 4 Setting up 19 4 1 Requirements for place of operation 19 4 2 Electrical connection 19 4 3 Mounting the drip tray 20 4 4 Connecting the...

Page 4: ... 5 8 Hot water preparation 29 5 9 Setting the grinding fineness 30 5 10 Preparing coffee with whole coffee beans 31 5 11 Changing and storing the cup filling level in bean mode 34 5 12 Preparing coffee with powdered coffee 36 5 13 Changing and storing the cup filling level in powder mode 38 5 14 Preparing coffee specialities 39 5 15 Milk cleaning system after dispensing drink with milk 42 5 16 Set...

Page 5: ...it 52 6 6 Cleaning the hose distribution system 53 6 7 Installing the coffee dispensing unit 54 6 8 Cleaning the brewing unit 55 6 9 Running the cleaning program 58 6 10 Running the descaling program 60 6 11 Cleaning the nozzle of the milk frother 66 7 Troubleshooting 69 7 1 Safety precautions 70 7 2 Coffee machine messages possible causes and remedies 73 7 3 Problems possible causes and remedies ...

Page 6: ...ponents could lead to serious injury or even death Observe the following safety precautions to avoid electric shocks Do not use the coffee machine if the connecting cable or mains plug are damaged Before reusing the coffee machine the mains cable must be renewed by a qualified electrician Do not open the housing of the coffee machine Danger of electric shock if live connections are touched and or ...

Page 7: ...ions to avoid burning scalding yourself and or others Do not touch either of the metal sleeves on both coffee spouts Avoid direct contact of the skin with escaping steamorhotrinsing cleaninganddescalingwater 1 3 Fundamental safety precautions Observe the following safety precautions to ensure safe handling of the coffee machine Never play with packaging material Risk of suffocation Inspect the cof...

Page 8: ...irs to the coffee machine must only be carried out by an authorised service centre Unqualified repairs can lead to considerable danger for the user They will also void the warranty Repairs to the coffee machine during the warranty period may only be carried out by service centres authorised by the manufacturer otherwise the warrantywillbecomevoidintheeventofsubsequent damage Defective parts may on...

Page 9: ... hazards which could arise from using it Children must not play with the appliance Cleaning and user maintenance shall not be made by children unless they are older than 8 and supervised This appliance is intended to be used in household and similar applications such as staff kitchen areas in shops offices and other working environments farm houses by clients in hotels motels and other residential...

Page 10: ...ur any other liquids apart from water or place foodstuffs into the water tank Do not fill the water tank beyond the maximum mark lower edge of the filling hole 1 4 litres Only operate the machine when the waste container drip tray and the cup grate are fitted Do not pull the cable to remove the plug from the mains socket or touch with wet hands Do not hold the coffee machine with the mains cable K...

Page 11: ...nded purpose or used in any other way the cof fee machine may be or become a source of danger A WARNING Therefore the coffee machine may only be used for its intended purpose A WARNING Observe the procedures described in this user manual Noclaimsofanykindwillbeaccepted for damage or injury resulting from use of the coffee machine for other thanitsintendedpurpose Theriskhastobebornesolelybythe mach...

Page 12: ...t Compliance with WEEE Directive and Disposing of the Waste Product This product complies with EU WEEE Directive 2012 19 EU This product bears a classifi cation symbol for waste electrical and electronic equipment WEEE This product has been manufac tured with high quality parts and materials which can be reused and are suitable for recycling Do not dispose of the waste product with normal domestic...

Page 13: ...iance with RoHS Directive The product you have purchased complies with EU RoHS Directive 2011 65 EU It does not contain harmful and prohibited materials specified in the Directive 1 9 Plug Wiring Themouldedplugonthisappliance incorporates a 13 A fuse Should the fuse need to be replaced an ASTA approved BS1362 fuse of the same rating must be used Do not forget to refit the fuse cover In the event o...

Page 14: ...d of this appliance may not correspond with the coloured markings identifying the terminals on your plug proceed as follows Brown cable L Live Blue cable N Neutral Green yellow cable must be con nected to ground E line With the alternative plugs a 13 A fuse must be fitted either in the plug or adaptore or in the main fuse box If in doubt contact a qualified electrician ...

Page 15: ... values on the product and on the printed leaflets are reported up after laboratory measurements performed according to related standards These values may differ upon usage and ambient conditions 2 Your coffee machine URNEX 18 17 16 19 20 11 14 6 8 7 12 13 10 1 3 4 5 15 2 9 9 ...

Page 16: ...h quickstart instructions 10 Coffee powder shaft for previously ground coffee 11 Coffee bean container 12 Lever for setting the grinding fineness 13 Rotary switch for milk froth hot water 14 Cover for bean container 15 Measuring spoon with cleaning brush and tool function 16 Descaling agent 17 Cleaning tablets 18 Test strip for determining the water hardness 19 Milk system cleaner 20 Milk tube 2 2...

Page 17: ...eating function Milk system cleaning 1 cup Espresso cup Mild Confirmation Program Number of cups per dispensed quantity Cup filling volume Coffee grinding quantity Messages Menu functions 2 3 4 5 6 Button combination for the menu 2 3 for 3 sec Water tank illumination 2 Water hardness 3 Illumination off Illumination on Hardness level 1 Soft Hardness level 2 Medium hard Hardness level 2 Hard Hardnes...

Page 18: ...18 80 EN Fully Automatic Coffee Maker User Manual 3 Display Function displays Coffee temperature 4 Switch off time 5 Warm Hot Extra hot 9 min 30 min 1 hours 3 hours Exiting the menu 6 Menu function ...

Page 19: ...ssible so that the mains plug can be easily removed in an emergency In order to assume a fault free operation the ambient temperature should be between 8 C and 40 C C When the appliance has cooled under 0 C the appliance temperature must reach an area within the recommended ambient temperature before switching on the appliance once again 4 2 Electrical connection Forsafeandtrouble freeoperation of...

Page 20: ...tedtoaproperly installed protective earth PE conductor system Connection to a mains socket without PE conductor is forbidden If in doubt the electrical system must be checked by a qualified electrician The manufacturer assumes no liability for injury or damage caused by a missing or interrupted protective earth conductor 4 3 Mounting the drip tray Position the drip tray with the stainless steel gr...

Page 21: ...press the milk tube into guides 2 and 3 3 2 1 4 Setting up C If you only wish to dispense hot water the hose may not be connected 3 Close the door with the coffee dispensing unit C Before opening or closing the door always push the outlet unit into the upper position otherwise the milk tube on the inside could become pinched off 4 Place a milk package to the left of the coffee machine 5 Insert the...

Page 22: ...r A CAUTION Milk mineral water or other liquids can damage the water tank or the coffee machine A CAUTION Only fill the water tank with fresh cold water A CAUTION Observe the maxi mum filling level of 1 4 litres A CAUTION During initial startup or when the water tank was previously emptied completely water intake can be slowed down In this case it is helpful to switch the device off and on again T...

Page 23: ...outside Wipe the water tank shaft dry also before inserting the water tank see also section 6 2 4 Setting up 4 6 Filling the coffee bean container C Every coffee machine is thoroughly checked before delivery Therefore there may be residual ground coffee in the grinder Your coffee machine is definitely new A CAUTION Make sure that no foreign objects such as stones get into the coffee bean container...

Page 24: ...ontainer only with pure coffee beans without sugar coatings or aromatised constituents Damage to the grinding mechanism To fill the coffee bean container 11 proceed as follows 1 Fold back the lid of the coffee container 2 Fill the container with fresh coffee beans 3 Then close the container again ...

Page 25: ...o not leave the coffee machine unsupervised during operation 5 2 Switching on the coffee machine C Before switching on always check that the water tank and the coffee bean container are full Every time the coffee machine is switched on or off it requires water for the automatic rinsing cycle C Small amounts of water can get into the waste container during each rinsing process This is system relate...

Page 26: ... Press the ON OFF button to switch off the coffee machine It will then perform a rinsing cycle C If you have also prepared a coffee speciality with milk milk froth the coffee machine will prompt you to also clean the milk system after rinsing Details for this can be found in section see section 6 3 system cleaning should be carried out otherwise time consuming cleaning of the milk frother will bec...

Page 27: ...ffee machine at any time during operation by pressing the ON OFF button 2 times Exception during the rinsing procedure when switching the coffee machine on off 5 Operation and use 5 5 Determining the water hardness Before using the coffee machine for the first time it should be set to the appropriate water hardness for your region You can determine the water hardness with the help of the test stri...

Page 28: ... for example to set the de termined water hardness level 1 To do this press buttons 2 and 3 simultaneously for approx 3 seconds The symbol display will briefly light up as a blinking line then the display will change to the current settings The following parameters can be set Water tank illumination via button 2 Water hardness level via button 3 Coffee temperature via button 4 Switch off time via ...

Page 29: ... 1 Thenpresskey3repeatedlyuntil the required hardness degree is set 3 5 Operation and use The image below shows the displaysforthe4possiblehardness degree settings Hardness level 1 Soft Hardness level 2 Medium hard Hardness level 3 Hard Hardness level 4 Very hard 2 Store the input by pressing 6 Allfunctiondisplaysofthe menuflashforapprox 3secondsto confirm Theappliancethenreturns tothenormaloperat...

Page 30: ...h for milk froth hot water C The milk tube must not be connected when preparing hot water C The Milk froth function must not be selected 5 9 Setting the grinding fineness Youcansetthethegrindingfineness 12 with the help of the lever A CAUTION Setting the grinding fineness when the grinder is not running can lead to damage Only set the grinding fineness when the grinder is running To set the grindi...

Page 31: ...k roasted coffee beans set the grinding mechanism to coarse If the grinding fineness is set too coarse the coffee will be dispensed too quickly 5 10 Preparing coffee with whole coffee beans To prepare coffee with whole coffee beans proceed as follows 1 Set one or two cups or if pots are selected a pot with the appropriate volume 500 or 1000 ml under the coffee outlet 4 2 In order to reduce heat lo...

Page 32: ... cup size is only possible in one or two cup mode The default factory setting approx 120 ml per cup is set for the four or eight cup mode in the pot selection C The coffee machine is set for standard quantities for each cup size by default If you wish to change any of the cup filling quantities instructions seesection5 11 4 Select the desired ground coffee quantity by pressing the button 5 5 The f...

Page 33: ...ferent coffee varieties It may therefore be necessary to brew 5 times until the correction is perfect C The last selected ground coffee quantity remains set for each cup size C The set ground coffee quantity remains stored even when the coffee machine is switched off 5 Select the required number of cups or pot size by pressing button 3 3 Thefollowingselectionsarepossible 1 cup 2 cups pot 4cups pot...

Page 34: ...ofwater first for prebrewing The actual brewing process takes place afterashortpause C You can stop coffee dispensing prematurelybybriefly pressing button 6 In the case of strongly uneven or only one sided cup filling during 2 cup operation check whether one or both coffee dispensing spouts are blocked on the inside by foreign bodies coffee bean or similar 5 11 Changing and storing the cup filling...

Page 35: ... 3 Press key 5 repeatedly until the symbol for the required coffee grinding quantity lights up 5 4 Press button 6 and keep it pressed until the desired filling amount is reached 6 5 Releasethebutton Thenewcup filling level is now stored C Repeat the proce dure if you also wish to change the filling level for the other cup sizes C All values remain stored even when the coffee machine is switched of...

Page 36: ...water soluble freeze dried instant products or other drink powders A CAUTION Too finely ground coffee powder can lead to faults To prepare coffee with powdered coffee proceed as follows 1 Select the Coffee powder function by pressing the button 5 5 The following symbol lights up in the display C Duringpreparationof coffee with powder only one cup can be prepared with powdered coffee C The ground c...

Page 37: ...o powder mode Instruction can be found in section seesection5 13 5 Operation and use 3 Open the lid of the coffee bean container 14 and the coffee powder shaft 10 4 Pourinthefreshcoffeepowder 5 Then close both lids again A CAUTION Ensure thatpowderdoesnot clog the container and that no foreign matter gets into the container A CAUTION Never fill the container with more than one level measuring spoo...

Page 38: ...oceed as described in section 6 5 8 Press button 6 to dis pense coffee C You can stop coffee dispensingpremature ly by briefly pressin button6 5 13 Changing and storing the cup filling level in powder mode The coffee machine is set for standard quantities by default However you can set the cup filling levelindividuallyforeachcupsize Proceedasfollows 1 Select the Coffee powder functionbypressingthe...

Page 39: ...esired cup filling level is now stored C Repeat the procedure if you also wish to change the filling level for the other cup sizes C All values remain stored even when the coffee machine is switched off Should you change your cup size you can adapt the cup filling level individually at any time C The stored cup filling levels for each individual cup symbol only applies in powder mode 5 14 Preparin...

Page 40: ...ee is poured into the cup followed by the hot milk froth on top of the coffee 1 To prepare a Latte Macchiato press button 4 repeatedly until the symbol for the Coffee speci ality is selected 4 C The appliance heats up to a higher temperature when Coffee speciality is selected The temperature control lamp flashes during the heating process C To prepare Latte Macchiato first pull the drip tray 8 out...

Page 41: ... the required quantity of coffee select the corresponding cup symbol by pressing button 4 C If Coffee powder is selected only one cup can be used 5 Operation and use C The standard filling amounts or the individual filling amounts you set in Chapter 5 11 Changing and saving the cup filling level in bean modeor5 13Changing and saving the cup filling level in powder mode also apply in this mode If y...

Page 42: ...dispensing drink with milk After using milk you should rinse themilksystemimmediately 1 Press button 2 repeatedly until the Milksystemcleaning display isselected 2 2 Press button 6 C The Milk system cleaning symbol and the temperature control lamp flash while the heating switches on briefly C After heating is complete thesymbols Milk system cleaning and Milk froth flash inthedisplay 3 Fill a conta...

Page 43: ...g is complete close the milk froth hot water rotary switch The appliance switches back to operating mode after several seconds 5 Operation and use C If several drinks are prepared with milk themilksystemshould be subsequently cleaned Otherwise the program will prompt cleaning when the appliance is switched on again It is then not possible to selectadrink Milk residue must also be cleanedfromtheout...

Page 44: ...isplays of the menu will flash first in a blinking line then the current settings will be displayed 3 2 2 Then press key 4 repeatedly until the required hardness coffee temperature is set 4 The image below shows the displays for the 3 possible coffee temperature settings Warm Hot Extra hot 3 Save the entries and quit the menu by confirming with button 6 All function displays of the menu flash for ...

Page 45: ...settings will be displayed 3 2 2 Then press key 5 repeatedly until the required switch off time is set 5 5 Operation and use The image below shows the displays for the 4 possible switch off times The appliance is programmed for the highest possible saving of energy The pre set shut off time is 9 minutes 9 min 30 min 1 hours 3 hours 3 Save the entries and quit the menu by confirming with button 6 A...

Page 46: ...unction displays of the menu will flash first in a blinking line then the current settings will be displayed 3 2 2 Then press key 2 repeatedly until the required illumination is set 2 The image below shows the displays for the 2 possible settings Illumination off Illumination on 3 Save the entries and quit the menu by confirming with button 6 All function displays of the menu flash for approx 3 se...

Page 47: ...temperature Shut off time Water tank illumination To reset the appliance to the factory settings proceed as follow Switch to the menu function by simultaneously pressing buttons 2 and 3 for approx 3 seconds The function displays of the menu will flash first in a blinking line the current settings will be displayed Press and hold buttons 2 and 4 for approx 3 seconds 5 Operation and use The reset is...

Page 48: ...he plug out of the mains socket before starting cleaning A WARNING Before cleaning allow the coffee machine cool down A WARNING Donot use any scratching abrasive or corrosive agents Wipe the inside and outside of the housing with a soft damp cloth A WARNING Never immerse the coffee machine itself the mains cable or the mainsplugintowater or other liquids A WARNING Do not clean housing parts such a...

Page 49: ... the opening in the cup grate 4 Clean the drip tray with the cup grate 8 with warm water and a mild washing up liquid 6 Cleaning and maintenance 5 Wipe the coffee bean container with a dry lint free cloth 6 3 Milk system cleaning program If you switch off the coffee ma chine with the ON OFF button after dispensing a coffee special ity with milk the coffee machine performs a rinsing cycle and then ...

Page 50: ... of water and the appropriate quan tity of cleaning solution for the milk system refer to notes on the cleaning solution 2 Insert the milk tube down to the bottom of the container with the cleaning solution Open the rotary switch for milk froth hot water C The cleaning solu tion is fed into the appliance via the milk tube and discharged via the outlet unit into the drip tray 3 After the run is com...

Page 51: ...e left side Pull the coffee grounds container out and clean the container thoroughly to prevent formation of mould Insert the cleaned waste containerbackintothemachine and push it until it stops C The clear water is fed into the appliance via the milk tube and discharged via the outlet unit into the drip tray 6 After rinsing is complete close the milk froth hot water rotary switch C If several bev...

Page 52: ...ed off this will not be detected This may result in prompting to empty after dispensing the first coffee when the coffee machine is switched on again the next time C Generally the waste container should be cleaned daily if the coffee machine is used every day You will be reminded of this each time by the following display symbol 6 5 Removing and cleaning the coffee dispensing unit Tocleanthecoffee...

Page 53: ...hose distribution system of the coffee dispensing unit only if necessary e g clogging see sec tion 6 6 5 Reinsert the coffee dispensing unit see section 6 7 6 Cleaning and maintenance 6 6 Cleaning the hose distribution system 1 Grip the loose hose end near to the spring and pull the cross shaped hose connector 1 out of its fixing Subsequently pull both hose ends with the sleeve ends out of the dis...

Page 54: ...The spring must be evenly pulled over the half of the hose and the funnel shaped end of the hose D must face upwards 6 Now insert both sleeve ends with the hoses into the dispensing tubes 2 and press them in until they snap in properly Push the connecting piece into the fixing slot 1 and subsequently push the hoses to the right and left under the frame3 A A B B C D A C 1 2 2 3 1 3 3 6 7 Installing...

Page 55: ...ill be jammed 6 8 Cleaning the brewing unit Clean the brewing unit every day If youdonotintendtouseyourcoffee machine for a longer period of time e g holidays it is necessary to empty the waste container 5 and the water tank 7 and to clean the brewing unit thoroughly 6 Cleaning and maintenance A WARNING Danger of burning The dispensing unit may still be hot if you have recently prepared coffee Alw...

Page 56: ...om falling out 5 Turn the brewing unit round The brewing unit is open and the ejector folded down The two stainless steel screens are now freely accessible C If the brewing unit is closed you can loosen it on the back with the help of the tool function on the measuring spoon 15 Push the toothed opening on the measuring spoon onto the pin and loosen it by turning completely at least 3 times 6 Clean...

Page 57: ...ngs using a strong flow of water 9 Dry the brewing unit 10 Replace the brewing unit by turning it into the right position the outlet tube facing downwards and to the front insert the brewing unit into the guide grooves and push it completely into the coffee machine 11 Push the coffee grounds container back into the appliance and push the outlet unit into the upper position Close the door C After s...

Page 58: ...l sieves in the brewing unit must be clean and wiped dry The cleaning water is collected in the drip tray Alternatively you can place a receptacle 350 ml under the spout Only empty the recep tacle when the coffee machine indicates that the drip tray must emptied A CAUTION Damage to the coffee machine and remnants left in the water by use of thewrongcleaner Use only provided Beko cleaning tablets w...

Page 59: ...Open the lid of the coffee bean container 14 and the coffee powder shaft 10 5 Put a cleaning tablet into the coffee powder shaft 6 Cleaning and maintenance 6 Then press button 6 The appliance will implement several cleaning cycles After the cleaning phase is complete the display will light up permanently 7 Remove and empty the drip tray 8 Press the drip tray back onto the appliance until it audibl...

Page 60: ...ance is now ready for operation again in the last selected coffee mode status 13 Now prepare a cup of coffee and pour it away in the sink to eliminate any remaining residues of the cleaning tablet 6 10 Running the descaling program The descaling program enables simple and effective descaling of your coffee machine You should descale the appliance at regular intervals but at the latest when the fol...

Page 61: ...5and5 7for instructionsonthis A CAUTION Damage to the coffee machine and remnants still in the water by use of the wrong descaler Use only durgol swiss espresso descaling solution If other descaling solutions are used Beko assumes no liability for any damage caused durgol descaling solution is available from your retailer A CAUTION Irritation to skin or eyes can occur if they come into contact wit...

Page 62: ...r tank arepermanentlylit 3 Remove the water tank 7 4 Add 125 ml durgol swiss espresso descaling solution to the water tank 5 Then pour 250 ml of water into the water tank by filling the empty descaling solution bottle 2 times with fresh water 6 Replace the water tank 7 Ensure that grounds container is correctly positioned in the appli ance 8 Now press button 6 to start the descaling process of the...

Page 63: ...s 6 Cleaning and maintenance C The drip tray serves ascollectingcontainer forthecleaningwater You can alternatively place a container 350 ml under the outlet The display lights up permanently 13 Now press button 6 to start the descaling process of the brewing unit The appliance will implement addition descaling cycles Pause times are for the descaling agent to take effect After completion of the 2...

Page 64: ...resh water 19 Remove the water tank 7 The display lights up permanently 20 Then push button 6 The cleaning phase of the descaling process begins The appliance carries out a rinse programme with 250 ml fresh water The indication Descaling pro gramme is flashing quickly 21 Remove the drip tray and empty it 22 Press the drip tray back onto the appliance until it audibly engages The display lights up ...

Page 65: ... IN O U T 26 Remove the drip tray and empty it 27 Press the drip tray back onto the appliance until it audibly engages The display lights up permanently 6 Cleaning and maintenance 28 Then push button 6 The following message is displayed 29 Remove the brewing unit and clean it thoroughly from the inside and from the outside according to the instructions in chapter 6 8 After 10 seconds the missing b...

Page 66: ...program is complete when the Descaling program function display goes out 32 Remove the water tank 7 and fill it with minimum 1 litre fresh water Replace the water tank The coffee machine is now ready for operation again and returns to the last selected coffee mode A CAUTION Residues of descaler may cause damage to the brewing unit in the long run It is imperative that you rinse the brewing unit th...

Page 67: ...enings are completely free after cleaning 6 Remove the lid 1 from the milk frother 7 Remove the milk frother nozz le from the milk frother by in serting the rounded end of the measuring spoon into the slot of the milk frother nozzle and turning 45 to pull it out The nozzle is lifted up slightly during turning so that it can removed more easily 1 1 8 Clean the milk frother nozzle with a thin needle...

Page 68: ... the cleaning solution for 5 hours or over night 12 Replace the frother nozzle in the milk frother and lock the nozzle by turning it 45 with the rounded end of the measuring spoon 1 1 6 Cleaning and maintenance 13 Replace the lid 1 pay attention to the direction 14 Replace the milk frother in the coffee machine and push the lever downwards to lock 1 15 Insert the end of the milk hose into the open...

Page 69: ...refill water always lights up permanently 7 1 Safety precautions A WARNING Danger from unqualified repairs Observe the following safety precautions to avoid danger and material damage Do not open the coffee machine Repairs to electrical coffee machines may only be carried out by qualified electricians Unqualified repairs can lead to considerable danger for the user and cause serious damage to the ...

Page 70: ...d rinse it thoroughly with flowing water Brewing unit not or not correctly fitted Insert the brewing unit into the appliance andclose the door Brewing unit overfilled Press button the message Brewing unit soiled is displayed Remove the brewing unit and rinse it thoroughly with flowing water Check if coffee powder shaft is clogged and clean if necessary 7 Troubleshooting ...

Page 71: ...nt coarser coffee powder Water system is calcified Run cleaning or descaling programme The adapter without filter cartridge is still in the water tank Remove the adapter from the water tank The water tank has overflowed or is too damp Dry the water tank and the water tank case thoroughly The water tank lid is missing Remove the water tank and put the lid on Too much air in system Refill the water ...

Page 72: ...ation Please contact the service hotline If we cannot help you on the telephone you will be instructed as to the further procedure www beko com Beko call center 444 0 888 Input voltage error Main switch blocked Coffee temperature is incorrect Brewing unit is blocked technical reason Use the splined opening on the measuring spoon to open the back of the brewing unit with the splined journal min 3 t...

Page 73: ...der used Measure coffee properly top up with max 1 measuring spoon of coffee beans Set ground coffee quantity higher Vary grinding fineness Try a different coffee sort Coffee type changed setting changed Take the automatic grinding quantity correction into consideration see section 5 10 under Notes Very loud noise during grinding Grinding mechanism clogged by foreign matter Send the coffee machine...

Page 74: ...stem connection see section 4 4 6 5 6 6 und 6 7 Milk frother is not completely inserted Checking the milk frother see section 6 11 Milk tube bent Relocate the milk hose see section 6 6 Milk container is empty Fill milk container Milk system clogged Clean froth nozzle see section 6 11 Steam outlet of the coffee machine is blocked Descaling the coffee machine see section 6 10 ...

Page 75: ...roth nozzle see section 6 11 Milk system is dirty Clean milk system see section 6 3 Steam outlet of the coffee machine is blocked Descaling the coffee machine see section 6 10 Display shows Water tank empty even though the tank is full Air in system Dispense a little hot water see section 5 8 Water system clogged As a precautionary measure run the cleaning or descaling program see sections 6 9 and...

Page 76: ...witched on Depending on grinding fineness and coffee filling level different size coffee ground waste is formed resulting in emptying cycles other than indicated Water in the waste container Water leaks into the waste container during each rinsing process No remedy necessary technical reasons Coffee dispen sing too slow Grinding fineness set too fine Set coarser grinding fineness Grinding quantity...

Page 77: ...wing unit at the black tooth pin An opened brewing unit is illustrated in section 6 8 Cleaning the brewing unit Coffee machine cannot be switc hed on Not plugged in Insert the mains plug Coffee dispensing is very uneven or only one sided Spout is clogged or blocked by foreign bodies e g coffee bean or similar Pull the coffee spout upwards and clean the inside or remove the foreign body e g coffee ...

Page 78: ...ffee machine and all parts Insert the water tank and the waste container back into the coffee machine Pack the coffee machine and the drip tray each into a plastic bag 2 Put the lower styrofoam tray into the box Place the coffee machineandthetrayintothebox wrap the the connecting cable and insert it into the prescribed styrofoamtray 3 Place the upper styrofoam tray on top so that the coffee machin...

Page 79: ... to use the coffee machine for a prolonged period clean it as described in section 6 in order to prevent mould from building up Mould is harmful to health Store the coffee machine and all accessory parts in a dry clean and frost free place which is protected against direct sunlight ...

Page 80: ...in the United Kingdom or Republic of Ireland Any parts removed during repair work or any product that has been replaced becomes our property The guarantee is not transferrable if the product is resold The Guarantee does not cover Transit installation or delivery damage Accidental damage Misuse or abuse Replacement of any consumable item or accessories These include but are not limited to plugs cab...

Page 81: ......

Page 82: ......

Page 83: ......

Page 84: ...www beko co uk ...

Reviews: