1.3operating
There is an indication button on the printer’s panel, and this button is not only an indicator
but also a function key.
1.3.1operating key
FEED button: Click the button and the printer feed paper one line. Hold down the button
and the printer continuously feed paper.
1.3.2 Operation
1. self- test
Step 1:
The power of the printer is turned off.
Step 2:
Press the indicator button
Step 3:
Energize
the printer for about 2 seconds and the printer will start the self-test.
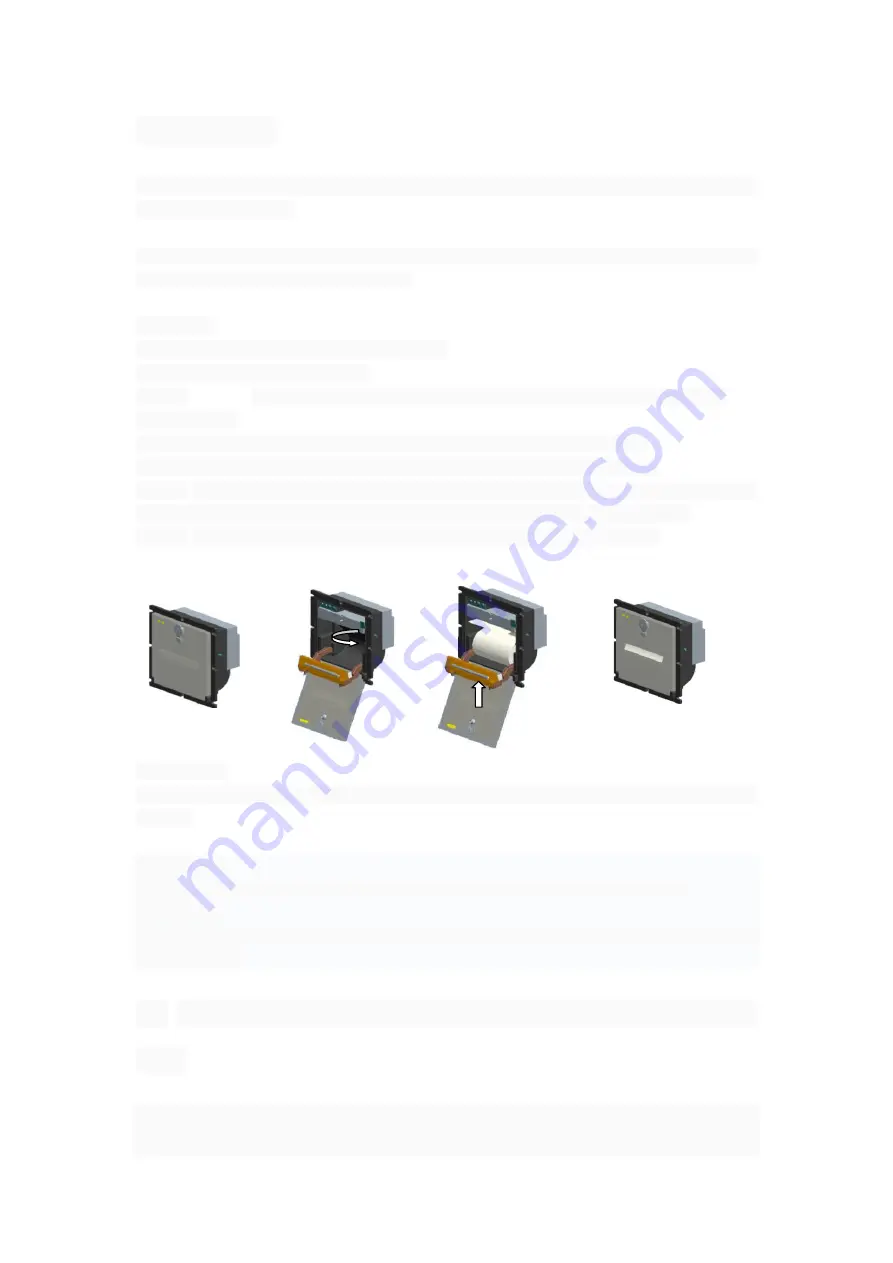
2. Load paper
Step 1:
Open the security lock of the printer, and open the printer’s cover.
Step 2:
Pull out the right wrench of the printer, and open the printer's creel.
Step 3:
Remove the printer’s paper axis and insert the roll paper. Then put the paper into
the paper storehouse, and get stuck the paper axis, and fasten the printer creel.
Step 4:
Pull out the paper end, and fasten the cover. End the loading paper.
3 Paper feed
Under the printer charged state, hold down the buttons, and the printing paper starts
feeding.
1.3.3Indicator light
Power Light:
When the printer is powered, the indicator light is bright with green light for long.
Status Light:
When the printer lacks the paper, the indicator light will be in a state of continuous glint
with green light.
1.4
Appearance size and installation dimensions (Unit:
mm)
Appearance size: feet inches length 135.5 mm * width 136.5 mm * depth 66.5 mm
Installation dimensions: length 127.5 mm * width 128.5 mm
Summary of Contents for RD-FH8C7
Page 41: ...B character set 1 and 2 C International standard ASCII ...
Page 43: ......


