25
7. APPLICATIONS
The Behringer VIRTUALIZER is a highly flexible device that can be used for a wide variety of applications.
Prior to a presentation of the VIRTUALIZERs many uses, please note the following remarks on how to set
signal levels correctly.
7.1 Level setting
Take care to set all levels properly on the VIRTUALIZER! Low levels deteriorate the dynamics of the music
signal, which results in a poor, weak and noisy sound. On the other hand, excess levels overdriving the
converters in the VIRTUALIZER should also be avoided. Digital distortion is (unlike its analog counterpart) very
unpleasant to hear as it does not occur gradually but abruptly.
Use the input level meter of the VIRTUALIZER to adjust the input signal to about 0 dB, so that the Clip LED
flickers only rarely. Make sure that it never lights up all the time!
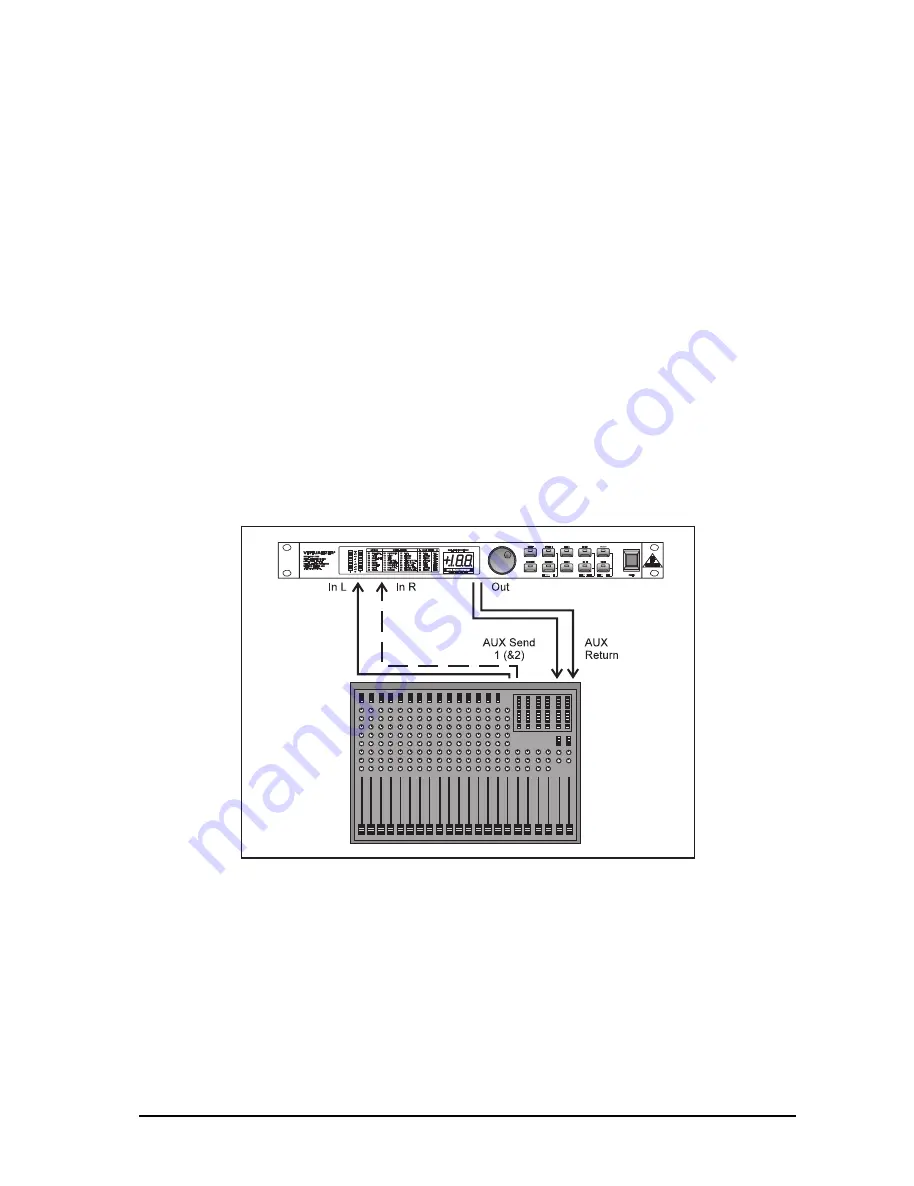
7.2 Using the VIRTUALIZER in the aux bus
By using the VIRTUALIZER in an aux bus of your mixing console you can feed the channel signals of one,
several or even all console channels into the VIRTUALIZER, i.e. for each channel you can use the aux busses
to separately determine the reverb levels of, for instance, various drum sounds: while lots of reverb is applied to
the snare drum, the effect intensity could be reduced in the channels assigned to the tom-toms. To use the
VIRTUALIZER in the aux bus, the unit must be wired as follows:
Fig. 7.1: Wiring aux busses
Connect the two Input phone jacks with the Aux Send outputs of the mixing console, and the Output jacks of
the VIRTUALIZER with the Aux Return inputs of the console. If you want to use the Behringer VIRTUALIZER in
mono or dual mode, connect one audio channel (left or right) to one aux bus.
+
Turn back the volume on your amplifier to protect your equipment against damage. All devices
you wish to interconnect should remain switched off until they are wired correctly.
7. APPLICATIONS
All manuals and user guides at all-guides.com


