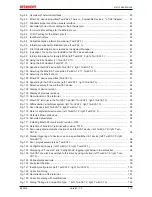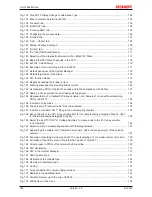
List of illustrations
EL37x2
178
Version: 3.5
Fig. 42
Invalid EL3xx4 configuration........................................................................................................
50
Fig. 43
EL37x2 LEDs...............................................................................................................................
51
Fig. 44
Pin assignment EL3702, EL3742 ................................................................................................
52
Fig. 45
Electrical isolation of the inputs ...................................................................................................
53
Fig. 46
EL3702 - equivalent circuit diagram with variable voltage source ...............................................
53
Fig. 47
EL3742 - equivalent circuit diagram with variable current source ...............................................
54
Fig. 48
Relationship between user side (commissioning) and installation...............................................
56
Fig. 49
Control configuration with Embedded PC, input (EL1004) and output (EL2008) ........................
57
Fig. 50
Initial TwinCAT 2 user interface...................................................................................................
57
Fig. 51
Selection of the target system .....................................................................................................
58
Fig. 52
Specify the PLC for access by the TwinCAT System Manager: selection of the target system ..
58
Fig. 53
Select "Scan Devices..." ..............................................................................................................
59
Fig. 54
Automatic detection of I/O devices: selection the devices to be integrated.................................
59
Fig. 55
Mapping of the configuration in the TwinCAT 2 System Manager...............................................
60
Fig. 56
Reading of individual terminals connected to a device................................................................
60
Fig. 57
TwinCAT PLC Control after startup .............................................................................................
61
Fig. 58
Sample program with variables after a compile process (without variable integration) ...............
62
Fig. 59
Appending the TwinCAT PLC Control project .............................................................................
62
Fig. 60
PLC project integrated in the PLC configuration of the System Manager ...................................
63
Fig. 61
Creating the links between PLC variables and process objects ..................................................
63
Fig. 62
Selecting PDO of type BOOL ......................................................................................................
64
Fig. 63
Selecting several PDOs simultaneously: activate "Continuous" and "All types"..........................
64
Fig. 64
Application of a "Goto Link" variable, using "MAIN.bEL1004_Ch4" as a sample ........................
65
Fig. 65
Choose target system (remote) ...................................................................................................
66
Fig. 66
PLC Control logged in, ready for program startup .......................................................................
67
Fig. 67
Initial TwinCAT 3 user interface...................................................................................................
68
Fig. 68
Create new TwinCAT project.......................................................................................................
68
Fig. 69
New TwinCAT3 project in the project folder explorer ..................................................................
69
Fig. 70
Selection dialog: Choose the target system ................................................................................
69
Fig. 71
Specify the PLC for access by the TwinCAT System Manager: selection of the target system ..
70
Fig. 72
Select "Scan" ...............................................................................................................................
70
Fig. 73
Automatic detection of I/O devices: selection the devices to be integrated.................................
71
Fig. 74
Mapping of the configuration in VS shell of the TwinCAT3 environment.....................................
71
Fig. 75
Reading of individual terminals connected to a device................................................................
72
Fig. 76
Adding the programming environment in "PLC" ..........................................................................
73
Fig. 77
Specifying the name and directory for the PLC programming environment ................................
73
Fig. 78
Initial "Main" program of the standard PLC project......................................................................
74
Fig. 79
Sample program with variables after a compile process (without variable integration) ...............
75
Fig. 80
Start program compilation............................................................................................................
75
Fig. 81
Creating the links between PLC variables and process objects ..................................................
76
Fig. 82
Selecting PDO of type BOOL ......................................................................................................
76
Fig. 83
Selecting several PDOs simultaneously: activate "Continuous" and "All types"..........................
77
Fig. 84
Application of a "Goto Link" variable, using "MAIN.bEL1004_Ch4" as a sample ........................
77
Fig. 85
TwinCAT development environment (VS shell): logged-in, after program startup.......................
78
Fig. 86
System Manager “Options” (TwinCAT 2).....................................................................................
80
Fig. 87
Call up under VS Shell (TwinCAT 3) ...........................................................................................
80
Summary of Contents for EL3702
Page 2: ......
Page 6: ...Table of contents EL37x2 6 Version 3 5...
Page 83: ...Commissioning EL37x2 83 Version 3 5 Fig 92 Incorrect driver settings for the Ethernet port...
Page 142: ...Commissioning EL37x2 142 Version 3 5 Fig 184 Process data tab SM0 EL37x2...
Page 143: ...Commissioning EL37x2 143 Version 3 5 Fig 185 Process data tab SM1 EL37x2...


