background image

151

Internet (WAP) Functions

Create new profile

To create a new profile, select 

Create new pro-

file?

 with the right rotary control and press the

control to confirm.

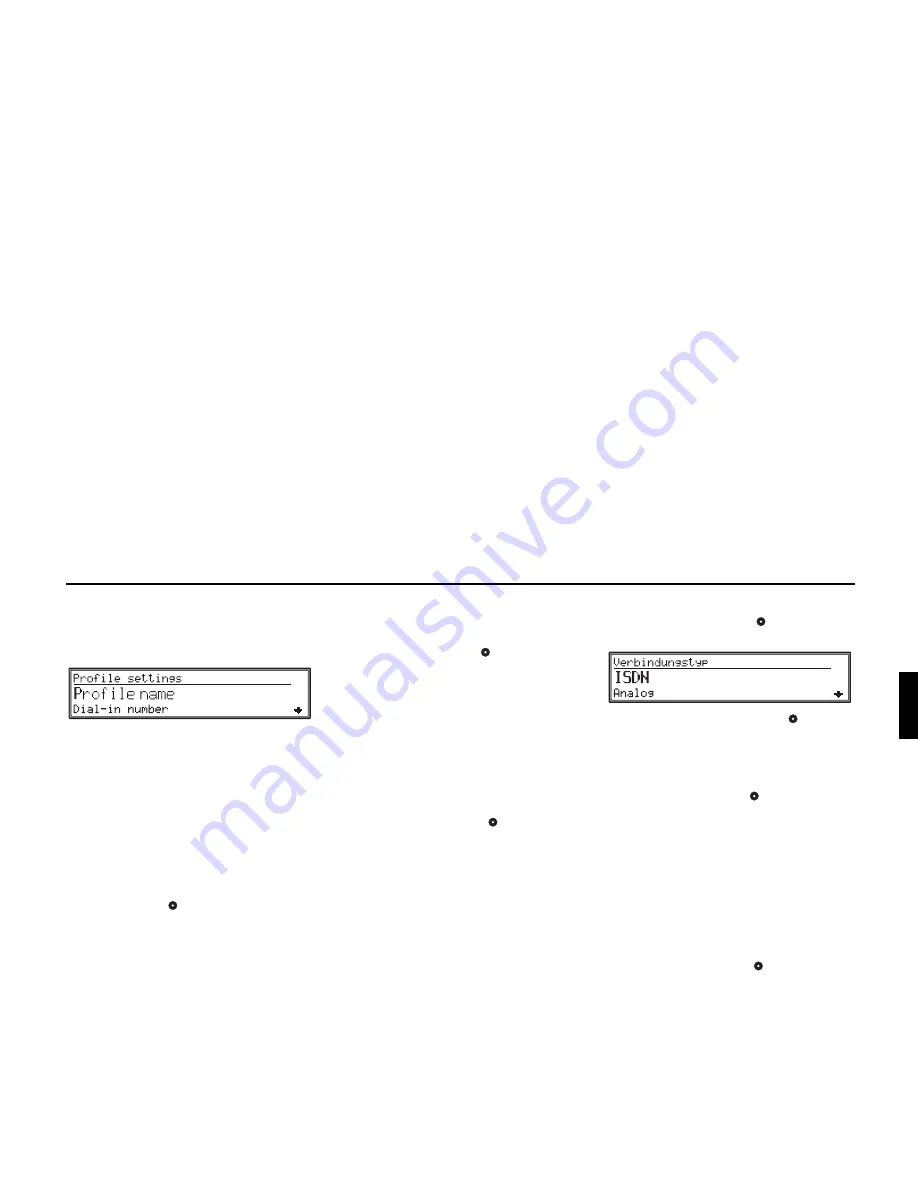
For browser-specific settings, select

Profilename

,

Dial-in number

,

Type of connection

,

User name

,

Password

,

IP adress

,

IP port

,

Home page

,

Timer

by turning the right rotary control, and confirm by
pressing the control 

.

Note:

Your provider can inform you which entries need
to be made for the following menu items.

Profile name:

For the max. ... Access profiles, a name of your
choice can be assigned.
With the right rotary control

 select 

Profilename

 and press the control to confirm.

A recommendation will be made. This recommen-
dation can be accepted or rejected by pressing 

Yes

or 

No

.

If 

No

 is selected, a name can be entered for the new

profile.
By pressing and holding the right rotary control,
the name will be accepted.

Login number:

With the right rotary control

 select 

Dial-in

number

 and press the control to confirm.

A recommendation will be made. This recommen-
dation can be accepted or rejected by pressing 

Yes

or 

No

.

If 

No

 is selected, a login number can be entered for

the new profile.
By pressing and holding the right rotary control,
the login number is accepted.

Type of connection:

With the right rotary control

 select 

Type

of

connection

 and press the control to confirm.

By turning the right rotary control

, select the

type of connection desired and press the control to
confirm.

User name:

With the right rotary control

 select 

User name

and press the control to confirm.
A recommendation will be made. This recommen-
dation can be accepted or rejected by pressing 

Yes

or 

No

.

If 

No

 is selected, the user name for the new profile

can be entered.
By pressing and holding the right rotary control,
the user name is accepted.

Password:

With the right rotary control

 select 

Password

and press the control to confirm.
A recommendation will be made. This recommen-
dation can be accepted or rejected by pressing 

Yes

or 

No

.

If 

No

 is selected, the password for the new profile

can be entered.
By pressing and holding the right rotary control,
the password is accepted.

Summary of Contents for Online Pro 7800

Page 1: ...n 108 Route options 108 Destination memory 109 Calling up a destination stored in the destination memory 109 Storing a destination in the destination memory 110 Deleting a destination from the destina...

Page 2: ...es 142 Processing messages 143 Delete message 143 Answer message 143 Writing messages 143 Deleting All Messages 145 Settings 145 Internet WAP Functions 146 Calling up WAP menu 146 Connecting terminati...

Page 3: ...eneral instructions for MP3 167 Creating an MP3 data medium 167 Notes on playing MP3 CDs 168 Track number total playing time and track title 168 MMC MultiMediaCard 168 Which MMC can be played 168 Reco...

Page 4: ...nformation may on occasion be given Therefore actual road signs and traffic regulations must always be observed In particular the navigation system cannot be used as an orientation aid at times of poo...

Page 5: ...n authorised service garage We assume no liability for any impairment of the vehicle s electronics This device is only intended for installation in the area provided for this purpose by the vehicle ma...

Page 6: ...t of controls 1 Left rotary control Info 2 On off switch 3 TP Traffic programme key 4 Communications key 5 Source key CD 6 Source key Radio 7 Select navigation 8 CD eject button 9 Right Rotary Control...

Page 7: ...ncorrect entries block the unit for another 60 minutes Note The unit and the vehicle ignition must remain switched on during the 60 minute waiting period If the ignition does not remain switched on th...

Page 8: ...rage medium remains in the unit The display folds forwards The portable component can then be pulled out The volume is limited to a maximum level after the display has been folded down After 20 second...

Page 9: ...reble balance and fader are stored separately for the audio sources radio CD MP3 and CDC AUX mode The loudness settings affect all the sources The Tone menu can be called up by pressing one of the sou...

Page 10: ...n or off Press the source key for more than 2 seconds Press multifunction button With multifunction button you can select either Loudness on ON or Loudness off OFF Adjust volume of subwoofer or centre...

Page 11: ...Europe CD All digitised roads of the southern countries are also included on the Southern Europe CD In these detailed areas of the Northern or Southern Europe CD road map motorways regional roads and...

Page 12: ...he remaining jour ney time The symbol represents the current time During route navigation you can still use the ra dio CD or MP3 Distance to the next message and estimated time of arrival are shown on...

Page 13: ...ng navigation mode for the first time If calibration of the navigation system has not yet been completed the system will prompt you to take a drive for calibration see Installation Guide A navigation...

Page 14: ...he right rotary control Destination and press the control to confirm The country last selected is displayed When the destination is first entered the unit will switch automatically to the country sele...

Page 15: ...the location selection list The scroll marks indicate that other locations sort ed in alphabetical order can be selected To make your selection turn the right rotary control and press the control to...

Page 16: ...xists more than once in the location select ed or returns to the destination entry If an incomplete location entry was confirmed the street selection list is displayed The street name most similar to...

Page 17: ...ed in alphabetical order can be selected Select the centre by turning the right rotary control and press the control to confirm The programme returns to the Destination Entry menu If you select Start...

Page 18: ...ll return to the Destination En try menu If you select Start the route calculation is started Starting the route calculation Once the destination is completely entered in the Destination Entry menu se...

Page 19: ...void Motorway Avoid Toll and Avoid Tunnel provides options for avoiding bridges ferries tunnels or toll roads This means that when the function is active the route will be calculated e g without tunne...

Page 20: ...me The destination entered can be filed into any po sition in the destination memory by turning the right rotary control The memory position is confirmed by briefly pressing the right rotary control T...

Page 21: ...page 109 Select destination to be renamed with the right ro tary control and press the left rotary control to display the additional information on the stored destination Press multifunction button A...

Page 22: ...destinations downloaded using Destina tions are handled in the same way as the destina tion memory Destinations can be selected and navigated to directly Select the desired destination using the right...

Page 23: ...ina tions In the Main Navigation Menu select Dest Memory with the right rotary control and press the control to confirm Select the desired destination with the right rotary control and press the contr...

Page 24: ...an be selected individually After pressing the multifunction buttons the required coordinates can be entered In the case of an incorrect entry the individual val ues must be overwritten When the desir...

Page 25: ...ables entry of a stopover via geographic coordinates Start route guidance to stopover Starting route calculation to the stopover is only necessary following the entry of a destination In all other sit...

Page 26: ...nversely and the route is recal culated Delete block Press multifunction button With the right rotary control select either Yes or No The selected element will be displayed invert ed Confirm by pressi...

Page 27: ...right illustrates the dis tance and the black part decreases as you ap proach the intersection Please follow the road This display tells you that you should continue to follow the road you are on Prep...

Page 28: ...e guidance has been activated a continuous check is made for the presence of rele vant announcements for the selected route The route is then calculated using the fast route op tion while taking into...

Page 29: ...s multifunction button The journey duration kilometres travelled and the average speed are displayed By pressing the right rotary control the display is cancelled The display can be reset to zero by p...

Page 30: ...cements will be displayed Press the multifunction button The traffic announcements relevant for the route are dis played If no traffic announcements are available the mul tifunction buttons and are no...

Page 31: ...ed By pressing the multifunction button the journey duration kilometres travelled and the average speed of the last navigation route can be displayed See Requesting journey duration and kilometres tra...

Page 32: ...ion of travel point of interest lies in the opposite direction to that of travel Select the desired destination using the right ro tary control By pressing the left rotary control informa tion about t...

Page 33: ...are dis played for the given location Once a selection has been made a WAP connec tion will be established to the Beckerclub homepage You can select the desired category e g restaurant etc After sele...

Page 34: ...rotary control The voice is applied and installed by pressing the control After installation the unit will return to the previ ously selected mode Radio CD etc Setting time In order to achieve correc...

Page 35: ...nounce ments to be read aloud Traffic announcements are given depending upon route calculation and receipt of new announce ments Set and confirm Traffic news in the System Settings menu The items Traf...

Page 36: ...rotary control you can choose between Arrival Time On and Off Confirm your selection by pressing and holding the right rotary control Turning Menu Animation on or off Set Animation in menus By pressi...

Page 37: ...arlier ETA is calculated Car This is the default setting It offers sufficiently accurate calculation of the ETA for most driv ers Goods vehicle With this setting the unit adjusts for drivers who may t...

Page 38: ...the key Calling The telephone must be activated to make a call Dial the number Call up the Communications menu Press multifunction button Press the multifunction buttons through to enter the desired n...

Page 39: ...voice mailbox depending on the network provider Press the multifunction button or turn the right rotary control A number can be entered during a call by pressing the multifunction buttons through Thi...

Page 40: ...onference can be separated again or it can be ended completely Both calls can be ended by pressing the multifunction button The two calls in the conference call can be separated into two individual ca...

Page 41: ...above or to add an entry select any entry By pressing and holding the right rotary control the Telephone Book Entry menu will be displayed By turning the right rotary control you can choose between Ne...

Page 42: ...name are operated as described above in Adding an Entry L schen After selecting Delete the following menu is shown for safety reasons By turning the right rotary control select either Yes or No the i...

Page 43: ...pens the menu for saving a name A name can be entered or the numbers changed as described under Editing Adding Deleting tele phone book entries on page 131 Selecting No will return without change Dele...

Page 44: ...ddition to the data transmission a voice connection to the emergency call centre is established further information can then be communicated to the call centre where possible Prerequisites for placing...

Page 45: ...er After selection a preset telephone number is displayed The factory set telephone number should not be changed You will receive a message in case of any necessary updates Note Customers outside Germ...

Page 46: ...trol and press the control to confirm For telephone specific settings selection of Call settings Telephone settings PIN settings Call forwarding SMS see also page 145 and Block can be made by turning...

Page 47: ...e version by turning the right rotary control Press to con firm your selection Select network You can set whether an available mobile phone network is selected automatically or specified by you GSM ba...

Page 48: ...Telephone Settings menu select Tele phone settings with the right rotary control and press the control to confirm By turning the right rotary control select GSM band settings and press the control to...

Page 49: ...red PIN number will be deleted and the programme will return to the Tele phone Settings Selecting Cancel will return to the Telephone Settings menu without changing status Note If On is selected and t...

Page 50: ...lls By turning the right rotary control select be tween On Off and Status the inverted entry is active and press the control to confirm Note Call Rerouting is a network dependent function Therefore it...

Page 51: ...error message will appear Selection Reset all All Call Rerouting functions can be turned off After selecting Reset all the display will briefly show Wait for net response All Call Rerouting functions...

Page 52: ...nd press to confirm A list of received SMS messages will be displayed Messages that have not yet been read are identified by the symbol Messages that have already been read are identi fied by the symb...

Page 53: ...ress to confirm your selection The selection No cancels this menu without change After confirmation Yes the SMS is deleted and the next SMS message is displayed If no other messages are available No S...

Page 54: ...cial characters and numbers Return New Line Press and hold multifunction button to get to the next line Moving the cursor Press multifunction button Repeatedly press multifunction button to select one...

Page 55: ...enu To call up the SMS Settings menu press the button in the Communications menu With the right rotary control select Telephone and press to confirm With the right rotary control select SMS and press...

Page 56: ...d thus the programmer of the page The general rules are described below By turning the right rotary control you can scroll through the page content On the right side of the display there is a half cir...

Page 57: ...ard The selected letter will be displayed inversely Select characters or letters by repeatedly push ing the multifunction button under the desired character i e to enter a C the multifunction button b...

Page 58: ...ollows You can choose a name of your own or accept the recommended name By pressing the right rotary control for more than 2 seconds the name entered is con firmed and saved to the Favourites list Edi...

Page 59: ...ed By turning the right rotary control select the URL to be deleted and press the control to confirm The URL will be deleted from the History list Delete list By turning the right rotary control selec...

Page 60: ...gs to log onto the Internet These special settings profiles differ for each net work provider OnlinePro is supplied with the profiles for the four largest network providers in Germany already set Plea...

Page 61: ...trol to confirm A recommendation will be made This recommen dation can be accepted or rejected by pressing Yes or No If No is selected a login number can be entered for the new profile By pressing and...

Page 62: ...be made This recommen dation can be accepted or rejected by pressing Yes or No If No is selected the time out for the new profile can be entered By pressing and holding the right rotary control the ti...

Page 63: ...pressing the control Selecting URL prefix By turning the right rotary control select Se lect URL beginning and press the control to confirm A list of the possible URL prefixes will be dis played By tu...

Page 64: ...lso page 123 Other services are also available You can visit the BeckerClub at http www beckerclub com You can use the BeckerClub card which is also included in the scope of supply to log onto the Bec...

Page 65: ...unications menu by pressing the key Press multifunction button The start page for the E Mail account entered in the profile will be called up Further operation is dependent upon the E Mail provider In...

Page 66: ...Send access data automatically is selected you must also enter the user name and password as described in the following If Send access data Manually is selected you must also enter the user name and...

Page 67: ...on of Load favourites please refer to WAP Favourites on page 149 URL for Here you can set the Internet pages from which settings are to be loaded Note The factory set addresses should not be changed Y...

Page 68: ...enu Mode press multifunction but ton The last selected waveband and transmitter are set To select the MW Medium wave LW Long wave and SW Short Wave wavebands repeat edly press multifunction button unt...

Page 69: ...ss the right rotary control SCAN will be displayed An automatic transmitter search begins The first run is performed on an insensitive plane all further runs on a sensitive plane Receivable stations c...

Page 70: ...ed multifunction button until you hear a signal tone To reach memory slots 7 12 press multifunction button Request press multifunction button or The stored transmitter is request ed Manual FM tuning I...

Page 71: ...to fewer frequencies with stronger signals to switch to Turning Regionalisation on or off Select radio menu mode Use multifunction button to turn Regionali sation on On or off Off Turning frequency d...

Page 72: ...ammed TP transmitter reception is poor the unit switches to automatic tracking un til the programmed TP transmitter is receivable If an RDS station is equipped with traffic program ming this is indica...

Page 73: ...ncements will be passed through The mute function is cancelled by pressing the button again Interrupting TP announcements Briefly press the button during the TP an nouncement The announcement currentl...

Page 74: ...ntical with only a few exceptions Thus the basic functions are only described here once In the example the audio source CD CD in built in drive is shown See the following sections for special operatin...

Page 75: ...hed Analogously it switches from the first track to the last track If a title has been playing for more than 10 seconds when the skip button is pressed the unit will skip back to the beginning of the...

Page 76: ...otects the laser diode from excessive heat When the protection circuit is activated Temp Fehler is displayed and playback is stopped With an MP3 CD the system switches to radio or another source After...

Page 77: ...ns and recordings or for recordings for which author ization has been obtained from the copyright hold er Creating an MP3 data medium The maximum number of files per medium is 500 Only MP3 music files...

Page 78: ...ht to left If during the display of an ID3 tag the next track is played the display is automatically updated The display of the ID3 tag is retained until after pressing the button one of the multifunc...

Page 79: ...of the CD changer The individual directories can be selected by press ing multifunction buttons and The number shown in front of Track indicates the cur rent directory CD Changer To operate a CD chan...

Page 80: ...4 Playback begins with the last CD played at the track playing before switching off Loaded CDs can be selected by pressing multi function buttons and The magazine compartment number and the number of...

Page 81: ...ress multifunction button to reach the second and third level of the User Settings menu To exit the User Settings menu press one of the buttons or Setting the GAL Gal The GAL is a control circuit with...

Page 82: ...value To set call up the General Settings menu Press multifunction button With the right rotary control select between 10 and 10 The setting is stored automatically The settings are from 0 no change...

Page 83: ...suppressed in the menu Ext audio source With this function activated an external unit Discman Walkman etc can be connect ed The function CD changer is then sup pressed in the menu The setting is store...

Page 84: ...unction button With the right rotary control se lect between 0 low volume and 7 high volume The setting is stored automatically Limiting the volume level Lim With this function the maximum volume of t...

Page 85: ...ice The individual entries for which a reset option is available are displayed By turning the right rotary control the desired entry can be selected from the list By pressing the rotary control the ar...

Page 86: ...iable stations Stations Fix Level At the level Stations fix frequencies can be assigned to the station buttons There is no RDS evaluation The search for Stations fix is equivalent to manual FM tuning...

Page 87: ...rect PIN is entered 3 times in a row SIM Card Subscriber Identification Module The card received from your provider containing all relevant data for your telephone service SMS Short Message Service Se...

Page 88: ...order to utilise the GAL a square wave volt age with a mass related amplitude of 4 V to 12 V must be provided by the vehivcle s elec tronic speedometer Volume is increased in 7 in crements of 2 5 dB...

Page 89: ...ence with other electrical electronic devices caused by the unit or interference with this unit caused by other electrical electronic devices is largely prevented The EC type approval mark e1 issued b...

Reviews: