2.
Secure the fascia to the heater with 2
off screws 'C' and 2 off washers 'D' (See
figure 4) through the holes in the lower
side legs of the fascia.
3.
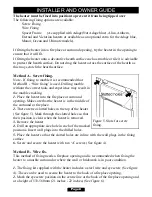
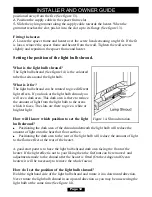
Hook the firefront on to the fascia as
in figure 17.
4.
Position the ash pan cover beneath the
firefront.
5.
Place the loose coals onto the top of
the fuel support (a glove is provided with
the coal pack). It is not necessary to use
all the coal supplied.
Fitting the Alisa and Anthem fascia.
The Alisa and Anthem fascia consist of three
parts. Two sides and a top. These are held in
place with four magnets.
1.
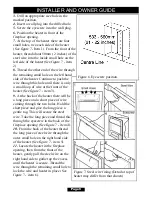
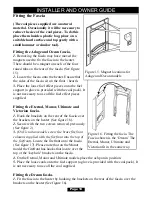
Lay the three fascia parts face down on a
flat surface as in figure 18. Each side trim
has a small tab at the top. Position the tab to
the outside upper edge (See figure 18).
2.
Locate the left-hand-side-trim tab into the
slot / fold along the upper edge of the top
trim (See figure 18).
3.
Locate the right-hand-side-trim tab into
the slot / fold along the upper edge of the
top trim (See figure 18).
4.
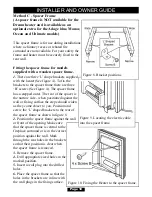
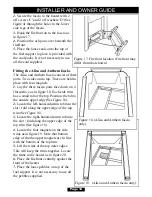
Locate the four magnets on the side
trims as in figure 19. Note that bottom
edge of the the upper magnets are in line
with the bottom of the top trim.
5.
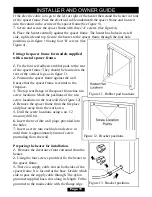
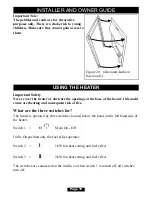
Lift the trims at the top outer edges.
This will keep the trims together. Locate
the trims to the heater as in figure 20.
6.
Place the firefront centrally against the
front of the heater
7.
Place the loose pebbles on top of the
fuel support. It is not necessary to use all
the pebbles supplied.
Page 14
INSTALLER AND OWNER GUIDE
Figure 19. (Alisa and Anthem fascia only).
Figure 17. Firefront location (Firefront may
differ from that shown)
Figure 18. (Alisa and Anthem fascia
only).


