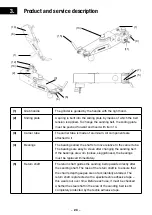
(6)
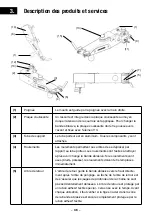
Grinding shaft
The grinding shaft engages in the tooth. A suitable grinding shaft
must be used depending on the chain pitch.
(7)
Sanding belt
The sanding belt carries out the sanding process. Use only
approved abrasive belts. The original abrasive belts are optimized
for chain sharpening and achieve correspondingly good
sharpening results.
(8)
Wing nut
cover hood
The cover hood can be removed with this wing nut.
This is necessary to change the sanding belt.
(9)
Wing nut
grinding belt guide
With item 9 the belt run of the sanding belt is corrected/set.
(10)
Exchange shaft
At this point in the grinder, the grinding shaft is kept for further
chain divisions.
(11)
Drive shaft
The grinder is driven by a 6.3 mm hexagon (1/4“ bit holder).
The grinder must be positively connected to the drive shaft with
a suitable drive device. This must be set clockwise.
(12)
Wing nut
exchange shaft
The replacement shaft is fixed to the grinder with this nut.
(13)
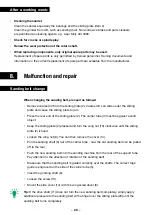
Wing nut
sliding plate
This wing nut is loose during regular operation. When changing
the sanding belt, the sliding plate is pushed forward and locked
with the wing nut (13). This means that the sanding belt can be
easily changed.
(14)
Cover
This cover protects you from unintentionally reaching into the
sanding belt. Only remove this to change the sanding belt.
(15)
Angle display
The angle displays provide orientation when sharpening the
teeth. For a correct and even sanding, these should be
held/positioned parallel to the saw bar when sharpening.
With the supplied gauge, these can be set to the desired angle.
– 21 –
Summary of Contents for Schleiferl
Page 17: ... 17 ...
Page 33: ... 33 ...

