


129
R5906112 /15
UDX
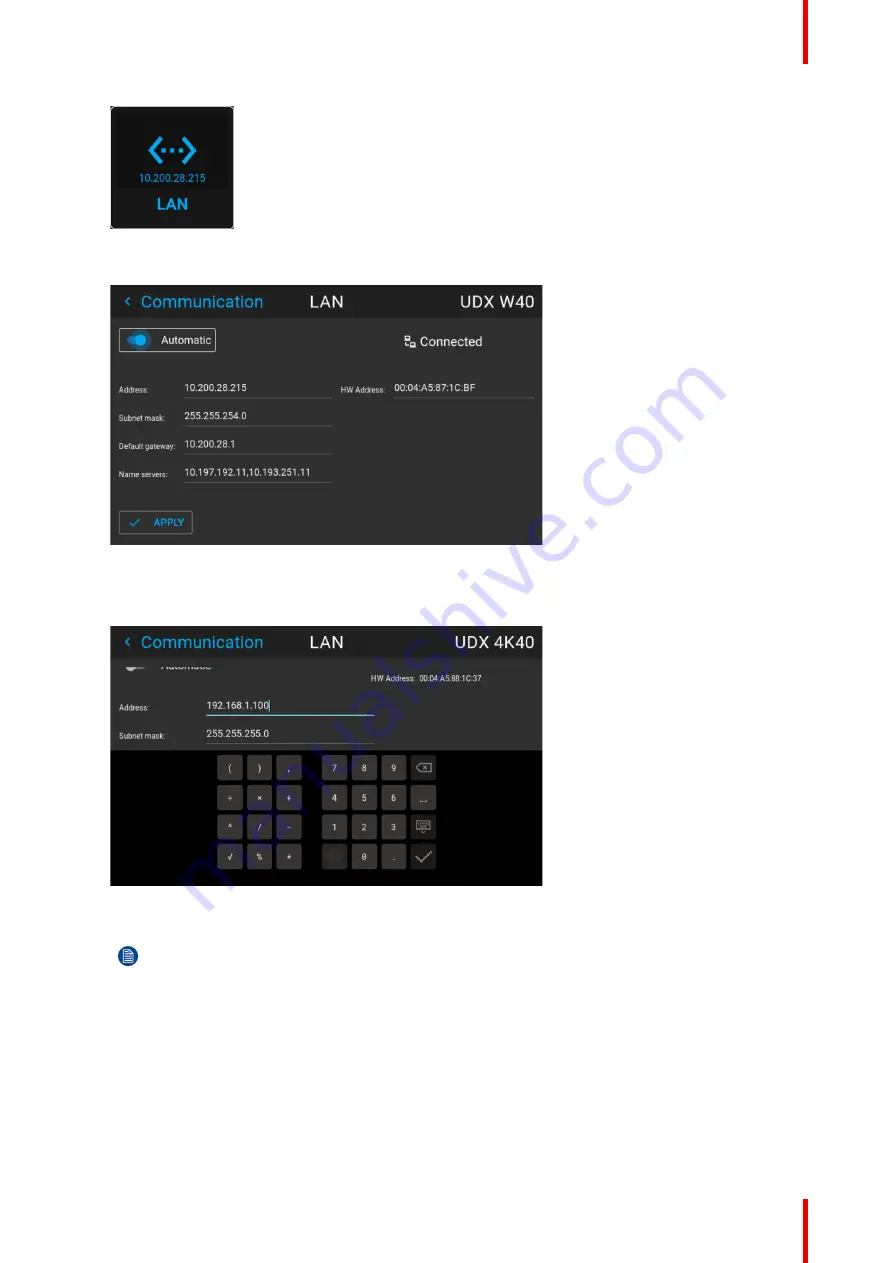
Image 10–11 Communication menu, LAN
The LAN menu is displayed
Image 10–12 Example of the LAN menu
2.
Disable the Automatic slider. The slider becomes gray.
3.
Use the arrow keys to select
Address
and press
OK
button to activate the input box.
Image 10–13 Example of entering the IP address
4.
Use the arrow keys and enter key to enter in the IP address.
Note:
Digits can be entered with the digit keys on the remote control or the local keypad. When a
digit is entered in that way, the next character will be selected automatically.
5.
Once filled in, select the
✓
symbol and confirm.
6.
Repeat steps 4 and 5 for the Subnet mask and Default Gateway.
7.
Select
APPLY
and click
OK
to confirm all changes.
When the connection is established, it is indicated with the connection symbol and the indication
Connected
.
Summary of Contents for UDX
Page 1: ...ENABLING BRIGHT OUTCOMES User manual UDX...
Page 22: ...R5906112 15 UDX 22 Safety information...
Page 30: ...R5906112 15 UDX 30 Getting started...
Page 158: ...R5906112 15 UDX 158 GUI System Settings...
Page 170: ...R5906112 15 UDX 170 GUI Status menu...
Page 198: ...R5906112 15 UDX 198 Specifications...
Page 208: ...R5906112 15 UDX 208 Video timing tables...
Page 214: ...R5906112 15 UDX 214 DMX chart...
Page 224: ...R5906112 15 UDX 224 WiFi GSM compliance information...
Page 228: ...R5906112 15 UDX 228 List of tools...
Page 234: ...R5906112 15 UDX 234 Index...
Page 235: ......


