background image

3. Display installation

3.2

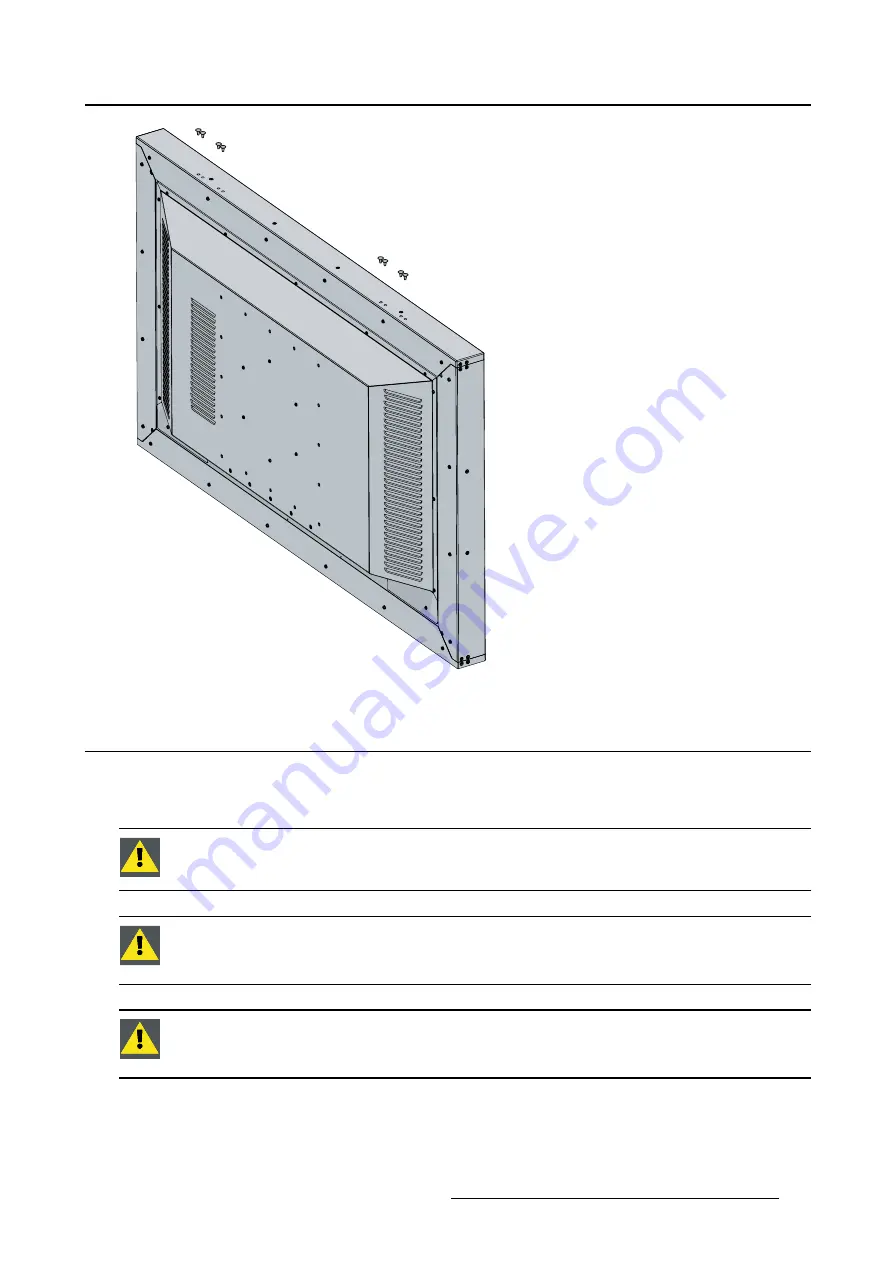
VESA mount installation

Overview

The display supports mounting arm & stands according to the VESA 400 mm standard.

C

AUTION

:

Use an arm that is in compliance with VESA requirements.

C

AUTION

:

The monitor VESA interface has been designed for a safety factor 6 (to sup-

port 6 times the monitor weight). In the medical system, use an arm with suitable safety
factor (IEC60601-1).

C

AUTION

:

The IP21 protection level (for version with protective glass) requires the all

the VESA mount holes (on the back side of the display) are closed by the 16 screws (M6)
and the 16 o-rings provided in the installation KIT

(451920612552) K5902150 MDSC-8358 28/11/2017

11

Summary of Contents for MDSC-8358 RL

Page 1: ...MDSC 8358 User Guide MDSC 8358 RL MDSC 8358 RLG MDSC 8358 RLF MDSC 8358 RLH 451920612552 K5902150 01 28 11 2017 ...

Page 2: ... 26 22 62 Support www barco com en support Visit us at the web www barco com Registered address Barco NV President Kennedypark 35 8500 Kortrijk Belgium Phone 32 56 23 32 11 Fax 32 56 26 22 62 Support www barco com en support Visit us at the web www barco com Printed in Belgium ...

Page 3: ...vation 16 4 5 OSD menu navigation 16 4 6 OSD menu unlocking 17 5 Advanced operation 19 5 1 Product info 19 5 2 Status info 19 5 3 Brightness info 19 5 4 Transfer function 20 5 5 Color temperature settings 20 5 6 Color gamma settings 20 5 7 Input channel selection 21 5 7 1 Input channel menu 21 5 7 2 Failover input 21 5 8 OSD setting menu 22 5 8 1 Time out OSD 22 5 8 2 OSD menu lock 22 5 9 Setup me...

Page 4: ...Table of contents 2 451920612552 K5902150 MDSC 8358 28 11 2017 ...

Page 5: ...el the backlight stabiliza tion the grayscale correction and the compliance with the DICOM standards will help the users avoiding misinterpretation in medical diagnosis The MDSC 8358 is also suitable for viewing a large range of contents as color temperature and color gamma adjustments are provided The display can also be controlled by remote through a serial or Eth ernet communication link The MD...

Page 6: ...ww barco com 1 3 About this user guide Overview This manual provides support to the user during the installation set up and utilization of the MDSC 8358 display Depending on the specific version that has been purchased some of the features and options described in this document may not apply to the display in user s hands 4 451920612552 K5902150 MDSC 8358 28 11 2017 ...

Page 7: ... 2 PARTS CONTROLS AND CONNECTORS 2 1 Front view Overview 1 2 3 4 5 Image 2 1 1 Power On Off 2 Enter key 3 Down key 4 Up key 5 Esc key A 5 key keypad is located on the bottom of the display 451920612552 K5902150 MDSC 8358 28 11 2017 5 ...

Page 8: ...ctors 2 2 Rear view Overview 2 1 1 1 1 1 Image 2 2 1 VESA mount screw holes 2 Connector location 2 3 Connector view Connectors 1 2 3 4 5 9 6 10 7 6 9 7 6 10 8 9 7 6 9 7 7 7 Image 2 3 6 451920612552 K5902150 MDSC 8358 28 11 2017 ...

Page 9: ... DL mode The 5V connections are available with the specific purpose to power an external DVI extender No other uses of the 5V are allowed Every 5Vout connector is connected with the nearest jack but every pair is indepen dent 500mA max If a DVI pair is disabled then there is no power on the connector and the jack connected to the DVI connector 2 4 Connector pin assignments 2 4 1 DVI D single link ...

Page 10: ...D S 19 GND data 0 shield 20 D5_RX T M D S 21 D5_RX T M D S 22 GND clock shield 23 CK_Rx T M D S 24 CK_Rx T M D S 2 4 2 RS232 connector Overview Image 2 5 Pin Function 1 Not connected 2 Rx driven by host 3 Tx driven by display 4 Not connected 5 Ground 6 Not connected 7 Not connected 8 Not connected 9 Not connected 8 451920612552 K5902150 MDSC 8358 28 11 2017 ...

Page 11: ...ist brackets are intended to be used during the monitor s installation phase only To mount and use the hoist bracket to the display 1 Mount the brackets to the display using the screws provided in the accessory kit Verify that the screwing operation is well done using a torque value of 4N m 2 Move your display as shown on the picture below 451920612552 K5902150 MDSC 8358 28 11 2017 9 ...

Page 12: ...remove the brackets and the 8 mounting holes can be closed either with 8 plastic caps version without the protection glass or using the same screws adding the respective o ring version with the protection glass 10 451920612552 K5902150 MDSC 8358 28 11 2017 ...

Page 13: ... interface has been designed for a safety factor 6 to sup port 6 times the monitor weight In the medical system use an arm with suitable safety factor IEC60601 1 CAUTION The IP21 protection level for version with protective glass requires the all the VESA mount holes on the back side of the display are closed by the 16 screws M6 and the 16 o rings provided in the installation KIT 451920612552 K590...

Page 14: ...nimum 6 screws M6 pointed out by the red arrows in the image below The screws can be inserted maximum 11 mm and minimum 8 mm Image 3 1 3 3 Video input connection WARNING When the display is assembled in the medical system take care of the an chorage of all cables to avoid unwanted detachment To connect the video inputs 1 Connect the available display s to the corresponding video input s using the ...

Page 15: ...he video outputs 1 Connect the available display s to the corresponding video output s using the appropriate video ca ble s Image 3 3 Overview possible outputs 1 DVI splitter The DVI single link connection cables 0 5m included in the box can be used to connect two outputs of the video splitter to two inputs of the monitor 3 5 Power supply connection To connect the power supply 1 Connect the power ...

Page 16: ...rounding earth the display by connecting the protective earth pin to a grounded outlet by means of a wire with a minimum AWG18 size according to national requirements regarding the maximum admitted cable length Use the included M4 screw to attach the wire to the protective earth pin 14 451920612552 K5902150 MDSC 8358 28 11 2017 ...

Page 17: ... when the display needs to come out of this mode by pushing the power on off key To change the status of your display 1 Activate the power through the switch located on the back side of the display 2 While your display is off press the Power On Off key once for 3 seconds The display goes into On Line status If no valid input is detected the display will go into standby mode To switch on off your d...

Page 18: ...comes up If no further actions are taken within the following 30 seconds the OSD menu will disappear again The time out of the OSD menu automatic close function can be adjusted or disabled in the OSD menu OSD Time out The OSD menu position can be adjusted in the OSD menu OSD Hor Pos and OSD Vert Pos The OSD menu can be locked for access see OSD menu lock page 22 To unlock the OSD menu by entering ...

Page 19: ...entering the OSD menu will display a Request for password window To unlock the OSD menu 1 If not already done so switch on the display 2 Touch the Enter key As a result the dialog box as shown below comes up if the OSD menu is password protected see OSD menu lock page 22 ENTER PASSWORD _ _ _ _ 3 Enter the password by using the four right keys of the keyboard you can label the four keys as 1 2 3 an...

Page 20: ...4 Daily operation 18 451920612552 K5902150 MDSC 8358 28 11 2017 ...

Page 21: ...le information items for your display are OUT MODE WORK HOURS BACKLIGHT HOURS SETUP Factory or User To view the status info 1 Bring up the OSD main menu 2 Navigate to the Status info menu 3 Enter the Status info submenu 5 3 Brightness info About brightness info The available information items for your display are MIN Minimum brightness RECOM Recommended brightness MAX Maximum brightness CURRENT Cu...

Page 22: ... 3 Enter the Transfer submenu 4 Select one of the available functions and confirm 5 5 Color temperature settings About color temperature settings The current color temperature can be set from 2000 K to 12000 K in steps of 100 K To change the color temperature settings 1 Bring up the OSD main menu 2 Navigate to the Color temp menu 3 Enter the Color temp submenu 4 Change the Color Temp as desired wi...

Page 23: ...play to automatically switch to a failover backup source in case the Display Port input main source is missing The display will automatically restore the main source once the signal is back The available failover inputs for your display are DVI1 DVI3 The failover input will be activated within about 1 second after the main input Display Port has been lost During the transition from main to failove...

Page 24: ...D menu 3 Enter the OSD submenu 4 Navigate to the TIME OUT submenu 5 Enter the TIME OUT submenu 6 Change the time out of the OSD as desired with the Up Down keys and confirm 5 8 2 OSD menu lock About OSD menu lock The OSD menu lock allows to password protect the OSD at different menu levels The possible options are OFF Key lock is disabled no password is required at any level SERVICE Password is re...

Page 25: ...tup menu The available information items for your display are FACTORY Factory settings USER User settings To select the setup 1 Bring up the OSD main menu 2 Navigate to the Setup menu 3 Enter the Setup submenu 4 Select one of the available profiles and confirm 451920612552 K5902150 MDSC 8358 28 11 2017 23 ...

Page 26: ...5 Advanced operation 24 451920612552 K5902150 MDSC 8358 28 11 2017 ...

Page 27: ... once a year Type of protection Electrical Equipment with internal power supply Class I equipment Degree of safety flammable anesthetic mixture Equipment not suitable for use in the presence of a flammable anesthetic mixture with air or with oxygen or nitrous oxide Non patient care equipment Equipment primarily for use in a health care facility that is intended for use where contact with a patient...

Page 28: ...in previously unidentified risks to patients operators or third parties The responsible organization should identify analyze evaluate and control these risks Subsequent changes to the network data coupling could introduce new risks and require additional analysis Changes to the network data coupling include changes in network data coupling configuration connection of additional items to the networ...

Page 29: ...ualified service techni cians under the following conditions If the power cord or plug is damaged or frayed If liquid has been spilled into the equipment If the equipment has been exposed to rain or water If the equipment does not operate normally when the operating instructions are followed Adjust only those controls that are covered by the operating instructions since improper adjustment of othe...

Page 30: ...r to a designated collection point for the recycling of waste electrical and electronic equipment To prevent possible harm to the environment or human health from uncontrolled waste disposal please separate these items from other types of waste and recycle them responsibly to promote the sustainable reuse of material resources For more information about recycling of this product please contact you...

Page 31: ...所有均质材料中的含量均在 GB T 26572 标准规定的限量要求以下 o Indicates that this toxic or hazardous substance contained in all of the homogeneous materials for this part is below the limit requirement in GB T 26572 x 表示该有毒有害物质至少在该部件的某一均质材料中的含量超出 GB T 26572 标准规定的限量要求 x Indicates that this toxic or hazardous substance contained in at least one of the homogeneous materials used for this part is above the limit requirement ...

Page 32: ...ite of the package of returned Product and accompanied by a declaration statement proving the Product has been successfully decontaminated Returned Products that are not provided with such external decontamination label and or whenever such declaration is missing can be rejected by Seller or by the Authorized Service Provider and shipped back at Customer expenses 6 4 Regulatory compliance informat...

Page 33: ...rop immediately Possible cleaning solutions 70 percent isopropyl alcohol 1 6 percent aqueous ammonia Cidex 2 4 percent glutaraldehyde solution Sodium hypochlorite bleach 10 percent Green soap USP 0 5 percent Chiorhexidine in 70 percent isopropyl alcohol Like Cleansafe optical cleaning liquid 6 6 Explanation of symbols Symbols on the device On the device or power supply you may find the following s...

Page 34: ...s approved according to the EAC regulations Caution Federal law United Stated of America restricts this device to sale by or on the order of a licensed healthcare practitioner Indicates the device is approved according to the BIS regulations Indicates the USB connectors on the device Indicates the DisplayPort connectors on the device Indicates the legal manufacturer Indicates the manufacturing dat...

Page 35: ...f the device you may find the following symbols nonrestrictive list Indicates a device that can be broken or damaged if not handled carefully when being stored Indicates a device that needs to be protected from moisture when being stored Indicates the storage direction of the box The box must be transported handled and stored in such a way that the arrows always point upwards 15 n or n Indicates t...

Page 36: ...the specific terms of a software license agreement between Barco NV or Barco Inc and the licensee No other use duplication or disclosure of a Barco software product in any form is authorized The specifications of Barco products are subject to change without notice Trademarks All trademarks and registered trademarks are property of their respective owners Copyright notice This document is copyright...

Page 37: ...l link preferred OSD languages English Grounding Ground pin M4 thread for grounding lug Display dimensions W x H x D w o front glass 1318 5 x 776 x 145 8 mm Display dimensions W x H x D w front glass 1326 5 x 778 x 153 7 mm Dimensions packaged W x H x D 1540 x 413 x 940 mm Net weight display 46 59 kg depending on version Net weight packaged 68 5 83 kg depending on version Mounting standard VESA 40...

Page 38: ...ure 10 35 C for performance 0 40 C for safety temperature change 1 C min non condensing Storage temperature 20 60 C temperature change 1 C min non condensing Operating humidity 10 90 RH non condensing Storage humidity 10 90 RH non condensing Operating altitude 700hPa 1060hPa 3000m max Storage and transport altitude 700hPa 1060hPa 36 451920612552 K5902150 MDSC 8358 28 11 2017 ...

Page 39: ...6 Important information Dimensions 145 8 75 776 1318 5 459 25 459 25 400 200 400 200 188 188 Image 6 1 451920612552 K5902150 MDSC 8358 28 11 2017 37 ...

Page 40: ...pen Source Software components used is available in the applicable EULA through the My Barco section of the Barco website or through other online means Copyright on each Open Source Software component belongs to the respective initial copyright holder each additional contributor and or their respective assignee s as may be identified in the respective Open Source Software documentation source code...

Page 41: ... or modifications without any recourse or claim towards Barco whatsoever You further acknowledge that any such additions changes or modifications may impair the ability of Barco at Barco s sole discretion to continue to provide ser vice warranties software updates fixes maintenance access or such similar abilities without any recourse or claim towards Barco whatsoever Barco offers to provide the c...

Page 42: ...6 Important information 40 451920612552 K5902150 MDSC 8358 28 11 2017 ...

Page 43: ... rate 9600 Data bits 8 Parity none Start bits 1 Stop bits 1 Handshake none Available commands 1a Get Model Number PC monitor ESC rh monitor PC string ACK where string is 12 digits ASCII string with 12NC model number example 991932051391 1b Get Serial Number PC monitor ESC rs monitor PC string ACK where string is 14 digits ASCII string with 14NC serial number example AN000631000001 1c Get Hardware ...

Page 44: ...ero NATIVE 1 DICOM 2 GAMMA 1 3 GAMMA 2 3a Get Current Backlight Brightness PC monitor ESC b monitor PC string ACK where string is a 3 character ASCII string with the current backlight brightness in the range from 200 to 350 cd m example 300 3b Set Backlight Brightness PC monitor ESC b string monitor PC ACK where string is a 3 character ASCII string with the desired backlight brightness in the rang...

Page 45: ...ple FPGA REV 3 6 Working hours of the monitor PC monitor ESC rWH CR monitor PC string CR LF where string is an ASCII string with the working hours number example 67 7a Power supplies status PC monitor ESC sP CR monitor PC string CR LF where string is an ASCII string with the power supplies status example OK 7b Fans status PC monitor ESC sF CR monitor PC string CR LF where string is an ASCII string...

Reviews: