


13. Projector control
What should be set up for an Ethernet address?
2 ways can be used to assign an address:
•
use the DHCP setting so that an automatic address will be assigned.
•
Assign manually an IP address, Net-mask (subnet-mask), (default) gateway address.
- Set the IP-Address field to the desired value. This must NOT be 0.0.0.0 for static IP-Address assignment. The IP address
identifies a projector’s location on the network in the same way a street address identifies a house on a city block. Just as
a street address must identify a unique residence, an IP address must be globally unique and have a uniform format.
- Set the Subnet-Mask as appropriate for the local subnet.
- Set the Default-Gateway to the IP-Address of the local router (MUST be on the local subnet!) on the same network as this
projector that is used to forward traffic to destinations beyond the local network. This must not be 0.0.0.0. If there is no
router on the projector’s local subnet then just set this field to any IP-Address on the subnet.
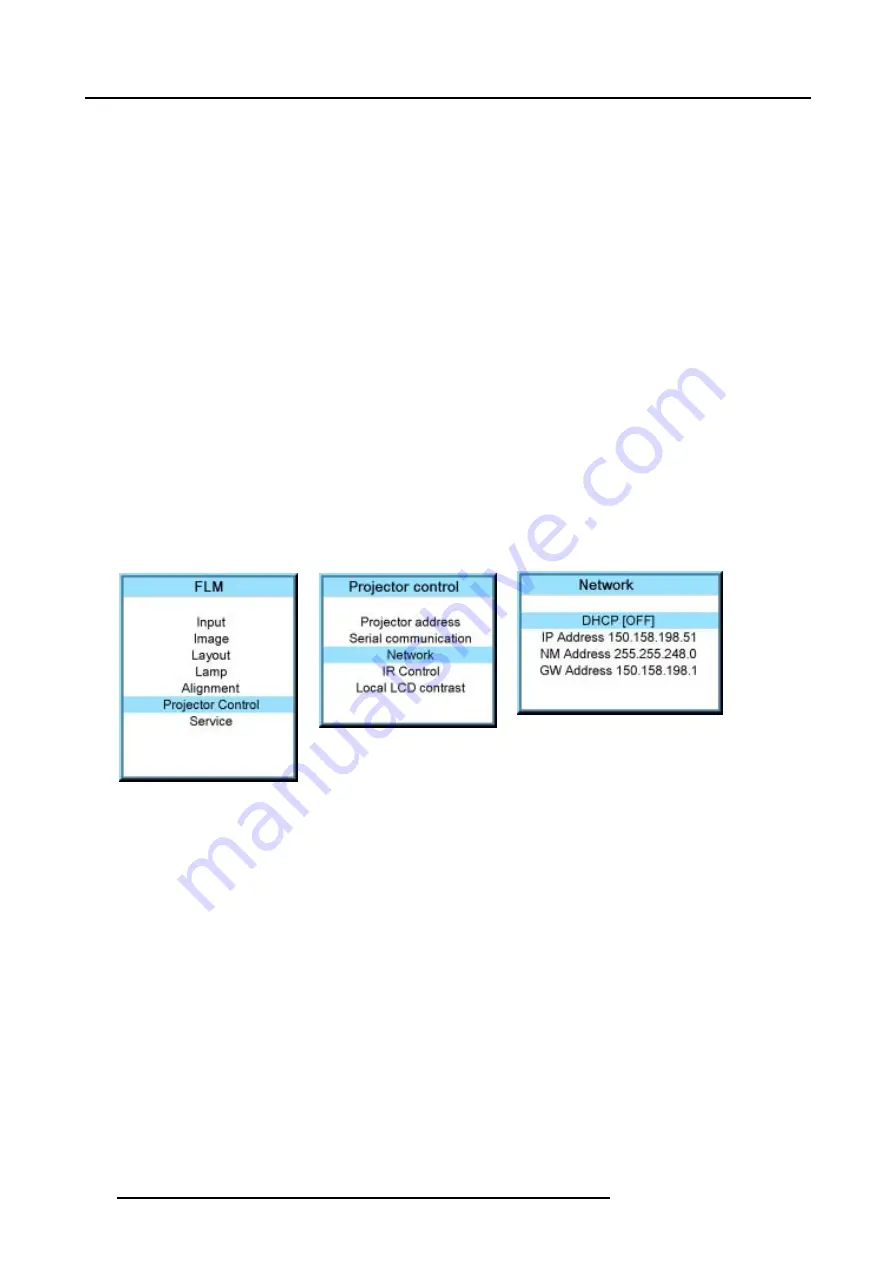
13.4.2 DHCP setup
How to switch DHCP setting?
1. Press
MENU
to activate the menus.
2. Use the
▲
or
▼
key to select
Projector control
and press
ENTER
.
3. Use the
▲
or
▼
key to select
Ethernet
and press
ENTER
.
The Ethernet menu opens.
4. Use the
▲
or
▼
key to select
DHCP
.
5. Press
ENTER
to toggle the DHCP setting.
[ON] = DHCP is activated. Automatic assigning of an address is activated.
[OFF ] = DHCP is deactivated. A fixed address will be used.
Image 13-18
Image 13-19
Image 13-20
13.4.3 IP-address set up
How to set up?
1. Press
MENU
to activate the menus.
2. Use the
▲
or
▼
key to select
Projector control
and press
ENTER
.
3. Use the
▲
or
▼
key to select
Network
and press
ENTER
.
The Network menu opens.
4. Use the
▲
or
▼
key to select
IP-address
and press
ENTER
to select.
Note:
An address contains 4 octets with a maximum value of 255.
This must NOT be 0.0.0.0 for static IP-Address assignment.
5. Use the
▲
or
▼
key to select the desired digit and press
◄
or
►
key to select the next digit in the address.
Or,
enter the value with the digit keys on the remote control or local keypad. The next digit in the address will be selected automati-
cally.
6. Press
EXIT
to return.
126
R5976986 FLM HD18 01/09/2006
Summary of Contents for FLM HD18
Page 1: ...FLM HD18 Users manual R9004450 R5976986 00 01 09 2006...
Page 4: ......
Page 44: ...5 Connections 40 R5976986 FLM HD18 01 09 2006...
Page 56: ...6 Getting started 52 R5976986 FLM HD18 01 09 2006...
Page 90: ...9 Image menu 86 R5976986 FLM HD18 01 09 2006...
Page 134: ...13 Projector control 130 R5976986 FLM HD18 01 09 2006...
Page 166: ...17 Removal of the projector covers 162 R5976986 FLM HD18 01 09 2006...
Page 170: ...A Dimensions 166 R5976986 FLM HD18 01 09 2006...
Page 186: ...E Order info 182 R5976986 FLM HD18 01 09 2006...


