


R5900103 /02
C-10, C-5
44
Image 4
–
3
2.
Stick the base on the chosen location.
3.
Place your device on the mounting base and turn it clockwise until it is locked (
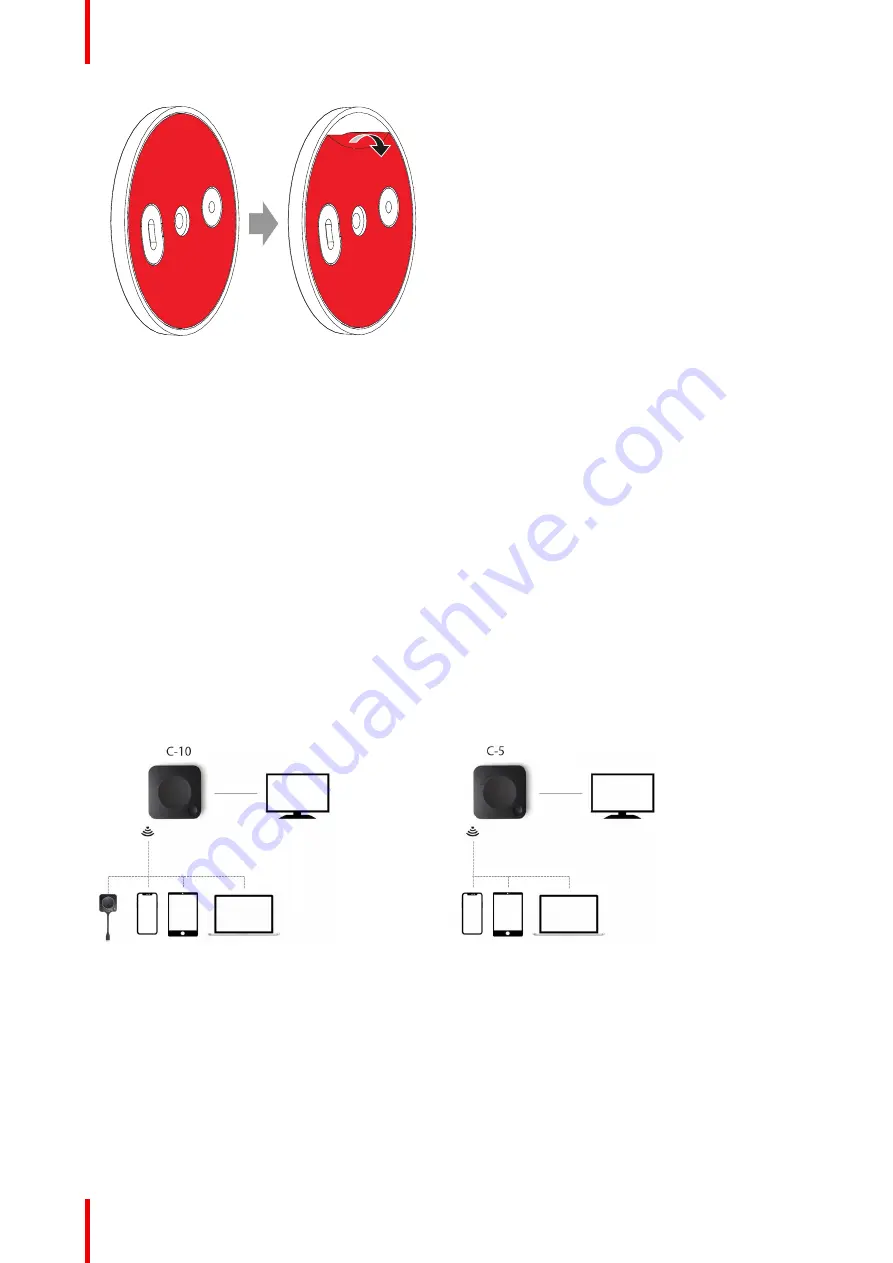
4.4 Out-of-the-box use of the Base Unit
Overview
This setup is the simplest in terms of installation and can be used for temporary setups and in organizations
where central management and 3rd party integration are not required.
The ClickShare Base Unit and (optional) Button operate directly out of the box, without any integration in the
Enterprise network. The Base Unit should be connected to the internet at least once to update and to register.
Users can connect directly to the Base Unit via the ClickShare Button, using the ClickShare App or Miracast or
with their mobile devices using Airplay or Google Cast.
Using a ClickShare Button allows you to stay connected to the internet. Using the ClickShare App, Airplay or
Google Cast will require connecting to the Base Unit directly and will only be able to access the internet if the
device supports to use data (3G/4G) at the same time. Note that this requires the Base Unit
’
s access point is
not turned off, is visible and can be connected to by anyone.
Sharing via Miracast will only be possible via Wi-Fi direct.
Image 4
–
4
Image 4
–
5
Using the ClickShare Base Unit and Button directly out of the box is ideal for temporary setups, visitor centers
and small to medium installations without network integration needs or possibilities. This setup requires the
least installation effort and keeps any shared data completely separated from your Enterprise network.
Updating and configuring the Base Units will need to be done manually.
Summary of Contents for C-10
Page 1: ...ENABLING BRIGHT OUTCOMES Installation manual C 10 C 5...
Page 22: ......
Page 25: ...25 R5900103 02 C 10 C 5...
Page 26: ...R5900103 02 C 10 C 5 26...
Page 29: ...29 R5900103 02 C 10 C 5 C 10 C 5 Specifications 2...
Page 40: ...R5900103 02 C 10 C 5 40 Getting started...
Page 62: ...R5900103 02 C 10 C 5 62 Image 4 38 C 10 C 5 Installation...
Page 68: ...R5900103 02 C 10 C 5 68 Preparing the Buttons...
Page 121: ...121 R5900103 02 C 10 C 5 Firmware updates 7...
Page 123: ...123 R5900103 02 C 10 C 5 Troubleshooting 8...
Page 130: ...R5900103 02 C 10 C 5 130 Index...
Page 131: ......


