12
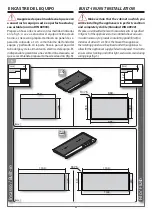
En los productos hechos a medida, el siste-
ma de fijación es personalizado.
With custom made models, assembly is
personalised.
1
2
3
4
6 A
1
2
6 B
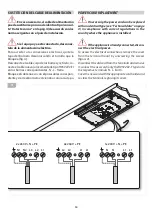
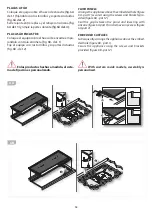
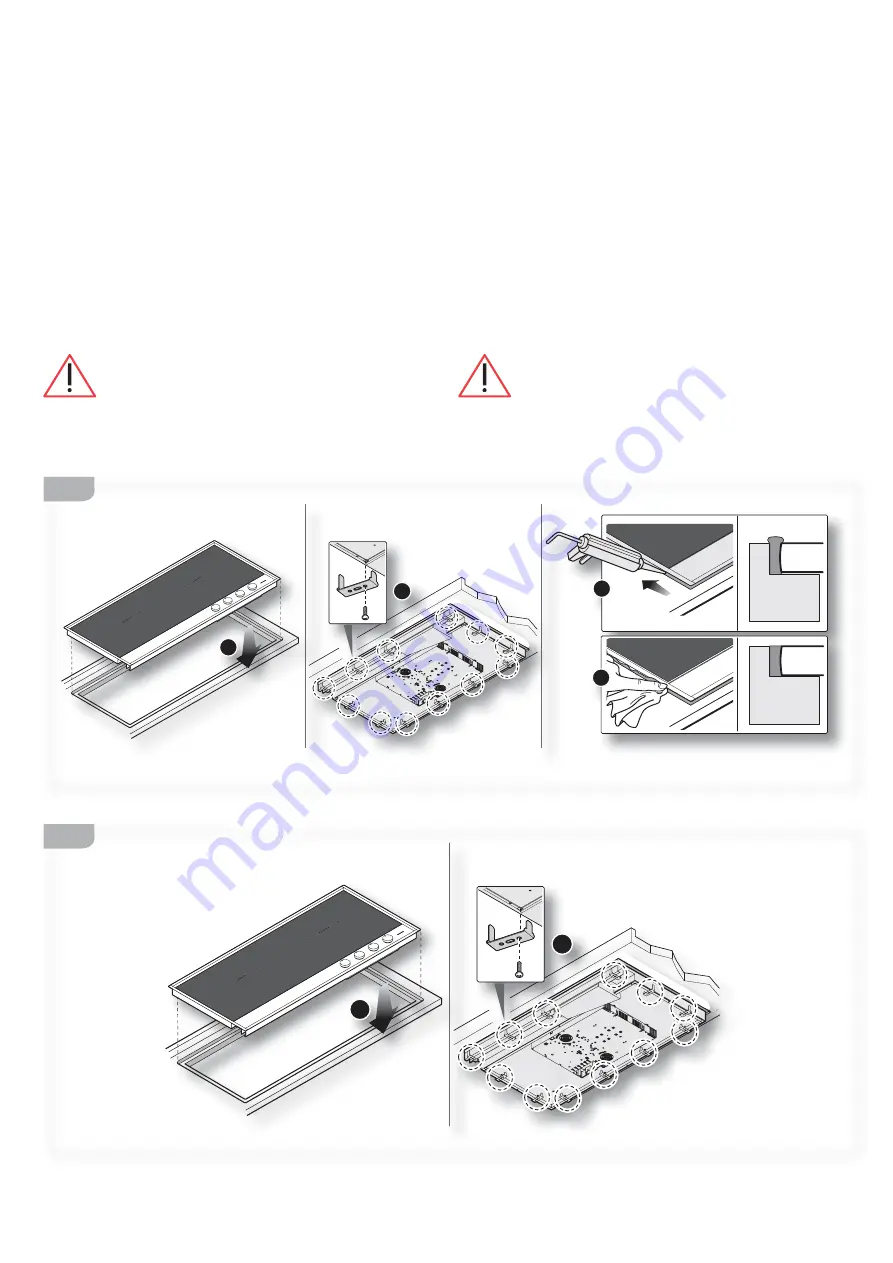
PLACAS A FILO
Coloque el equipo sobre el hueco de encastre (
fig. 6A
det. 1)
fijándolo con los tornillos y soportes incluidos
(
fig. 6A det. 2)
.
Selle la junta entre la placa y el rebaje con silicona (
fig.
6A det. 3)
y limpie la parte sobrante (
fig.6A det. 4).
PLACAS AD ENCASTRE
Coloque el equipo sobre el hueco de encastre empu-
jándolo contra la encimera (
fig. 6B - det. 1)
.
Fije el equipo con los tornillos y soportes incluidos
(
fig. 6B - det. 2).
FLUSH PANELS
Arrange the appliance above the embedded hole (figure
6A - part 1) secure it using the screws and brackets pro-
vided (figure 6A - part 2).
Seal the gap between the panel and lowering with
silicone (figure 6A part 3) and remove any excess (figure
6A part 4).
EMBEDDED SURFACES
Subsequently, arrange the appliance above the embed-
ded hole (
figure 6B - part 1)
.
Secure the appliance using the screws and brackets
provided (
figure 6B - part 2)
.


