23
bayeta suave ligeramente empapada en detergente
neutro (para los modos de empleo de los productos
de limpieza, siga las instrucciones del fabricante).
Asegúrese de que no se filtre detergente por
debajo del mando giratorio.
Después de limpiar el mando giratorio, ase-
gúrese de no haberlo movido por accidente de la
posición de “0 - apagado”.
•
Superficies de vitrocerámica
Conocimiento del material
Las superficies de vitrocerámica son extre-
madamente resistentes al calor (hasta 800
°C aproximadamente) y a los choques térmicos (es
decir, no se rompen si se vierte agua fría sobre la
placa caliente), y ofrecen una buena resistencia a
los arañazos derivados del uso cotidiano de la placa.
Además, presentan una excelente resistencia a las
sustancias ácidas (p. ej., vinagre, zumo de limón,
etc.), pero las sustancias con alto contenido en
azúcar, al fundirse, pueden deslustrar el vidrio, sin
que ello afecto a sus prestaciones.
Cómo limpiarlo
Limpie la placa después de cada uso, para que no
se acumule la suciedad y la limpieza resulte más
fácil y rápida.
Espere hasta que el equipo esté frío; a
continuación retire de la placa los restos más grandes,
utilizando una rasqueta específica para vitrocerámica:
si se trata de fragmentos de aluminio o plástico que
se hayan fundido inadvertidamente o alimentos que
contengan azúcar, limpie la placa lo antes posible,
porque estas sustancias pueden deslustrar irreme-
diablemente las superficies de vidrio.
Una vez eliminados los restos más grandes, limpie
la placa utilizando una bayeta suave (o papel de
cocina) ligeramente empapada con productos es-
pecíficos para la vitrocerámica o simplemente con
líquido lavavajillas, siguiendo las instrucciones de
uso del fabricante.
No utilice bajo ningún concepto esponjas o pro-
ductos abrasivos o demasiado ácidos, ni tampoco
lejía, productos limpiahornos o quitamanchas.
PERIODOS DE INACTIVIDAD
Si no tiene previsto utilizar el aparato durante una
larga temporada (más de 2-3 semanas):
• limpie a fondo el equipo siguiendo las instrucciones
del capítulo correspondiente;
• desconecte el enchufe de alimentación eléctrica.
manufacturer’s instructions on the use of the cleaning
products).
Ensure that the detergent has not remained
lodged under the knob.
Ensure that upon finishing the cleaning of the
knob, it has not been accidentally moved from the
“0 - off” position.
•
Glass-ceramic surfaces
Useful information on the material
Glass-ceramic surfaces are extremely heat-
resistant (they can withstand heats of up to
approx 800°C), they are resistant to thermal shocks
(they do not break when cold water is poured on the
hot surface) and they provide good scratch-resistance,
the results of daily wear and tear.
Additionally, they have excellent resistance to acidic
substances (e.g. vinegar, lemon juice, etc...) however,
substances, rich in sugar, upon melting, may clouden
the glass; this however does not affect the operation
of the appliance.
Cleaning instructions
Clean the surface after each use, so that dirt does not
accumulate, making cleaning easier and more rapid.
Wait until the appliance is cool, subsequently, remove
the larger residue from the surface with the help of
a scraper specifically designed for glass-ceramic
surfaces: if residues consist of aluminium fragments,
accidentally melted plastic material or sugary sub-
stances, clean the surface as soon as possible as the
above mentioned may irreparably clouden the glass
surface.
After having removed the larger residue, clean the
surface using a soft cloth (or a piece of kitchen roll)
lightly dampened in products specifically designed
for glass-ceramic surfaces or with basic washing-up
detergent,following the manufacturer’s instructions
on the use of the cleaning products.
Never use sponges or abrasive products, ex-
tremely acidic products, bleach, oven cleaning
products or stain removers.
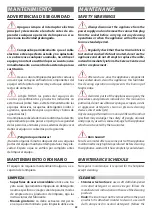
PERIODS OF INACTIVITY
If the appliance will not be used for a long period of time
(more than 2-3 weeks):
• thoroughly clean the appliance following the instruc-
tions in the respective chapter;
• disconnect the electric power supply plug.

