A series
I
42
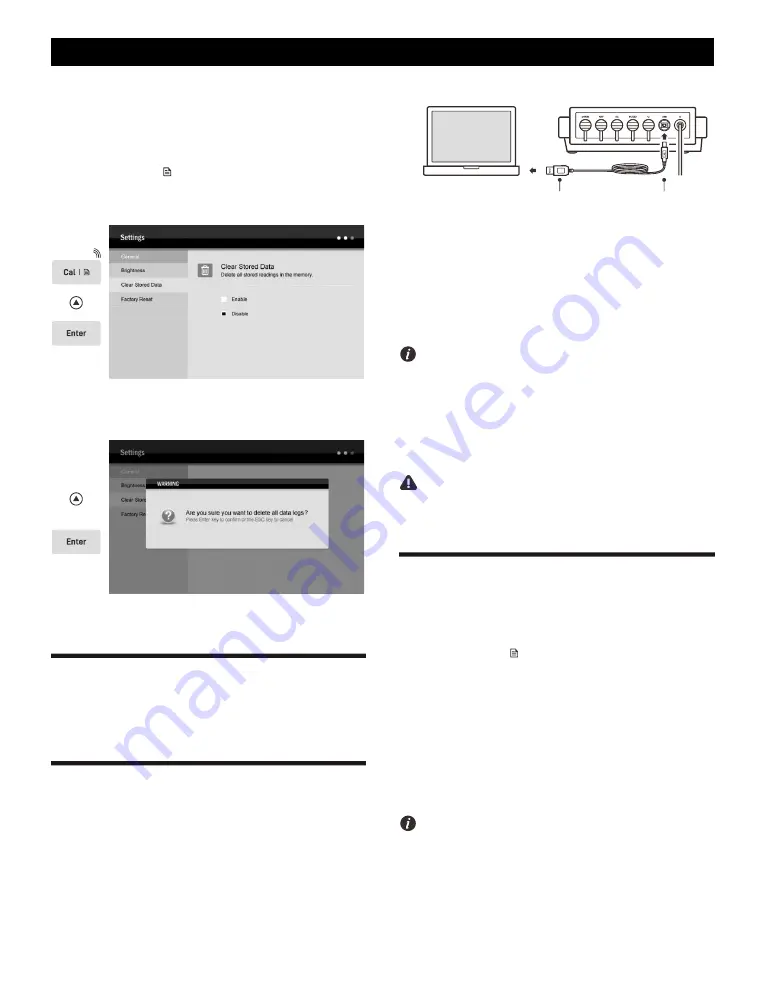
Deleting the Data Logs
If the memory is full, the meter will automatically show a reminder
when the
MI
key is pressed. To delete data log, please follow the steps
below.
2.1 Press and hold the
key to enter the setup menu.
2.2 Press the
key to select the
Clear Stored Data
, press the
Enter
key to confirm.
2.3 Press the
key to select the
Enable
. Press the
Enter
key, the
screen shows "Are you sure you want to delete all date logs?"
2.4 Press the
Enter
key to confirm or the ESC key to cancel.
Connect the USB cable to the meter and printer (order code: AB58-GK).
Press the
key to print the displayed reading or data logs.
Communication
The A series meter can transfer the data to a computer or import the
data to Excel by a DAS software. You are able to download this
software from our official website. Before installation, ensure that the
Windows 10 operating system has been installed on your computer
and you have a USB-B2303 data cable.
Receiving the Data
1. Connect the black port of the data cable to meter and the blue
port to computer.
Blue port
Black port
2. Click the
DAS_A_Series
icon, the system automatically scans
an available communication port and shows a message box
"Found a port on your computer".
3. Click the
OK
, the application starts.
4. Click the
Connect
, the screen shows "Port is connected".
5. Click the
OK
, then click the
Receive
, the stored data will transfer
to computer automatically.
If your computer can not find a communication port, click the"PL2303_
Prolific_DriverInstaller_V1190.exe" to update the drive program.
Creating an Excel File
When transfer is completed, click the
Save as Excel
, the readings
in data sheet will automatically convert to Excel file.
Note, once the software is closed, all received data will be lost and
can not be recovered.
Interval Readings
The A series meter contains an Interval Readings option in setup menu.
If enabled, the meter will automatically send the measurement data to
a printer or computer at the predefined time.
1. Press and hold the
key to enter the setup menu.
2. Press the
key to select the
Interval Readings
, press the
Enter
key to confirm.
3. Press the
/
key to select a predefined time, press the
Enter
key to return to the measurement mode.
4. If the meter has been connected to a computer, click the
Receive
button, the measurement data will automatically transfer to DAS
software.
If the meter has been connected to a printer, press the
key
to print the displayed reading.
•
Note, the first data needs 1 minute to be shown on the screen.
•
Do not press any key on meter during the Interval Readings mode
that will cause the communication interruption.


