


Flashing characters
Progressive message
Press TEMP button for “action”
Press LIGHT button to “select”
Pause / back to Main Screen / setting not saved
Pause / back to Main Screen / setting saved
Menu Items may or may not appear
SEQUENCE KEY
( View page 2 for full description )
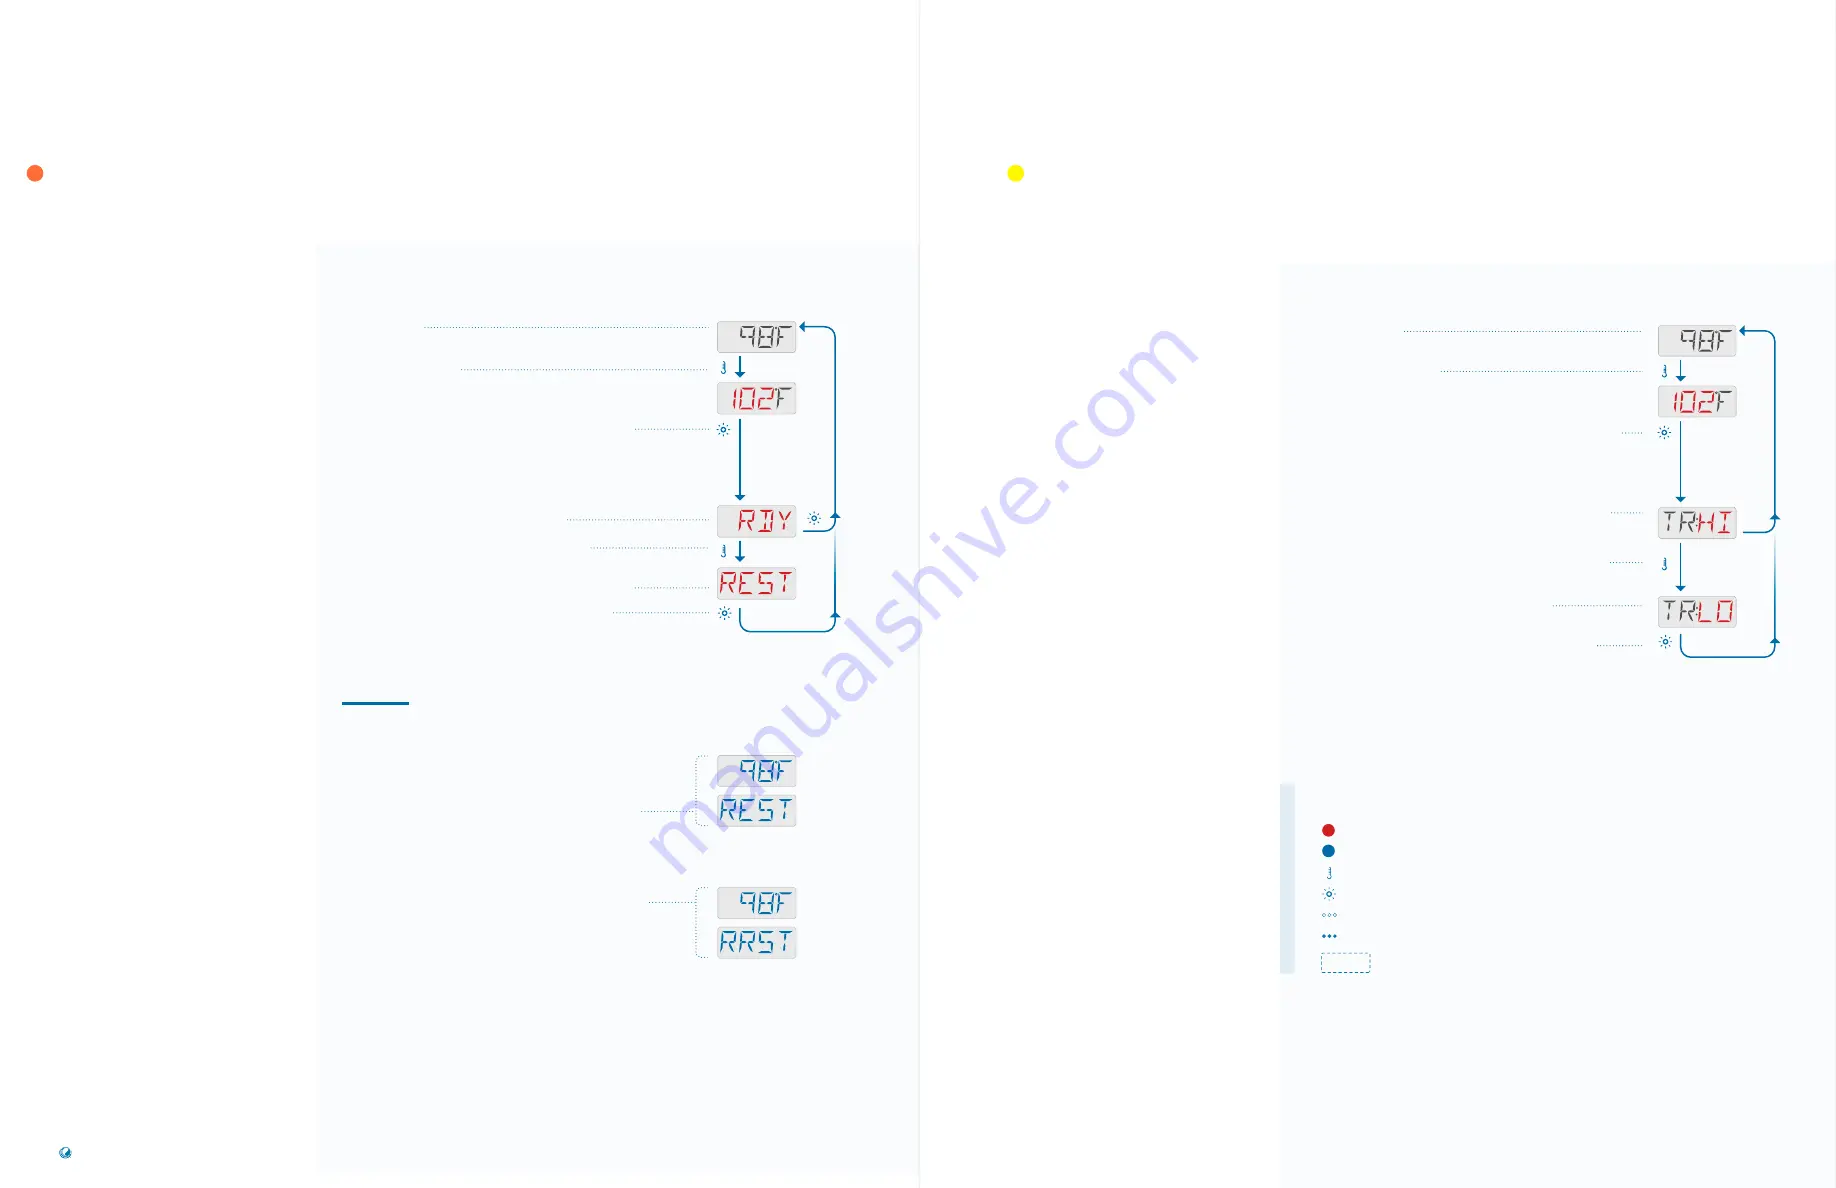
Follow this sequence to view
the current Heat Mode and/
or change the Heat Mode.
There are two Heat Modes
you can select from the
panel menu:
1 - Ready Mode (RDY)
2 - Rest Mode (REST)
Ready-In-Rest Mode (RRST)
is a third Heat Mode. But,
it is a subfeature of Rest
Mode and is not selectable
from the panel menu.
However, when you follow
the sequence to view the
current Heat Mode, any of
the three Heat Modes can
be displayed as the current
Heat Mode.
SEQUENCE
Press the TEMP button. The Set Temperature
will appear and flash.
While the Set Temperature is flashing, press LIGHT until
one of the following Heat Modes appears: RDY, REST,
RRST. The first one to appear is the current Heat Mode
setting.
In this example RDY appears first, which means the
current Heat Mode is set to READY. If you wait for a
moment, the Main Screen will appear automatically, and
the Heat Mode setting will remain READY.
If you want to change the Heat Mode to REST,
press the TEMP button.
REST indicates that the Heat Mode will be set to REST.
Press LIGHT to save your setting. The Main Screen
will appear automatically. If you do not press LIGHT,
your setting will not be saved, and the Main Screen will
appear momentarily.
NOTES
REST MODE
When the spa is in REST Mode (REST), the Main Screen
will alternate between displaying the water temperature
and REST.
READY-IN-REST MODE
If you press the JETS button while in Rest Mode, the spa
will switch to Ready-In-Rest Mode (RRST) for one hour.
The Main Screen will alternate between displaying the
water temperature and RRST.
Main Screen
°°°
TP200
USER GUIDE
42369 Rev A2
22
21
Balboa Water Group | Your Single Source Solution
Follow this sequence to view
the current Temperature
Range and/or change the
Temperature Range. There are
two ranges to choose from:
1 - High Range (TR:HI)
2 - Low Range (TR:LO)
SEQUENCE
Press the TEMP button. The Set Temperature
will appear and flash.
While the Set Temperature is flashing, press LIGHT
until one of the following settings appears: TR:HI or
TR:LO. The first one to appear is the current Temperature
Range setting.
In this example TR:HI appears first. TR:HI indicates
that the current Temperature Range setting is HIGH.
If you wait for a moment, the Main Screen will appear
automatically, and the Temperature Range setting will
remain HIGH.
If you want to change the Temperature Range to LOW,
press the TEMP button.
This indicates that your Temperature Range
will be set to LOW.
Press LIGHT to save your setting. The Main Screen
will appear automatically. If you do not press LIGHT, your
setting will not be saved, and the Main Screen will appear
momentarily.
Main Screen
HEAT SETTINGS
HEAT MODES
HEAT SETTINGS
TEMPERATURE RANGES


