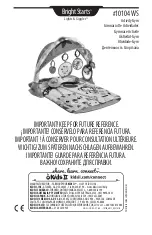
Copyright © 2015, Baby Trend Inc., All Rights Reserved. Todos los derechos reservados. Tous droits réservés.
8
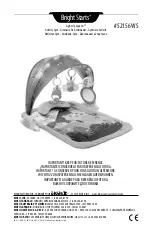
SAFETY
7
Copyright © 2015, Baby Trend Inc., All Rights Reserved. Todos los derechos reservados. Tous droits réservés.
ASSEMBLY
Fold
7)
• Push inward then down on Fold Button
located on both sides to fold (Fig. 7).
Note:
Remove toy bar before folding.
Unfold
8)
• To unfold, hold Lower Seat Frame while
gently pushing Front Base Frame in
opposite direction until locks into place
(Fig. 8).
Carry Handle
9)
• Use Handle at back of Seat Pad to carry
(Fig. 9). Only use Handle when folded.
Do Not
carry with hand or arm between
the frames.
Rocker Function
10)
• Rotate Rocker Stopper inward on both
sides to use rocking function (Fig. 10).
Non-Rocker Function
11)
• Rotate Rocker Stopper outward on both
sides until ends fully lock in place and
touch the ground (Fig. 11).
Note:
Before moving product, return to
Rocker Function mode.
SEAT RESTRAINT
12)
• Unbuckle the straps on each side of the
seat restraint (Fig. 12a) Carefully place
the child in the product seat and buckle
the straps (Fig. 12b) Adjust the straps so
that the restraint fits the child snugly.
CARE AND CLEANING
13)
•
Seat pad and headrest:
Using a damp
cloth and mild soap, wipe clean and air dry.
Do Not immerse in water.
14)
•
Toy bar and toys:
Using a damp cloth
and mild soap, wipe clean and air dry.
Do Not immerse in water.
15)
•
Frame:
Using a soft cloth and mild soap,
wipe the frame.
Fig. 10
Fig. 9
Fig. 8
Fig. 12a
Fig. 12b
Fig. 7
Fig. 11