Baby Lock Vesta BLMVE, Instruction And Reference Manual
The Baby Lock Vesta BLMVE is a high-quality sewing machine that boasts a wide variety of advanced features. To help users make the most of its capabilities, an Instruction And Reference Manual is available for free download at manualshive.com. This comprehensive manual provides detailed instructions and serves as an invaluable resource for mastering the machine's functions.
Share
Download


Reviews:
No comments
Related manuals for Vesta BLMVE

S750
Brand: Janome Pages: 41

orion Series
Brand: Alfa Network Pages: 55

VX520
Brand: Republic Bank Pages: 18

PG K17-28
Brand: Tornado Pages: 14

737-099
Brand: RS Pages: 2

Trooper 1000
Brand: Nobles Pages: 3

K 70/30 Bp Pack Adv.
Brand: Kärcher Pages: 28

Modular Series
Brand: GBC Pages: 25

DDL-5600N Series
Brand: JUKI Pages: 48

FA4
Brand: Janome Pages: 29

DECT5152S
Brand: Philips Pages: 2

Stratagy ES48
Brand: Toshiba Pages: 2

Stratagy iES16
Brand: Toshiba Pages: 12

FT-9005
Brand: Toshiba Pages: 40

FT-9003
Brand: Toshiba Pages: 40
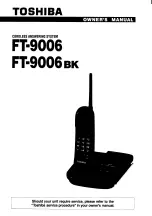
FT-9006
Brand: Toshiba Pages: 44

FT-8981
Brand: Toshiba Pages: 50

FT-8981
Brand: Toshiba Pages: 52


